
Sew Your Own Leggings with a Banded Waist
Sewing your own leggings is very satisfying! It's a quick project that is both fun and nearly instantly gratifying. Christine Jonson Sewing Circle members recently participated in a leggings sew-a-long on Facebook.
About the leggings pattern:
The BaseWearOne Pattern #622 offers a variety of workout and everyday wear. The legging pattern is a one pattern piece legging with no side seams. Choose your size based on CJ’s Perfect Sizing Worksheet and use this information to create an entire wardrobe of pull on pants with a variety of details. Learn to apply elastic like a professional using a serger or make a custom stretch banded waistband. Learn to recognize the perfect serger stitch and topstitch to be sure that your stitches don’t break when the fabric is stretched.
This legging pattern takes the best qualities of a pair of tights and a straight leg pant to create a flattering and comfortable to wear legging. The shape of the leg from the knee to the hem is cut a bit straighter and wider than the usual tapered shape that is common to tights. This does not mean that the pant won’t hug your leg; it will simply follow the shape of your leg with a bit of extra ease and length.
Choose your size based on your hip measurement. The measurements shown on the Finished Garment Chart is the measurement taken at the widest point at the hip of a sewn pair of leggings without stretching the fabric. So depending on the stretch and recovery of your fabric you can determine the fit “before” you cut the fabric.
Fabrics
Cotton, Rayon, Poly, LYCRA blends, and Ponte all make great leggings. Each one will have its own personality and perhaps its own pattern size for your perfect fit.
If your hips measure 38” you could use a size 12 and up to a size 18 and they would all fit you, just differently. The more stretch your fabric has the smaller the size pattern you can use for a comfortable fit. The “snappier” quality of the fabric the tighter they will fit. Combining the information of both the % of stretch and type of recovery will help in determining what size pattern to use to give you’re the exact fit you have in mind.
Determine the type of waistline you want for you leggings before cutting them out. Adding a band to the waistline in place of using elastic requires an easy pattern alteration before cutting out the pants. See the instructions below and the Tips and How-To page on the website
To choose a comfortable fit for your waistline with elastic I recommend starting with a length of elastic a bit longer than the measurement of where you want the band to rest on your body. Wrap it around, snug it up until it feels right and add 1” for the overlap to zig-zag a secure connection. If you choose to run the elastic through a casing it is easy to adjust the length once it is in place. The elastic can be whatever width you find most comfortable.
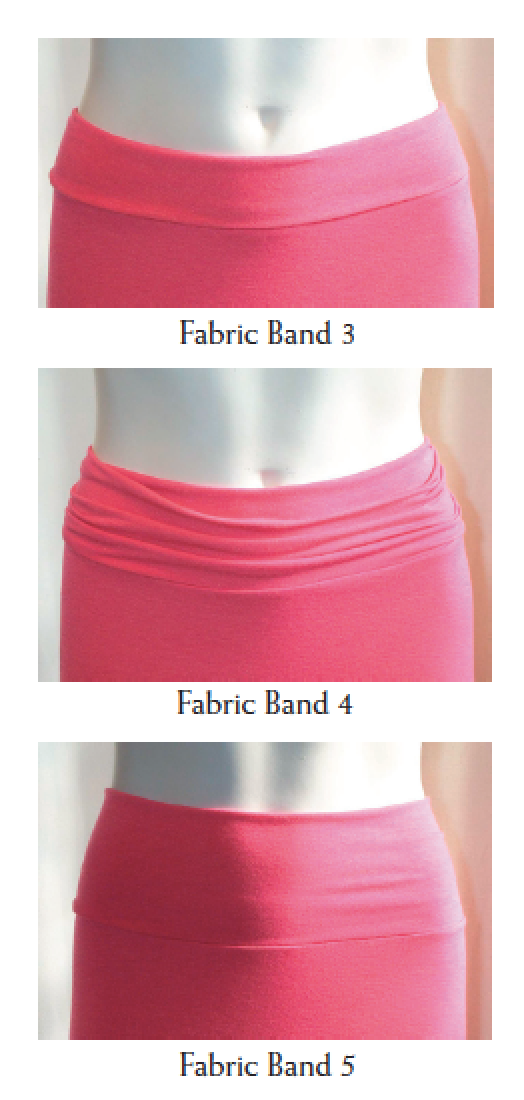
REPLACE AN ELASTIC BAND WITH A FABRIC BAND
The fabric for the band should have at least 80% crosswise stretch, 100% is best with snappy recovery.
Choose your band measurements based on the Band Measurement Chart.
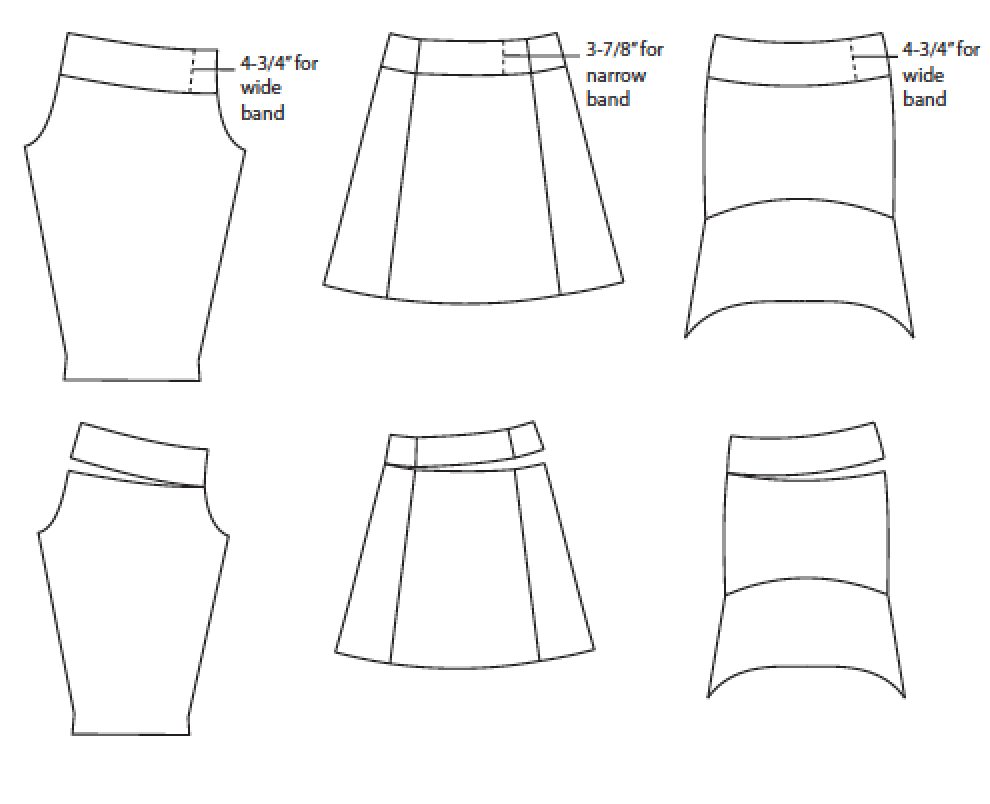
Trim the top of the pattern pieces by 4-3/4” for the wide band or 3-7/8” for the narrow band following the curve of the pattern.
Construct the pants or skirt per the instructions, eliminating the elastic at the waist.
Serge the two short sides of the band together to form a tube. Fold the tube in half with the wrong sides together. Edge serge the raw edges together.
Quarter the band and quarter the top edge of the pants or skirt. Serge the band onto the garment with the band seam at the center back.
These bands are explained in detail in our Stretch Fabric Waistband download!
Lycra blend knit fabrics make excellent waistbands that are both comfortable and figure flattering. Consider a smooth fabric waistband that can sit at the waist, hips or anywhere in between. This waistband can be folded, crushed or worn flat depending on the day’s desired effect.
This type of waistband helps achieve a wonderfully smooth transition at the waist, which has always been an issue with an elastic waist. No casings, pins or topstitching involved. Great!
Soft-hand, jersey type LYCRA blend fabrics with at least 100% crosswise stretch and good recovery work best. A simple alteration is all that is needed to make the change to your pattern. By removing a portion of the garment and replacing it with a band the garment will still fit properly, just smoother. Depending on the desired width of the band the pattern alteration varies. Calculating the band length is easy using the measurement information included here. The suggested patterns and fabrics work out great using this technique.
Happy Sewing!
BAND MEASUREMENT CHART
Wide Band
– Finished width 5-3/8”
Cut 4-3/4” off the top of the pattern
Cut the band 12” wide
Narrow Band
– Finished width 3-7/8”
Cut 3-7/8” off the top of the pattern
Cut the band 9” wide
Calculate Band Length
This is to ensure the correct “tightness” of the band (also known as
negative ease ).
These tips are an approximation. You’ll need to experiment with your band fabric, garment fabric and your body.
Measure your high hip/low waist (belly button level).
Multiply this measurement by 78% and add two seam allowances (5/8” x 2 = 1-1/4”).
Cut the band to this length on the crosswise grain.
(High Hip Measurement x 78%) + 1-1/4 =
Length of Band
Example: for a 36” high hip (36 x 78%) + 1-1/4 = 28 + 1-1/4 = 29-1/4”
For a wide band, the fabric would be cut 12” x 29-1/4”
If attaching a knit band to a woven garment cut the band slightly longer, about 2 inches.
If the knit chosen for the band has less than 100% stretch, for every 10% less stretch, add 1 inch to the length.
Download the Banded Waist Article - including photo examples of stretch fabric waistbands.