Sew Along: Swing Shirt
by Christine Jonson
I am excited to hostess this Sew Along highlighting my Swing Shirt pattern #505. When given the chance to work outside the parameters of printed pattern illustrations and instructions my thoughts on sewing and construction come alive. I really enjoyed sewing with this pattern using traditional sewing techniques blended with my own special ways to eliminate some of the typical construction problems.
I designed this shirt many years ago and it was a well-loved piece in my retail collections that sold around the country and in my own boutique. What goes around comes around is certainly true in this case.
Issy Miyake is an inspiration to me and this shirt is a nod to his aesthetic.
Many fabrics come to life using this pattern. Among my favorites are linen, jersey, cotton batik, rayon/viscose LYCRA blends, silk velvet and all fabric blends with a beautiful hand and drape.
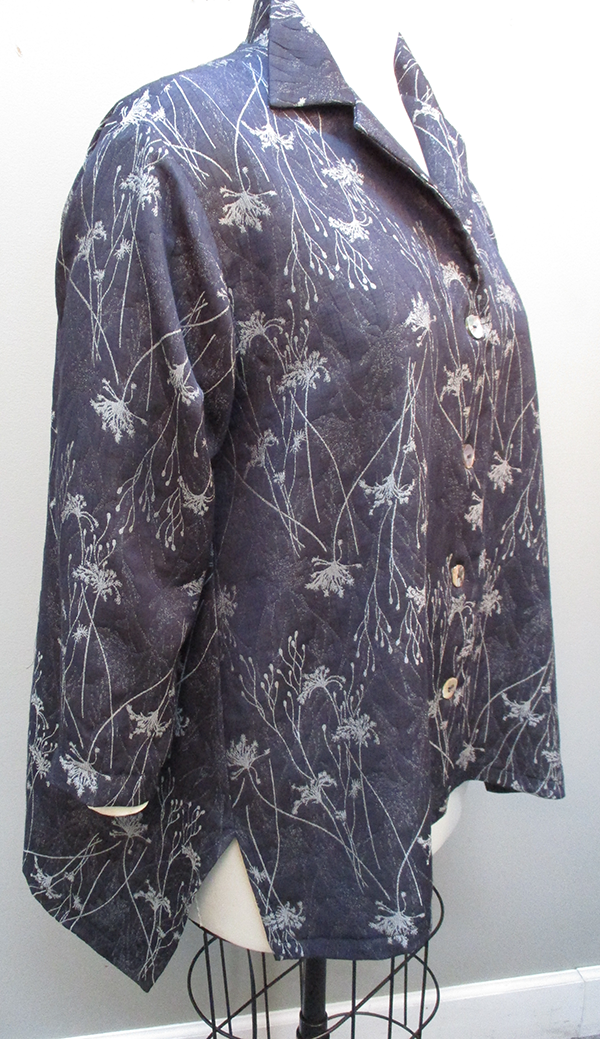
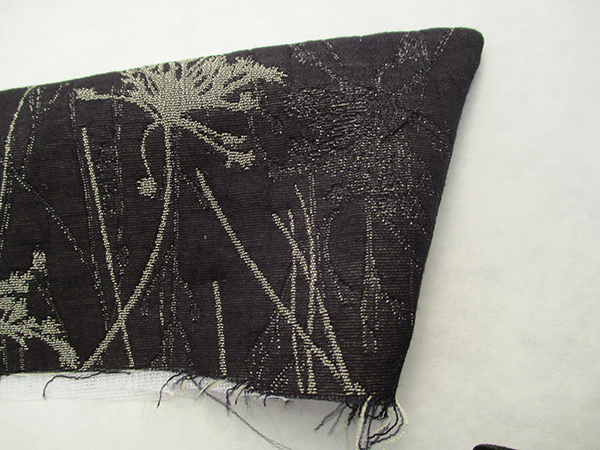
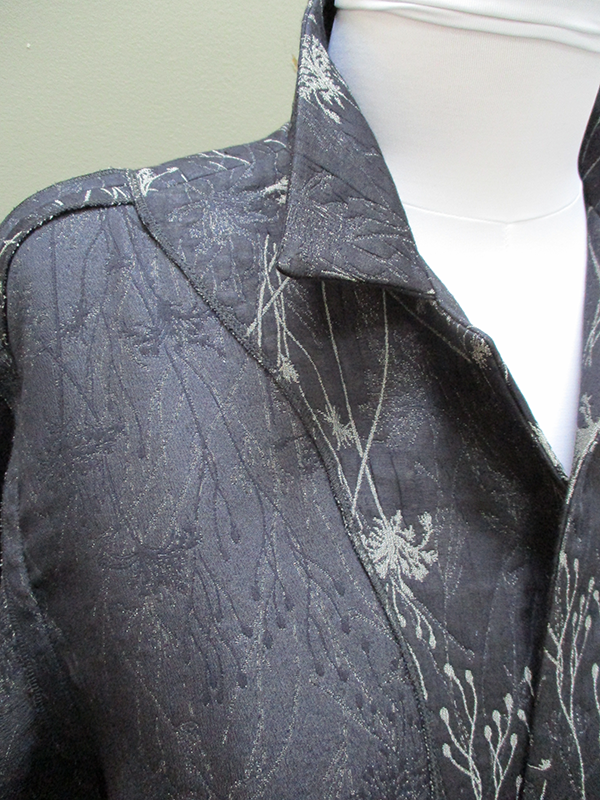
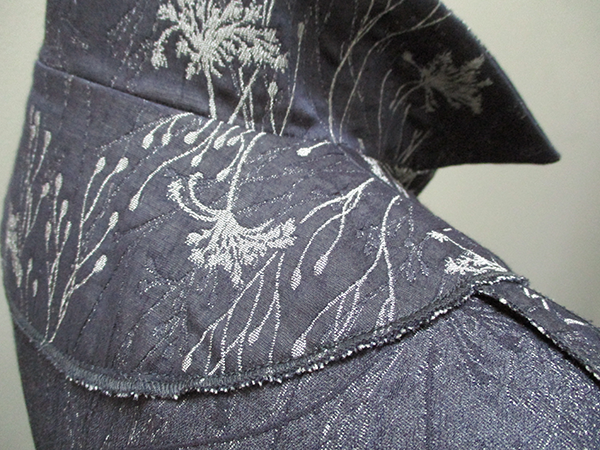
I looked through my stash of fabrics to find this beautiful woven lightweight silk/viscose fabric. It has a lovely woven Queen Ann’s Lace design on a background of lightly quilted dark navy.
I use fusible Tricot knit interfacing almost exclusively. If I need a bit more stability, I just double it up and/or change the grainline.
Of course, other interfacings are used for different applications.
Interfacing should not change the hand of fabric. Instead it should support the weave during sewing. Layering lightweight fusible Tricot interfacing is a perfect way to enhance the weight and support of fabric without making it stiff. Cut the interfacing along the suggested grain line and then cut other layers in the
Choosing your perfect size.
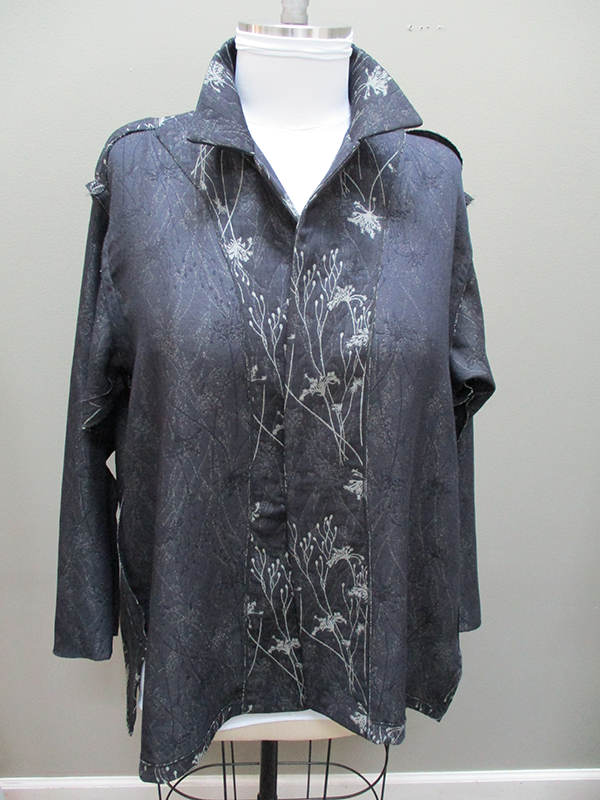
For this Sew Along I chose to make a Size XL/22 using light/midweight woven fabric.
The Body Measurements for a Size 22 are Bust-48, Waist 40, Hips 50.
The Finished Garment measurements for a Size 22 are Bust 64”, Waist 70, Hips 72
The bicep measures 19”
As you can see this pattern has quite a bit of Design Ease.
The dress form shown with the print Swing Shirt is a size 22.
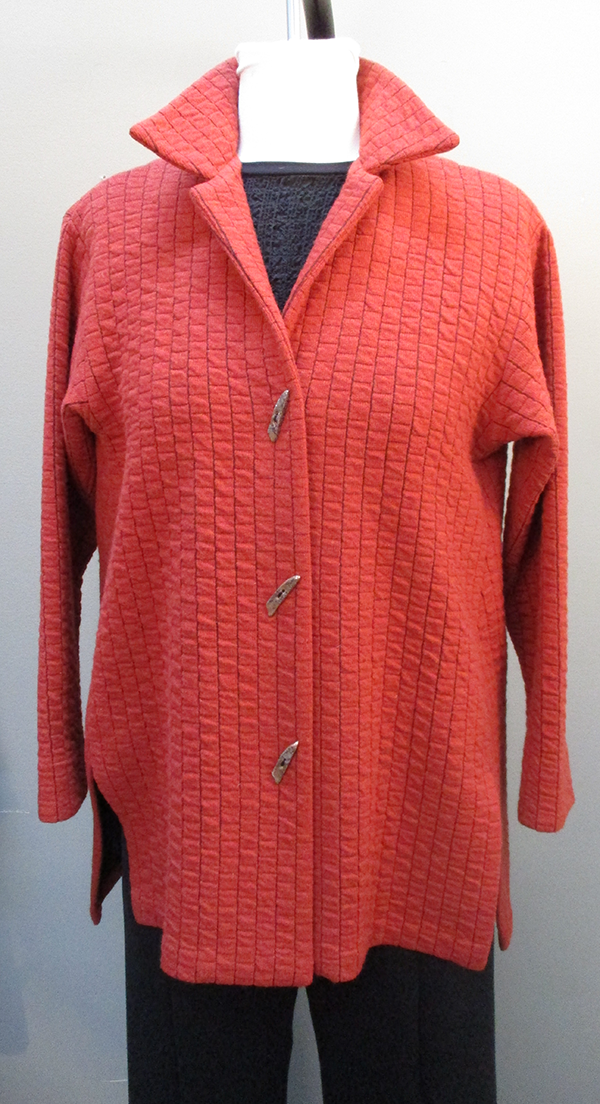
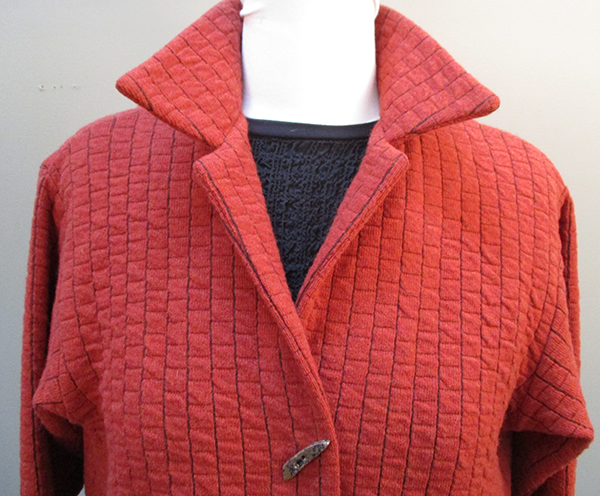
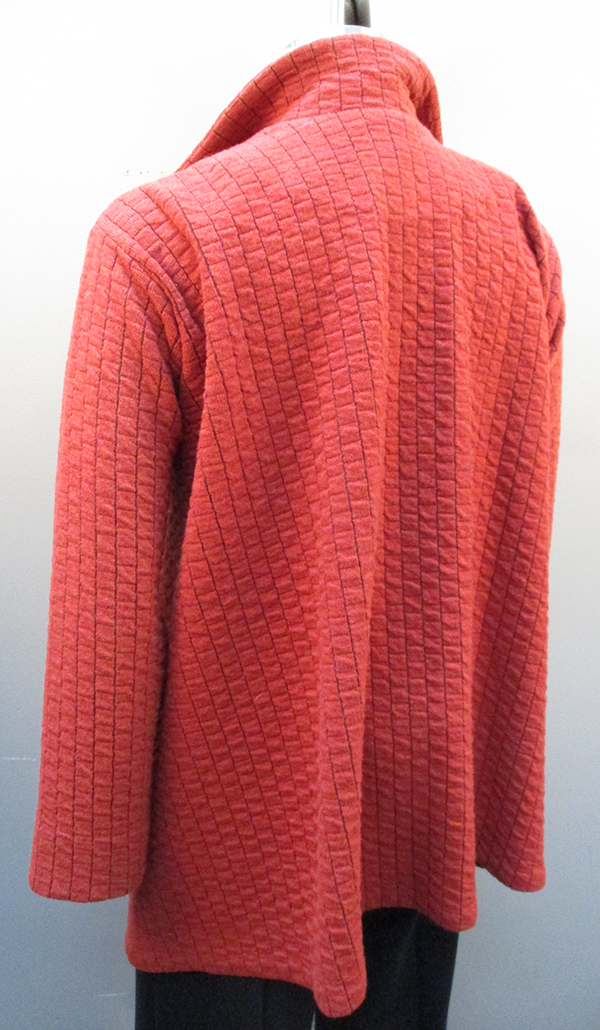
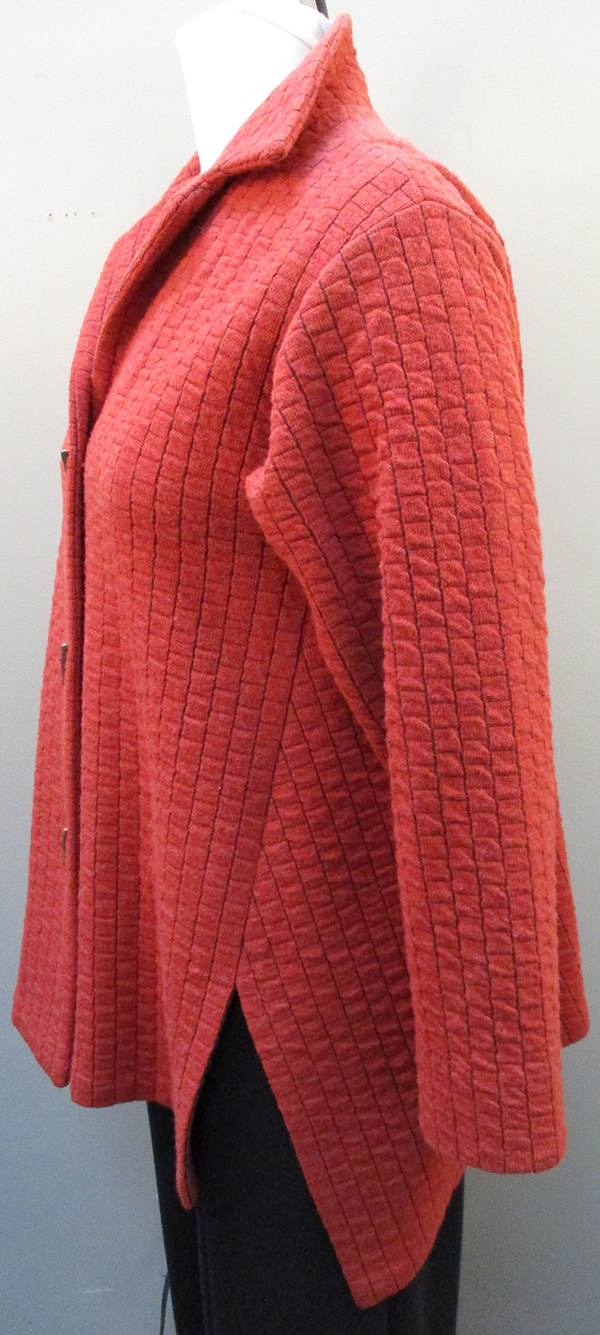
The dress form shown with the orange quilted fabric is a size 8.
Take your measurements (Full Bust, Waist, Hips) and compare them to the Body Measurements Chart the back of the patterns. Choose the size closest to your measurements. Next, look at the Finished Garment Measurements Chart. Think about the fabric you are using and choose the size that will give you the amount of design ease you want. Design ease is the amount of space allowed beyond wearing ease which you need to move around and be comfortable. You do not want to use design ease for fitting. It should be the extra to allowed for the design to flow freely.
Sew Along Steps
1. My Swing Shirt Pattern #505 and my lovely fabric ready to get started!

2. Press the pattern and cut out the tissue pieces

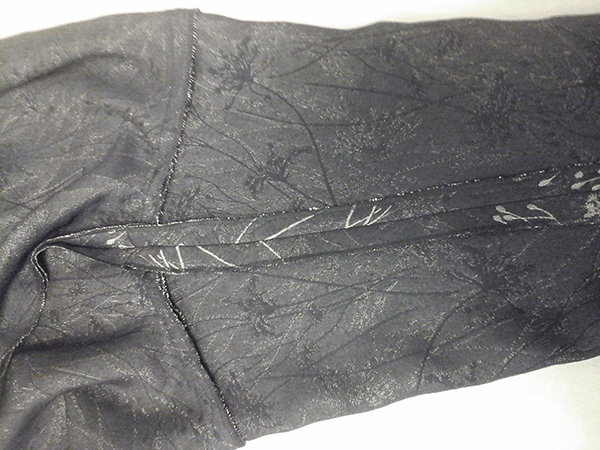
3. Decide pattern changes now…I determined ahead of time that I would need to add width to the sleeve from the elbow to the wrist because this shirt and sleeve was drafted for a knit fabric. I also decided that I did not want a center back seam. I checked the finished length of the front, back and sleeve and decided I was happy with the lengths.

4. My fabric measured 54” wide. I checked the Layouts for 60” wide fabric and found that I would be able to follow the layout even though my fabric was narrower than the 60”. I did have to squeeze the sleeve across the width.
Changes-I laid the Back #2 pattern piece 5/8” past the fold of the fabric because I wanted to eliminate the CB seam.

5. Front and Facing layout.

6. Sleeve alteration using my curved ruler and chalk.

7. Sleeve cut out.

8. All my pieces cut.

9. Interfacing lay out.

10. Fuse interfacing to both Collar #4 pieces and Front and Back Facings #s 5 & 6.

11. Fuse interfacing to all pieces as directed in Steps 1-7 and sew Collar pieces #4 together as shown.


12. This fabric ravels like mad!!! I decided to serge around each cut out piece and sew the shirt with a single needle machine at 5/8”. Fabric that ravels this much is likely to pull apart at the seams when it is serged. A 4 or 5 thread serge stitch is simply not wide enough to deter this weave from raveling. I am using a 3-Thread serger to support the raw edge which will not add too much thread to seams. You are certainly welcome to serge/sew this shirt together using a knit fabric.

13. Sew shoulder seams together and Press open.

14. Sew Sleeves #3 to armholes. Carefully match edges and Center Top.

15. Press towards sleeve.

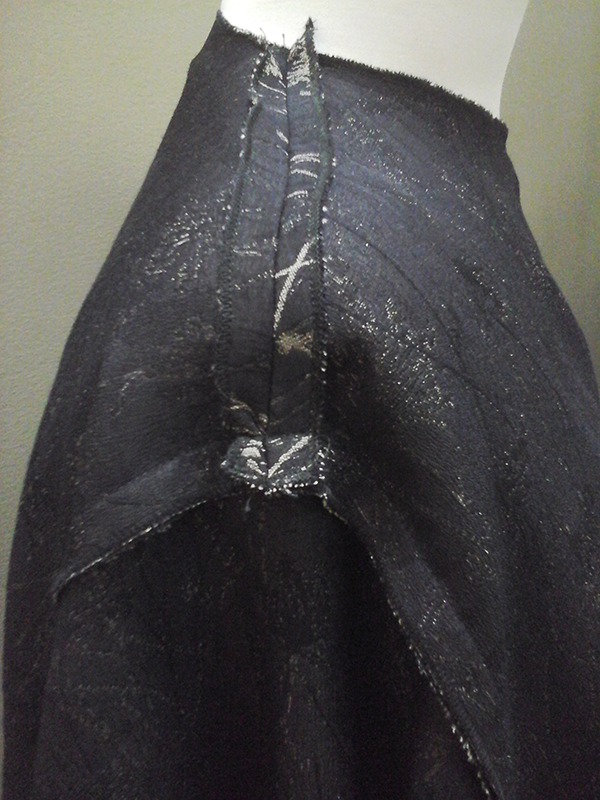
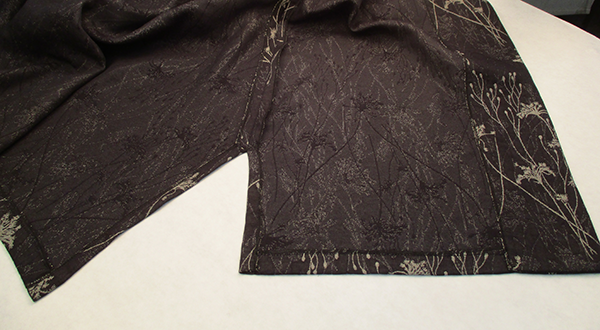
16. Sew side seam from wrist to side slit. Be careful to match underarm seams and dot. Press seam open to Dot and press slit hems.


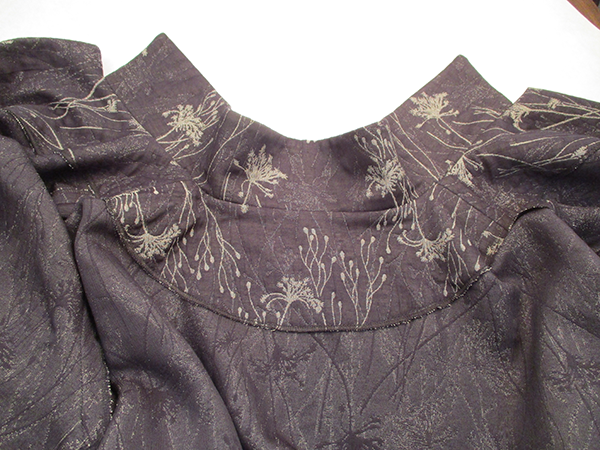
17. Sew collar to neckline. Match Center backs and pin in place. Be sure that the finished edge of the collar is the same distance from both corners of the jacket.


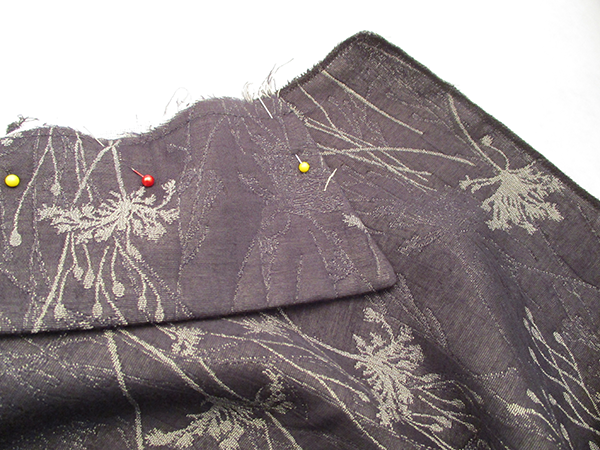
18. Place facing on neckline, matching shoulder seams and sew in place. If your shoulder seams don’t match up perfectly it is better to sew the pieces together smoothly than to force these seams to match. This becomes very important when topstitching the facings to the garment.


19. Sew together carefully matching center fronts being mindful of the shoulder seams not needing to be perfectly matched.
20. Collar is sandwiched between shirt and facing.

21. Measure the length between the collar and the bottom raw edge of the shirt. Make sure they are equal side to side. Knowing this before you sew the long facing to the shirt is important. Adjust as needed.
22. Trim ¼” off neckline seam allowance.
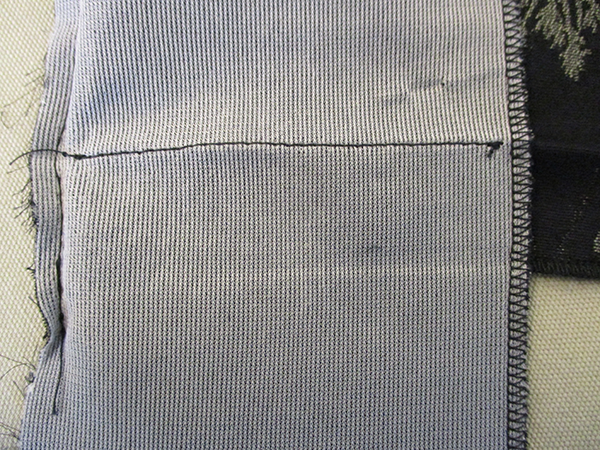
23. The front facing is drafted longer than it needs to be because many fabrics shrink when interfacing is fused on. You will be sewing the facing on from the neckline to the hem with the facing side UP on one side, and from the hem to the neckline on the other side. Pin the facing along the seam allowance. This method will allow the fabric side to be eased evenly on both sides. Compare the length from neck to shirt hem and be sure they match. If not, fix it now!

24. Trim off ¼” of the seam allowance.


25. Open the seam flat and press seam allowance towards the jacket. Press well.
26. Fold the facing to the inside of the shirt and press in place. Press the neckline seam and front facing seams flat and smooth. Using a dress form is super helpful for this next step. I like to stitch my facings to the garment all the way around from the bottom hem, around the neck to the other side. I like this because it secures the facing from flopping around and it gives excellent support for the life of the garment. The trick is to sew them together perfectly! Keeping the grain lines in tack and even is imperative. The best way to accomplish this is to press and pin them the way the two fabrics wants to lay together and not force them. If you do force them, it will show in drag lines on the outside. Sometimes this means that you may not be able to match the shoulder seams exactly or match the center backs, but that is OK.


27. Double check that the front lengths match from the collar to the hem.

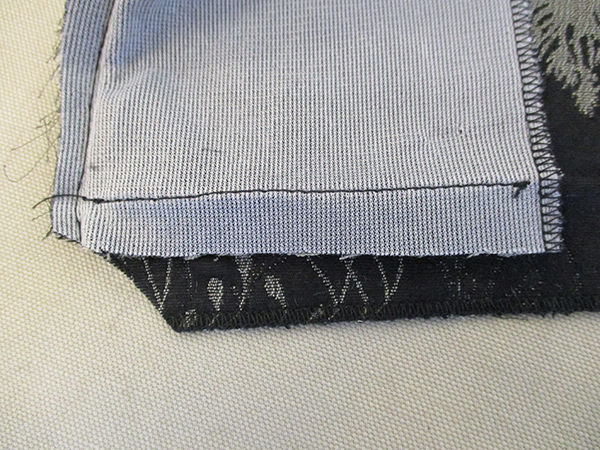
28. Fold facing to the inside and Press bottom hem in place including the facing to be able to see the fold line clearly. There will be excess facing.


29. Fold back the facing to the outside matching right sides along pressed fold and pin in place.
30. Sew the facing to the shirt just a tiny bit outside of the fold line. Stitching just outside the fold line will maintain the hem fold. Also, don’t stitch all the way to the end of the facing. Miss 2-3 stitches.
31. Trim the corner and just the facing as shown. I also trim just the serging of the shirt fabric an inch shy of the facing to get rid of the possible thick line when pressed. Don’t trim the facing too close to the stitching line as the hem corner needs the support.
32. Turn facing to inside and hem up in place, press and pin. Press and pin carefully so the facing meets the hem perfectly because it will be topstitched in place.

33. Press back hem in place and press the hem of the slits in place as shown.


34. Sew facing to shirt from the inside all the way around. Sew slowly and carefully just on the other side of the serged line following the curves around the shoulder area very carefully. It is very easy to sew small folds underneath and/or sew crooked lines. Sometimes it is best to baste the facing in line while the pins are in place. This step will show the amount of care you took when sewing and handling the facing as shown.
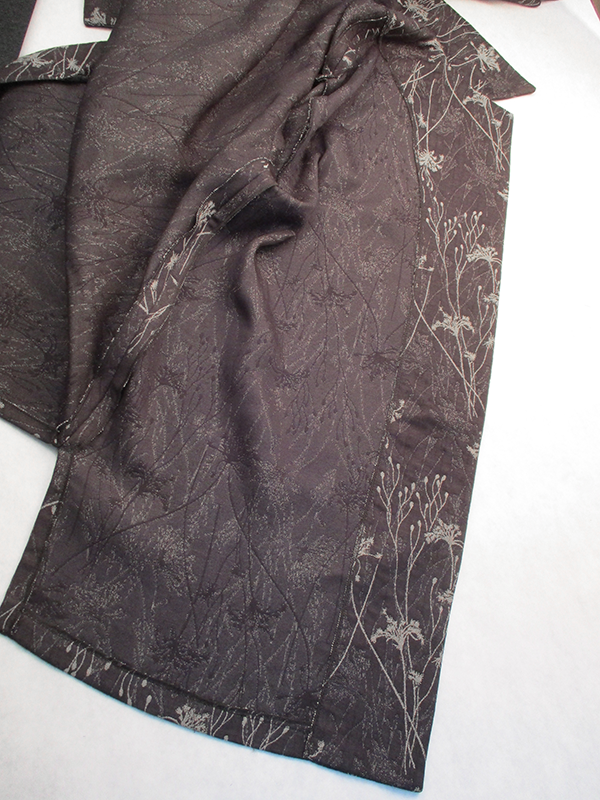
35. The facing is sewn onto the shirt completely around the facing. The bottom hems and slits

Buttonhole Placement
NOTE: First make sure that the center fronts of the garment are the same length from the neckline to the hem. There is chance that you can fudge things if they aren’t the same by placing the buttons a bit higher or lower than the exact placement on your tape measure. It is better to make small ¼” changes at every button than to try to fix the problem by sewing one button ¾” higher or lower!
Choosing where to place the first buttonhole depends on several factors. If you are placing the first buttonhole at the neckline, determine where the last buttonhole will be. Then decide how many buttons you want on your shirt. Divide the space between the first and last buttonhole by the number of buttons and that will give you the space between the buttonholes.

Decide if you want to make vertical or horizontal buttonholes. I like horizontal buttonholes on just about everything except dress shirts. The following details are meant for horizontal buttonholes.


If you are not going to have a buttonhole at the neckline mark the first buttonhole 1/2” above the widest part of your bustline. Then decide where you want the last button. If you want a button above the bustline mark that and then that will be distance between the others. Typically, there will be 4”-4.5” between the buttonholes.
I decided on 4 buttons, which is unusual for me! I like an odd number of buttons, but I only had 4 of the mother-of-pearl I liked, so I went with it 😊
I use a straight pin placed horizontally to mark the placement. Then I measure 5/8” from the edge and place a cross pin.

I place the buttons on the pins and look to make sure I like the placement.

My Pfaff 1222SE make the most beautiful buttonholes!

I lay the button next to the measurement grid on the left side of the buttonhole attachment to determine how long to make the buttonhole and beginning at the bottom buttonhole I make the 4 buttonholes!

I understand that that there are several ways to cut open a buttonhole, but I have found that using a very thin, very sharp, very pointy Exacto knife blade works the best with the least chance of cutting the threads.

Beginning in the middle of the buttonhole, with your index finger underneath, slowly push the tip of the blade between the stitching lines and pierce the fabric. Carefully slide the blade up cutting between the stitching lines and stop 1/16” away from the bar tack. Turn the buttonhole in the other direction and beginning where you started slide the blade to the other end again stopping just shy of the bar tack. Be sure you have good lighting when you do this. The worst thing is if you cut through these stitches. Going back and trying to repair a buttonhole usually does not end well.
After the buttonhole is cut open pull and carefully trim any fabric loose threads with a small pair of sharp scissors.

37. Button Placement
Lay the shirt down flat on a table and match the neckline and hem. Fold back the buttonhole side along the end of the buttonholes. This will help give you exact placement. Fold the buttonholes over the other side along the finished edge.


Place a pin through the buttonhole at the end closest to the finished edge. Now pull the buttonhole over the pin leaving the pin on the other side. Secure the pin in this exact place. This is the exact placement for your button.


I attached my buttons by zig-zag machine stitch. Be sure to determine the width of the zig zag prior to beginning to sew. It’s very easy to break needles! Also, drop the feed dogs by setting your machine on darn stitching.

Sew them by hand if you like. Also, if your fabric is a bit on the thick side, I suggest sewing the button with a shank to allow room for the fabric.


Alternatives
The brick color quilted Swing Shirt (size Small) has hand sewn facing and hems as well as silk covered snaps to replace buttonholes.
I make this version for the Cover story in the July 2008 issue of Sewing Savvy magazine.
38. Sleeve Hem
Try on your Swing Shirt, button it up, and pin sleeve hems in place. Press in place and top stitch.