
Creative Options Tutorial: Pants


Creative Options Tutorial: Taper Pant and Wide Leg Pant #824
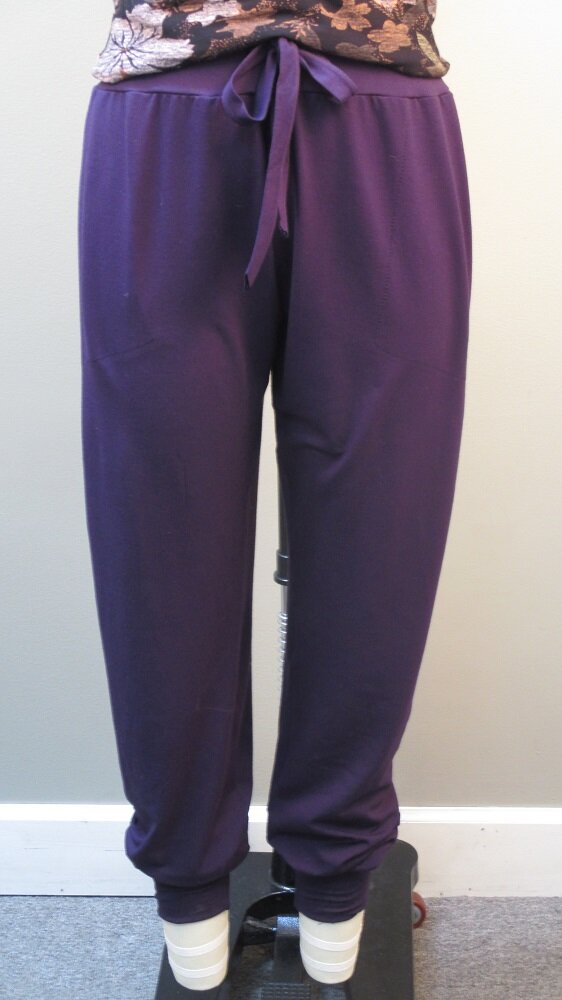
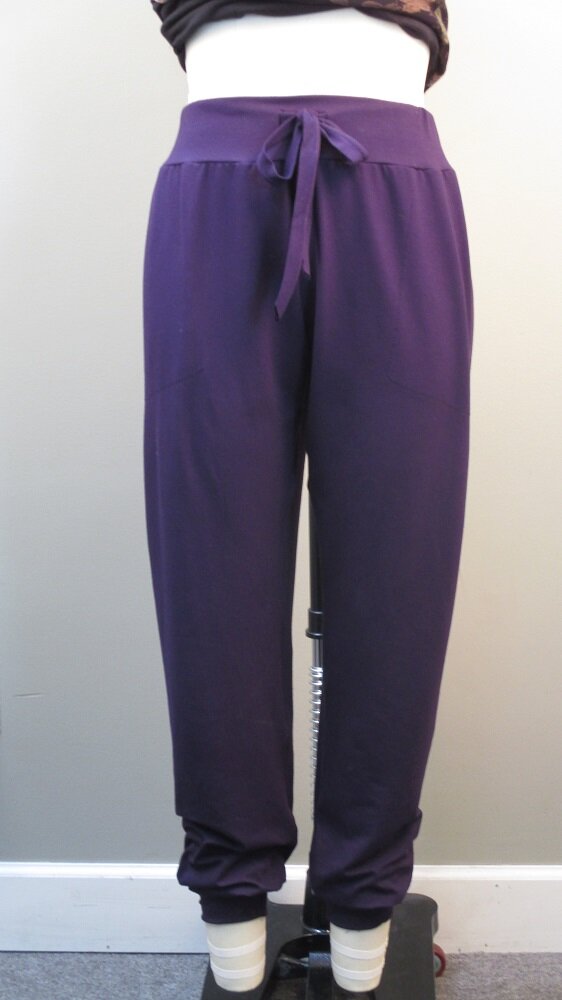
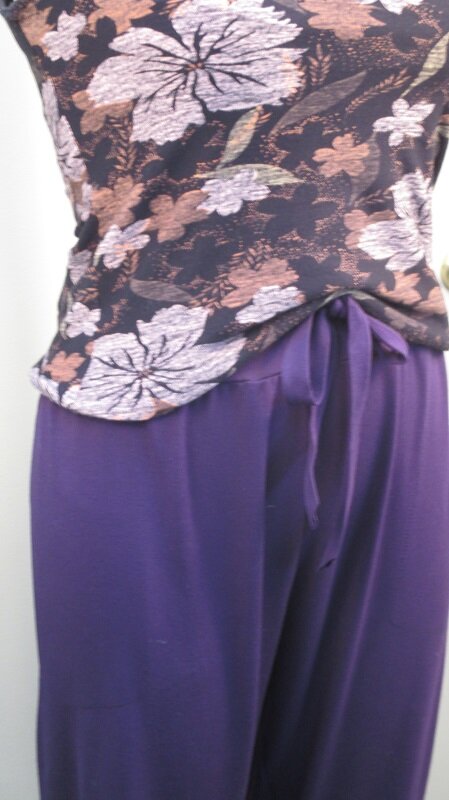
Working with a simple but well-made pant pattern leaves you with so many creative options! Starting with the Taper and Wide Leg Pant Pattern #824, I made a very fashionable stay-at-home lounge-pant. An add-on pocket, drawstring, stretch fabric waistband and hem cuffs are perfect for this popular pull-on pants pattern.
The fabric possibilities are endless, from an easy jersey to linen and cotton prints or even French Terry. They all work, so make several pairs to change up your daily fashion routine!
Many of these options can also be used for other pant patterns. Find a pattern style you like and start creating!
Woven or Knit
The Wide Leg Pant pattern is a good choice for woven fabric because of its design ease and wide leg. The Taper Pant is closer fitting with a shapely leg and less design ease in the back rise/crotch which makes it a good choice for a knit. The body of the pant can be as tight or loose as you want because you will be adding either a drawstring, stretch-fabric waistband or both. When choosing your size think about the amount of ease you want in your finished pants and the amount of ease already available in your fabric.
Size
Use the finished garment measurements chart found inside the pattern envelope. Measure your hips at their widest point. Look for the closest match on the chart.
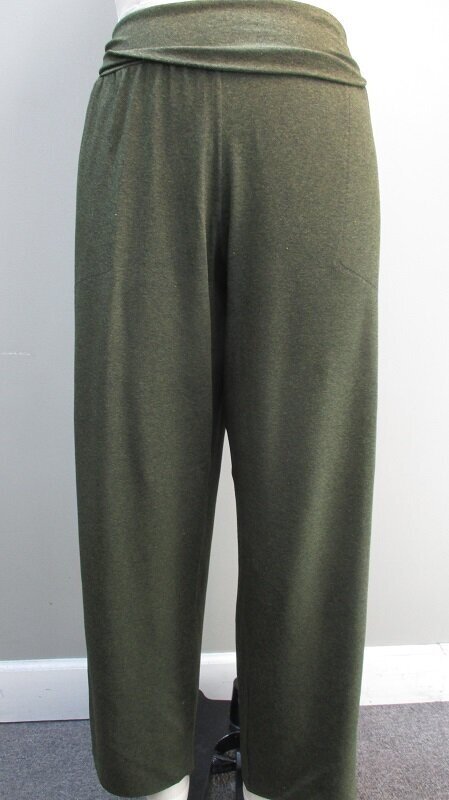
For Knit Fabrics: Choose a size less than your hip measurement for a tight fit, the closest size to your hip for a close fit, or a size larger than your hip for a loose fit. Also consider the amount of crosswise stretch and recovery of your fabric. Soft recovery fabric will result in a larger fit. For my Taper Leg Pant I chose to use a size 14 (I am usually a 12) to give me extra room for comfort. The waistband and drawstring will have negative ease to hold the pants in place.
For Woven Fabrics: If your woven has stretch, choose the size closest to (but not smaller than) your hip for a close fit. For a woven with no stretch, choose a size or two larger. (You need to be able to sit comfortably.)
Suggested Alterations
Taper Pant with Knit Fabric Options:
- Stretch Fabric Waistband
- Cuffs
- Drawstring
- Pockets
Wide Leg Pant with Woven Fabric Options:
- Stretch Fabric Waistband
- Drawstring
- Pockets

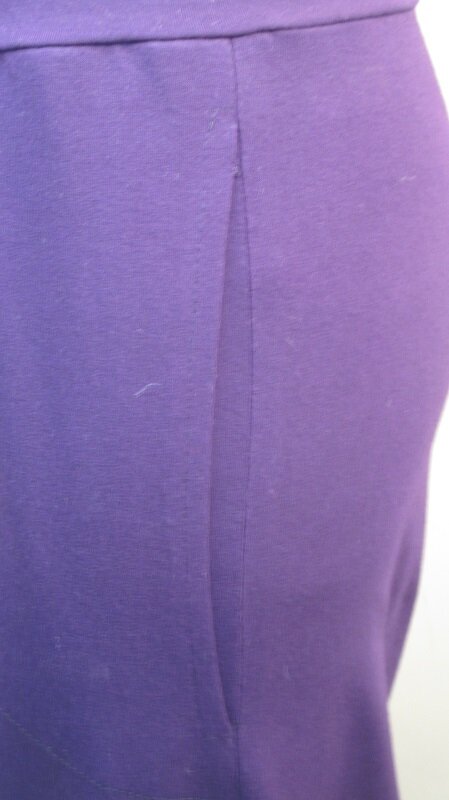
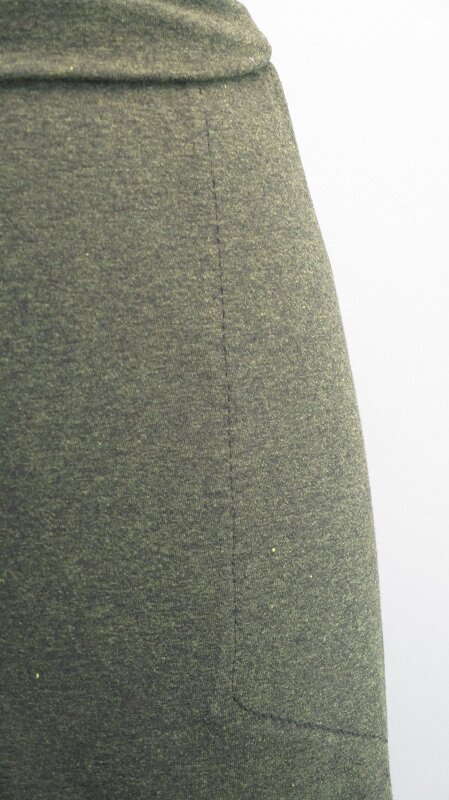
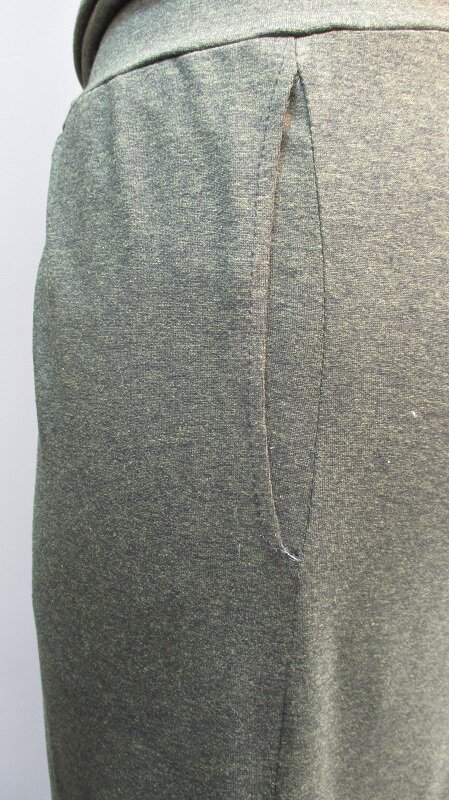
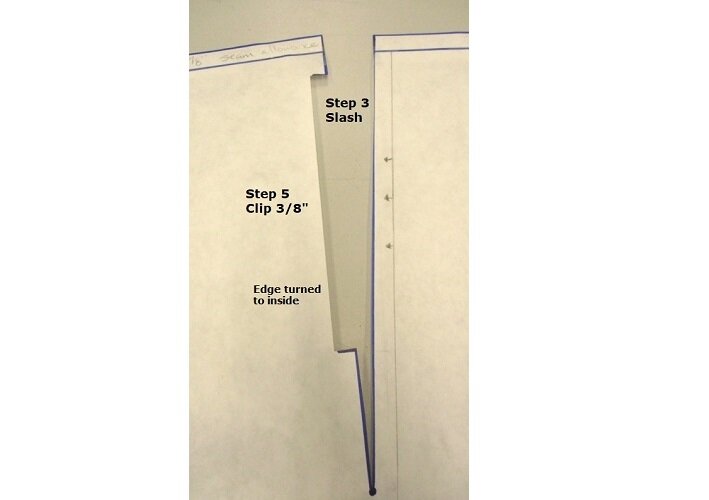
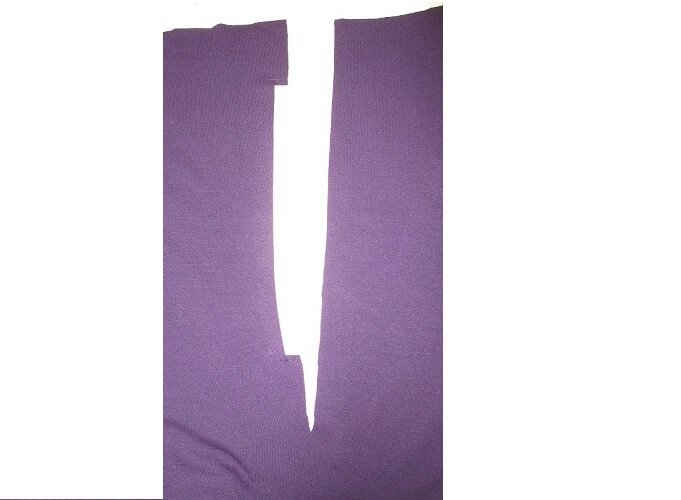
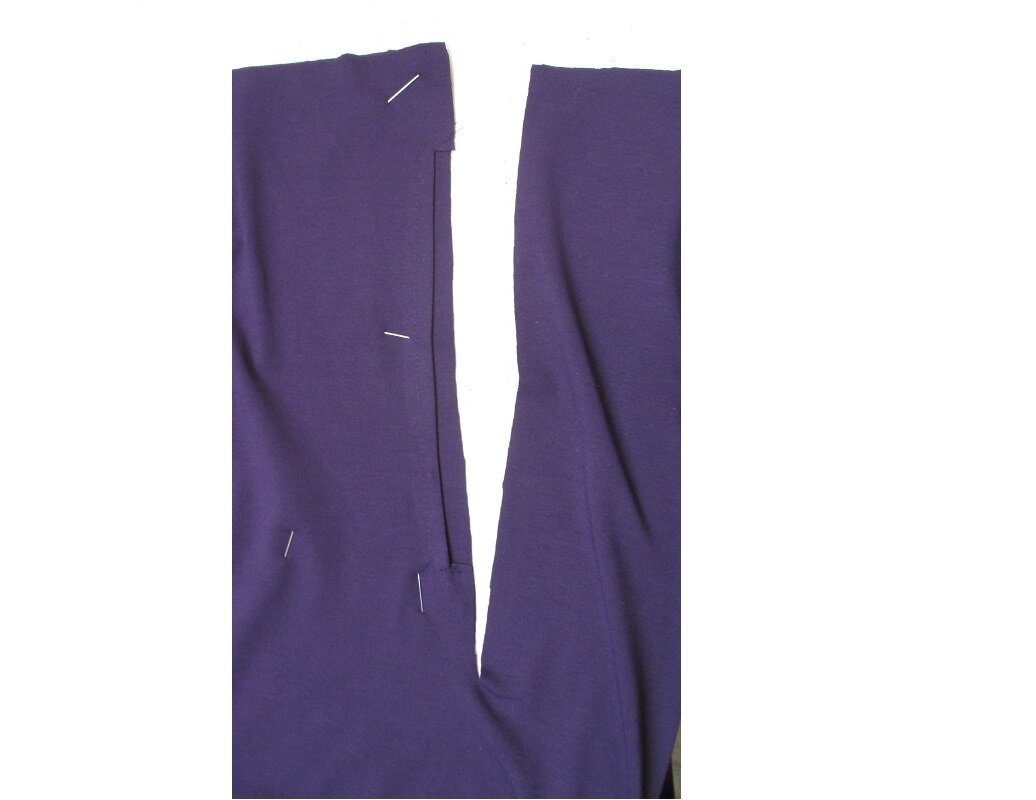
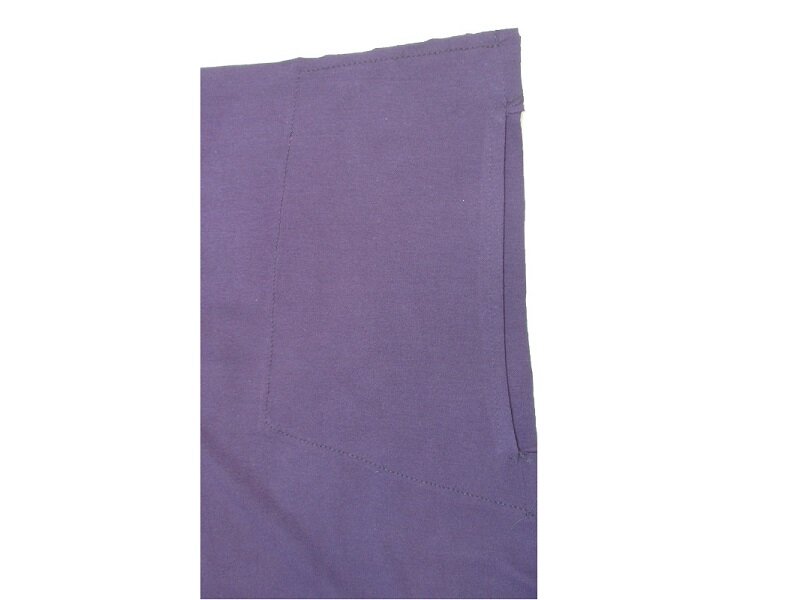
Adding Pockets
This technique works well with any combination of pattern and fabric.
Follow this tutorial for using a dart to add a faced pocket to garments without side seams (includes printable pattern). These instructions work with several of my other patterns as well and can be used for woven or knit fabrics.


Drawstring
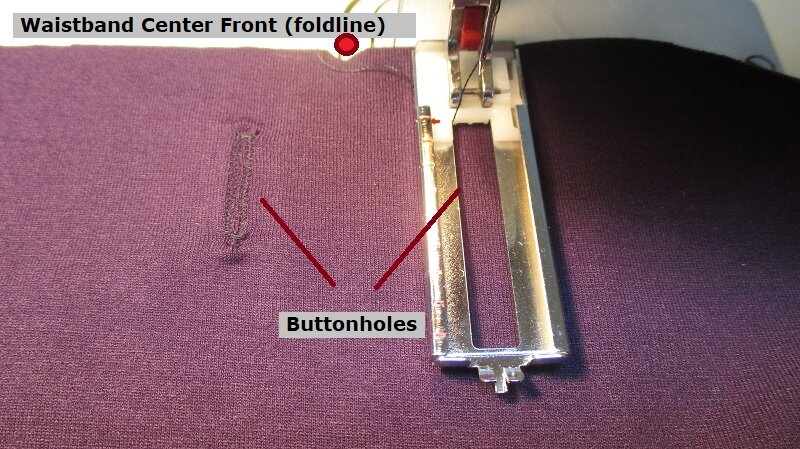
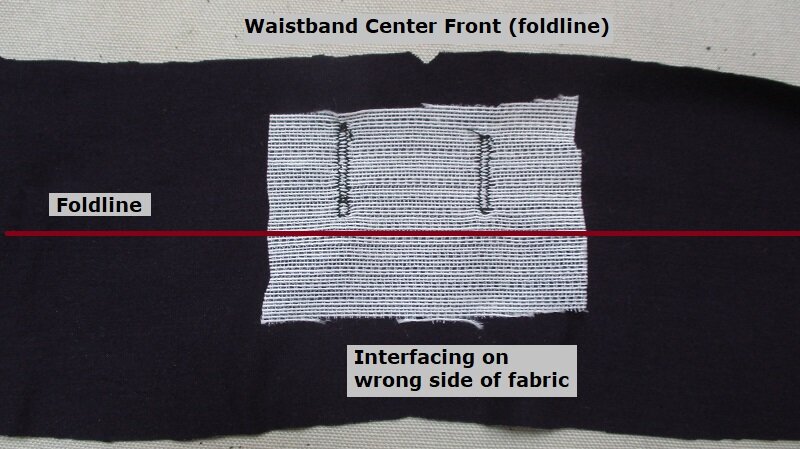
1. To add a drawstring to the band in place of elastic, simply make two buttonholes on either side of the center front, just under the fold line. Use interfacing under the buttonhole. (pictures shown using a stretch fabric waistband)
2. Press fold-line.
3. Determine your preferred width and length for the drawstring. I made my drawstring using the same fabric and cut it 2.5” wide by 60” long (long enough to tie a bow).
4. Serge the long edges, right sides together. Leave a 2” opening on long edge. Serge short edges, right sides together and turn right side out. Topstitch the opening closed.
NOTE: You may also choose to use a ribbon or cord.
5. Run drawstring through waistline.

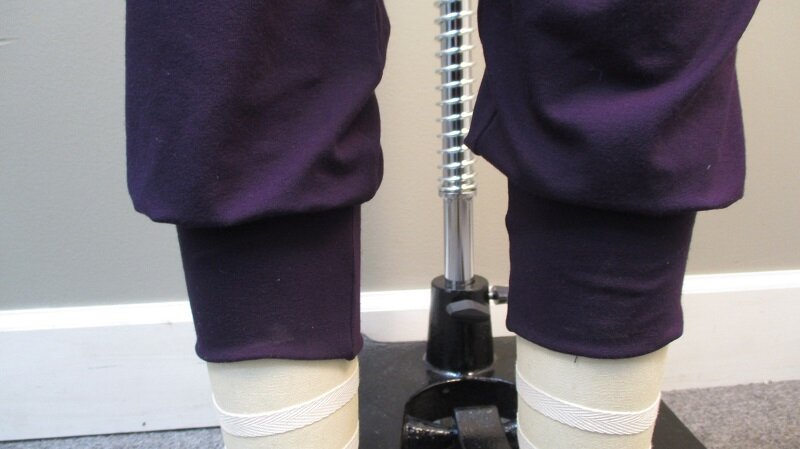
Ankle Cuffs
This option works best with the Taper Pant made with knit fabric.
Pant Length
The leg should be narrow at the hem. Use the Lengthen/Shorten line to alter the length. Shortening the pant this way will give a slimmer, flattering leg with less fabric to gather into cuff.
1. Measure your side seam length from waist to the floor.
2. Starting at the waist just below the seam allowance mark your side seam length on the pattern.
3. Trim the 2” hem allowance off, leaving 5/8” for seam allowance for the band.
4. Use the lengthen/shorten line to bring the leg to the length you marked above. You may have to smooth (true) the inseams. If possible, use a fashion curve ruler to achieve a nice curve.
Cuff
1. The band that I made for the cuff is 4” tall. You can adjust this to your preference by changing the width of the rectangles.
2. Cut 2 rectangles 10” long x 9” wide.
3. Fold in half lengthwise, right sides together, and serge edge.
4. Fold this tube in half, wrong sides together, and serge edges together.
5. Make a clip at the halfway point from the serged side.
6. On the hem of the pants make a mark at the halfway point from the inseam.
7. Match the inseam and clips. Stretch the cuff to match the band and serge.

Stretch Fabric Waistband
I prefer a finished waistband width of 2.5”. You may change this to suit your preference.
NOTE: This alteration is similar to the Stretch Fabric Waistband tutorial [PDF], but uses straight lines rather than following the waistline curve.
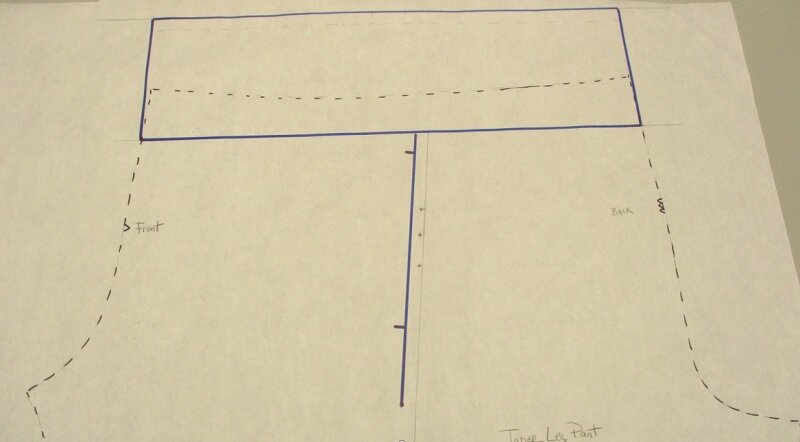
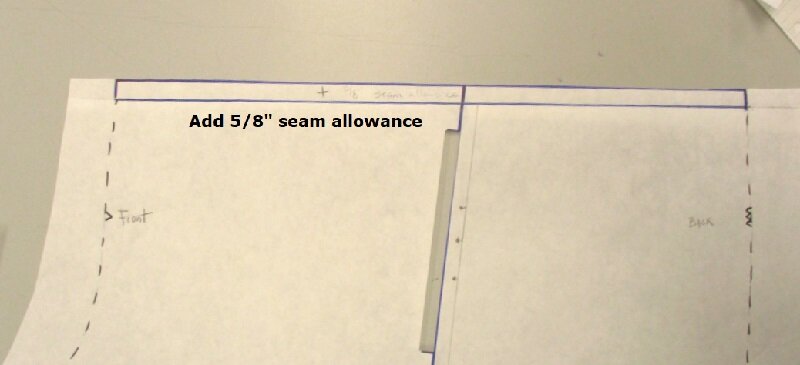
Make Pattern
1. Make a mark 2.5” down from top of pattern at center front and center back waistline. Draw a straight line connecting them.
2. Draw a line parallel to the first at double the width of your finished waistband plus 1 ¼” for seam allowance. (waistband width x 2) plus 1 ¼” = distance”
For my 2.5” waist band the second line is 6 ¼” from the first: (2.5” x 2) + 1 ¼” = 6 ¼”
3. Draw a straight line connecting the parallel lines at each end to create a rectangle.
4. Cut the newly drafted waistband off the pattern.
5. Add 5/8” seam allowance to the top of the waistline on the remaining pant pattern.
Adjust Waistband Length
You will need to adjust the length of the new waistband pattern to create negative ease or “tightness”.
NOTE: This tip is a good start but is only an approximation. You will need to experiment with your fabric’s stretch and recovery to find the perfect fit.
1. Measure your waist (belly button level). Multiply this length by 75%, then add 2 seam allowances (5/8” x 2 = 1 1/4”).
(Waist x 75%) + 1 ¼” = Waistband length
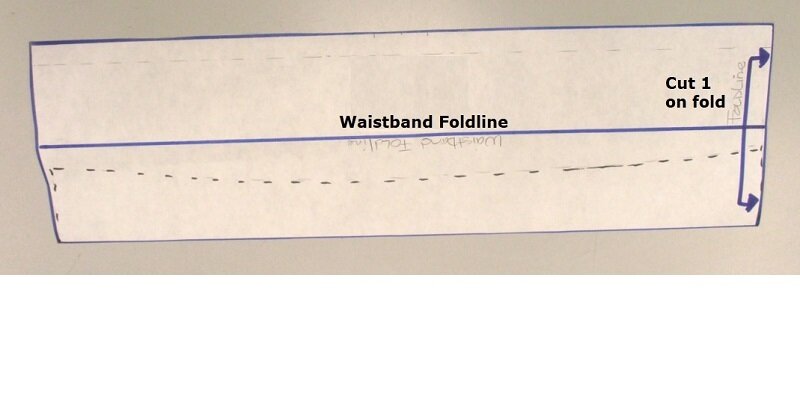
2. The pattern piece that you drafted will be cut widthwise on the fold. Divide the band length in half and trim the pattern to this size.

Construct
1. Sew the pants per instructions, eliminating the elastic at the waist.
2. Using the pattern piece you made, cut 1 with short end on the fold.
3. With right sides together, serge the short sides of the band together to form a circle.
4. If you will be adding a drawstring, add buttonholes to each side of center front now.
5. Fold the band in half with the wrong sides together.
NOTE: Try the band on to check the fit. Make adjustments to the band length if needed.
6. Edge serge the raw edges together, creating a tube.
7. Serge the band onto the garment with the band seam at the center back.