
Sew Along: Fitted Jacket
Final Update: Part 5 Added May 6, 2020
Sew Along Updates
Updates to sew along will be added on Wednesdays and Saturdays, but you can join in at any time and finish the project at your own pace!
Introduction (April 18, 2020)
Part 1: Planning (April 22, 2020)
Part 2: Videos and Pattern Change (April 25, 2020)
Part 3: Start Sewing! (April 29, 2020)
Part 4: Facings and Collar (May 2, 2020)
Part 5: Finishing Touches (May 6, 2020)
Introduction - April 18, 2020
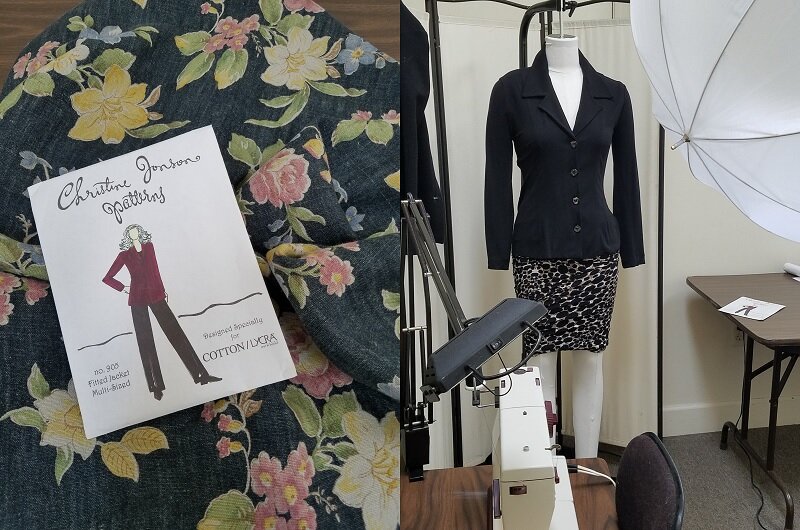
Hello! Christine here :)
I'm so happy for the response I've received regarding the upcoming Sew Along with my Fitted Jacket #905. Thank you. I'm thinking part of the Sew Along with be written with step-by-step instruction, and part will be video with yours truly! If you take a look at the Sew Along I posted on the website recently making the Swing Shirt #505 it will be similar to that format but updated in sections until complete. I am new to posting these things myself so be kind!
Have a great day and take care! Talk again soon :)
Christine xo
Part 1: Planning - April 22, 2020
A casual and easy to sew tailored-ish jacket that does not depend on time consuming sewing techniques was my goal. Several of the techniques you will learn are consistent throughout my pattern line.
This jacket is not meant to be a serious tailored jacket that requires tailoring techniques. It is a fun, easy to sew and wear anytime jacket!

Fabric Choice
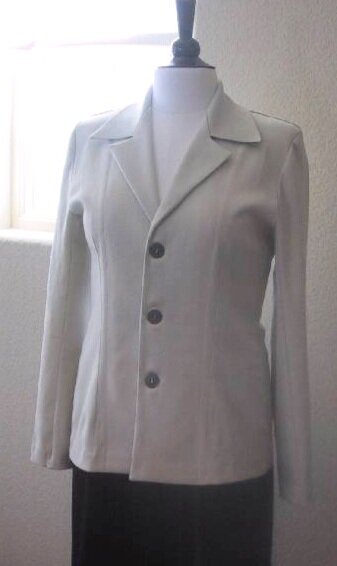
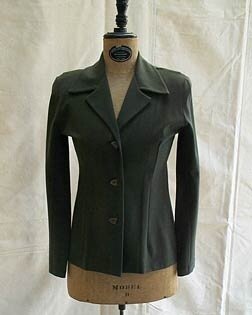
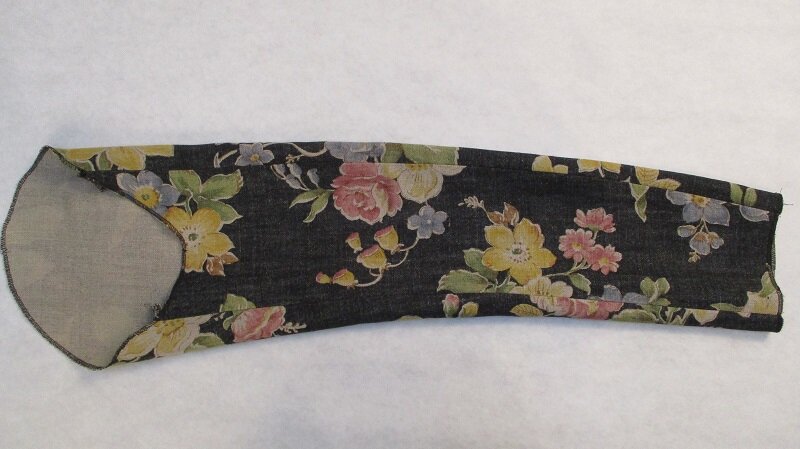
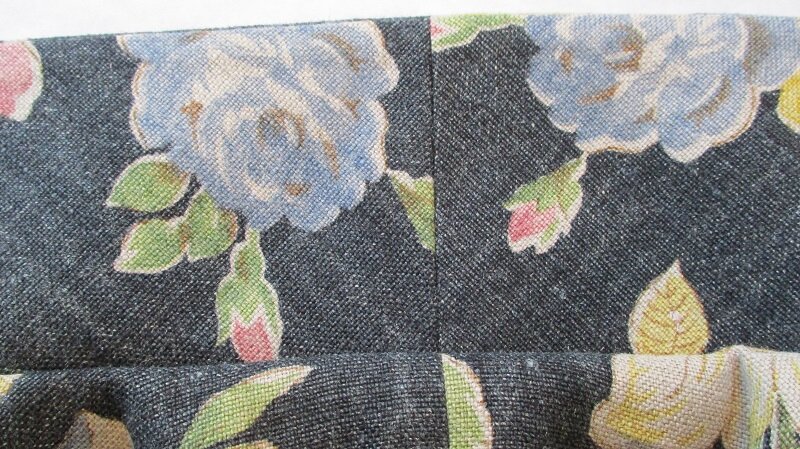
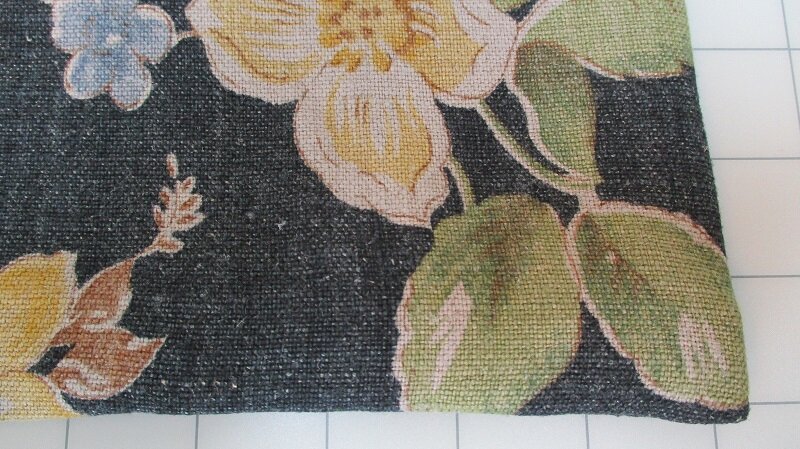
Fabric choice affects sizing and fit for this style. Originally this jacket was designed for stretch fabrics but as time went on, I saw that it fit easily in woven fabrics as well. I have sewn this jacket in many types of fabrics and the fit is always a little different each time. Decide the type of fit you want. This jacket looks great buttoned up, close fitting and shapely, or loose fitting and relaxed. It has enough shape on its own to wear unbuttoned to still be flattering and slimming.
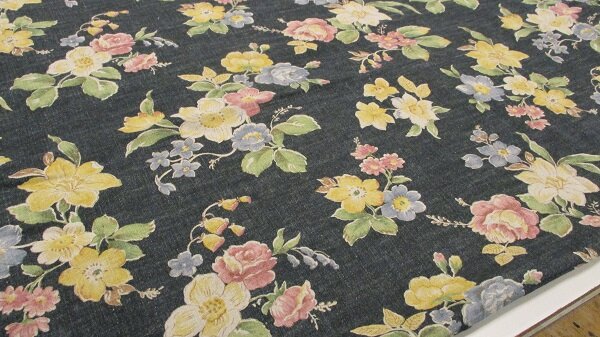
For this Sew Along I decided to sew my sample using a non-stretch linen using traditional sewing techniques. I will also be showing sample jackets I made using serging construction as well. Either way you choose to construct your jacket, I think you will be happily surprised by how fast and easy this jacket comes together.
I recommend a mid-weight woven or LYCRA blend fabric with body and stability that will hold a press. Cotton, Wool, Ponte, Linen, Denim.
Sizing
The next step in preparing to create your Fitted Jacket is to take your body measurements. It would be helpful to have another person measure you if possible. Measure your upper bust, full bust, waist, hips, center back finished length and sleeve length. Jot them down.
Compare your Upper Bust measurement to the bust measurements on the Finished Garment measurements chart (see below). Pick the size with the closest match to your upper bust. This will assure a proper fit at the shoulders.
NOTE: Be aware that this is a pattern with 5 sizes (XS-XL), and going up 1 size is the equivalent of jumping up by two number sizes. In example, XS is equal to size 6, SM is a size 10, MD is size 14, LG is size 18 and XL is size 22.
If you are between sizes, the easiest option is to move up to the next size.
For a more fitted jacket, it would be a good idea to hand draw in-between sizes. It’s easy, just draw between the lines of the 2 sizes!

NOTE: The Finished Garment Measurement chart can be found inside the pattern envelope. Do not use the Bust measurement (full bust) listed on the Body Measurements chart (on the back of the pattern envelope).
Fabric + Size = Ease
Final garment ease is the result of either fabric choice or pattern size, or both. Do you need to allow for ease in the pattern size or is there enough in your fabric?
Compare all your measurements to the Finished Garment measurements for the size you picked. Subtract your measurements from these to determine the amount of ease in the rest of the pattern. These numbers will help when you alter other areas of the jacket.
Next consider the type of fabrics you will be using. Your fabric choice can make a difference in the sizing and fit of the jacket. The Perfect Sizing Worksheet included with your pattern can be a beneficial tool to help with this.
Simply put:
If you are using a Lycra blend knit fabric with soft recovery, your pattern size can have less ease because the fabric gives extra ease needed for a good fit.
If you are using a woven fabric with no stretch, the pattern size must be large enough to give all of the ease needed for a good fit.
Woven Fabric: Bustline Fit
This pattern does not have a bust dart. It does have a double ended dart. This type of dart gives fit at the waist while shaping both the bust and hips. I chose this style of dart more for fitting at the waist than the bust. A knit fabric would take care of the ease needed over the full bust. If you are using a woven, or a knit with very little stretch, you may need to do a Full Bust Adjustment (FBA).
Compare your full bust measurement to the bust on the Finished Garment measurement chart. If your full bust is larger than the Finished Garment bust, you will need a FBA. To determine the amount of the adjustment, subtract your upper bust from your full bust and jot that number down.

If you need a FBA using a woven fabric, there are a few options:
- Add a classic horizontal bust dart, ending approximately 1.5”-2” from the bust apex.
Then either:
- Eliminate the double ended dart.
Or
- Shorten the double ended dart, ending the dart just under the bustline.
If you have a full bust adjustment that you are comfortable using that will be fine. Otherwise, I highly recommend the following tutorials on FBAs:
Curvy Sewing Collective: Beginners Guide to FBA
Megan Nielsen Design Diary: How-to FBA
My top pick is a BluPrint Class: FBA for Any Pattern (Requires a subscription but it’s really good and totally worth it!)
Part 2: Videos and Pattern Change - April 25, 2020
I definitely learned a lot about making videos this week!
Fitted Jacket #905
- Intended pattern style and fit
- My Fabric Choice: non-stretch linen
- Alteration to correct pattern piece (Side #2), see photos below
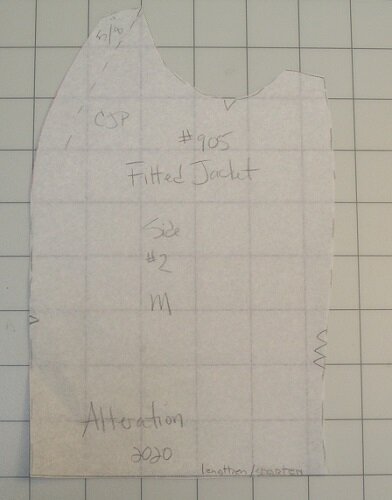
Alteration to Pattern Piece - Side #2

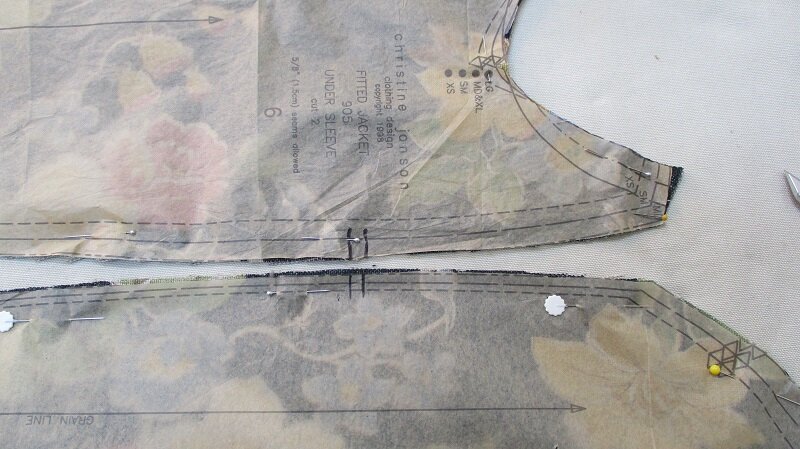
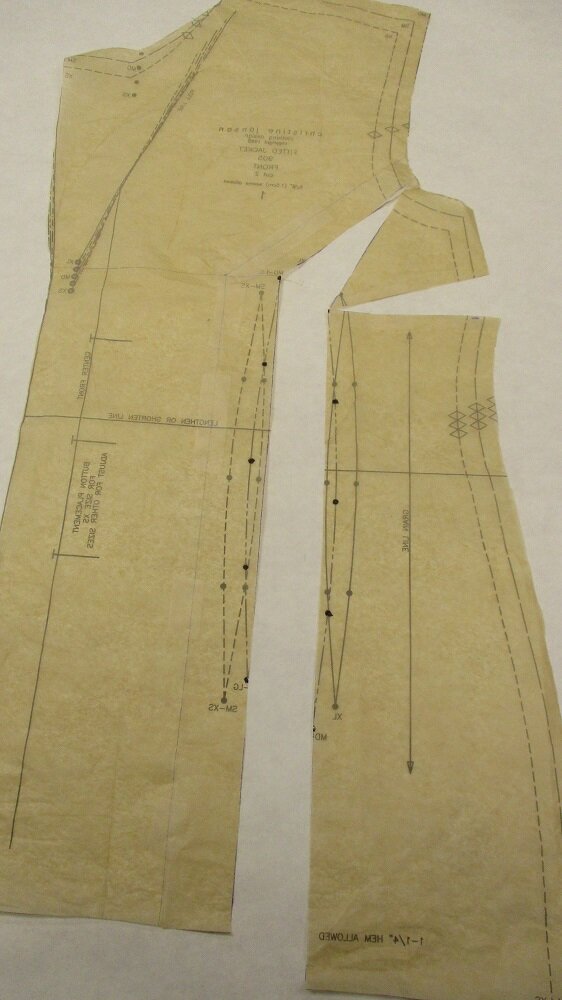
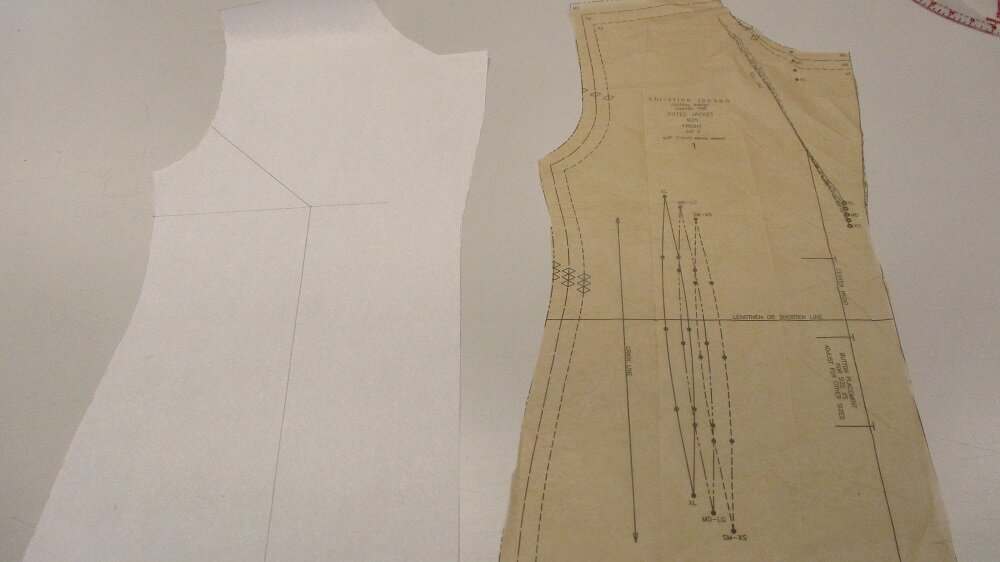
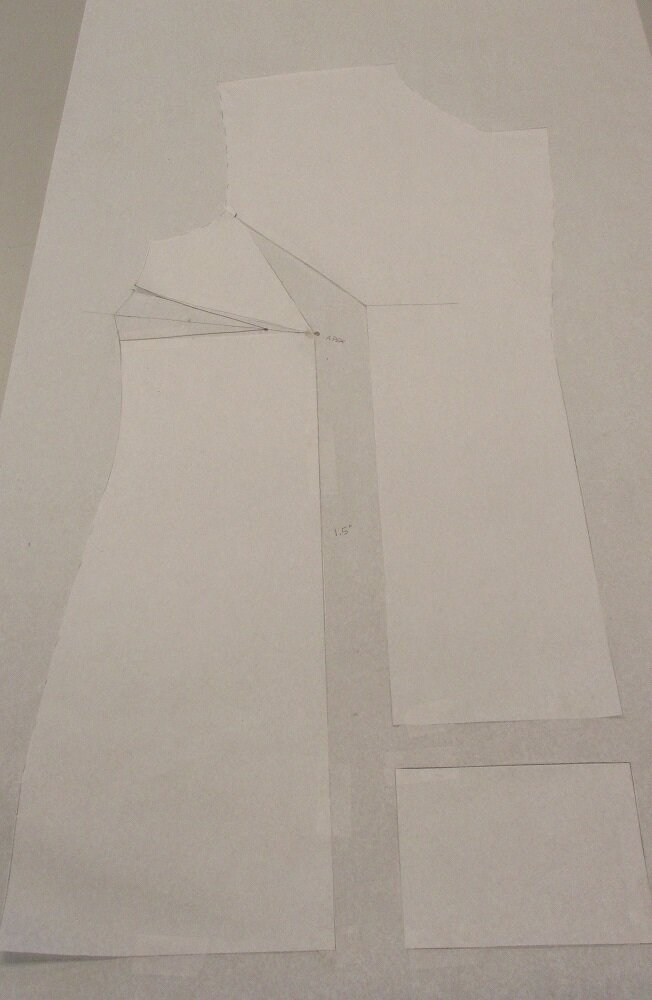
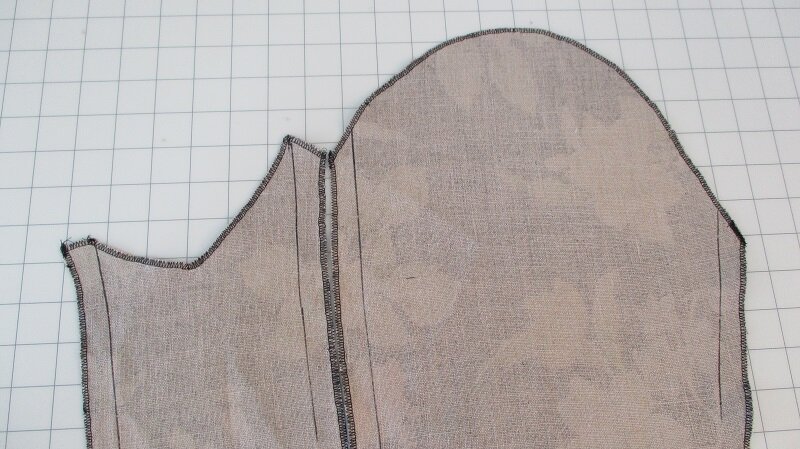
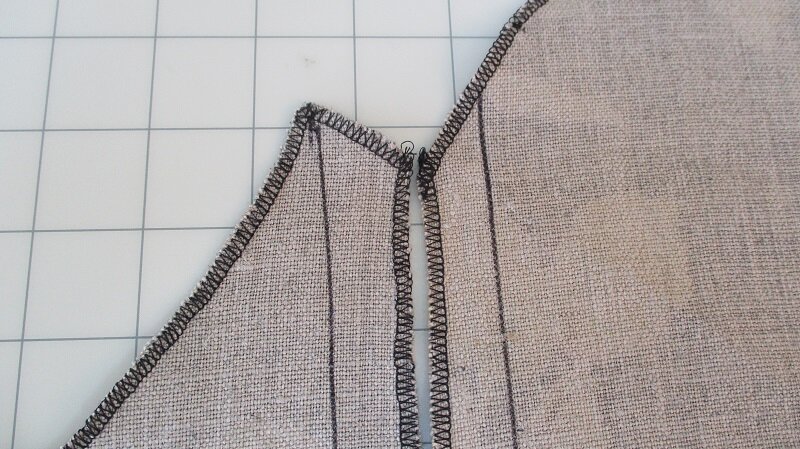
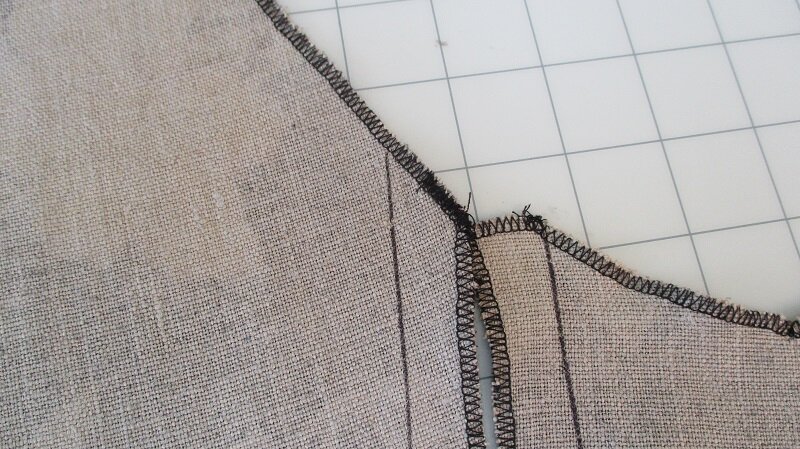
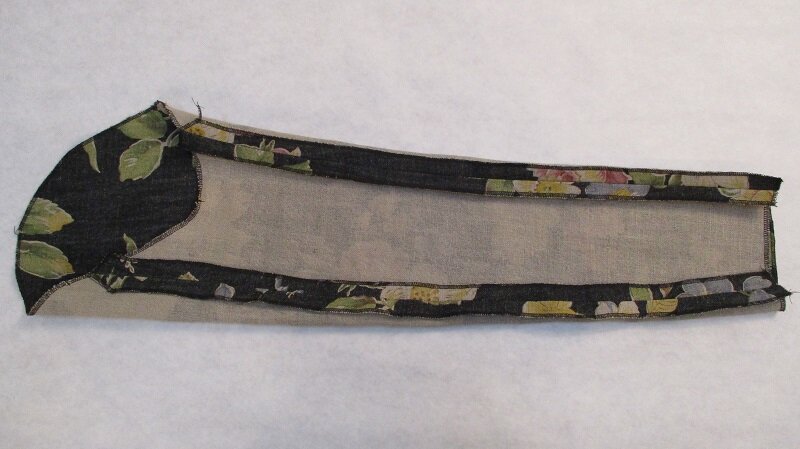
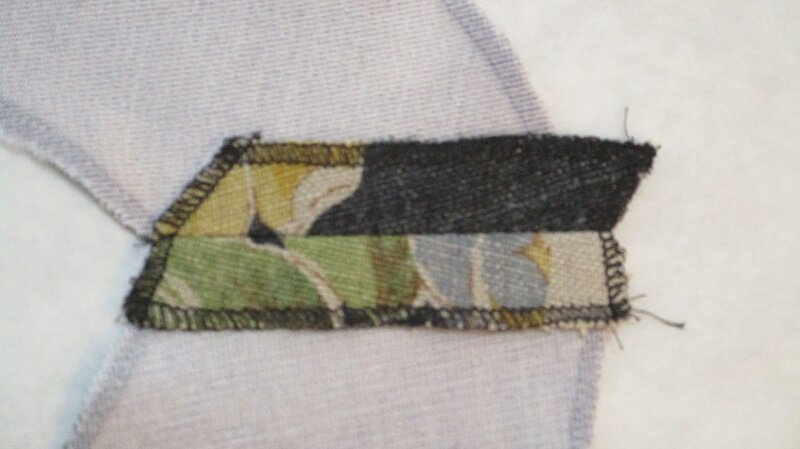
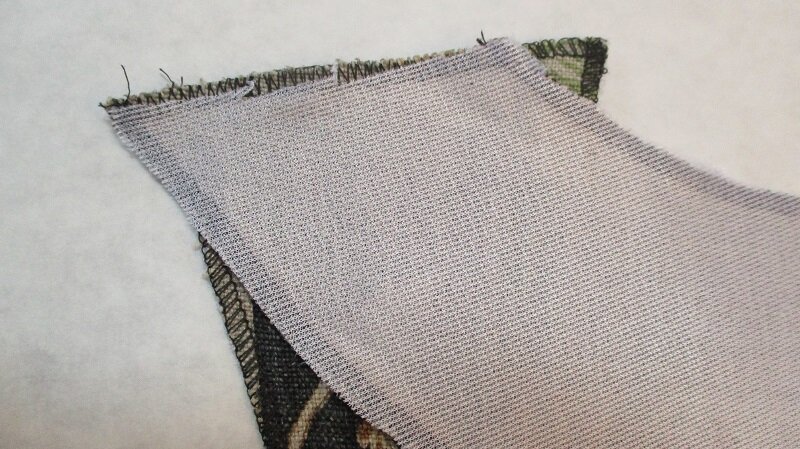
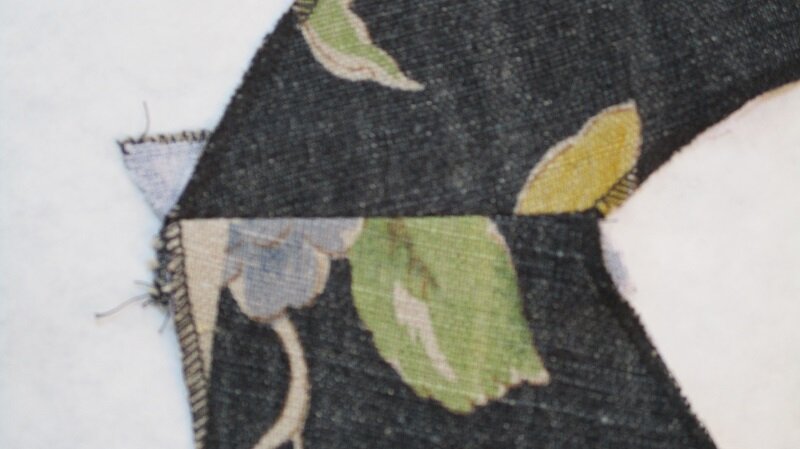
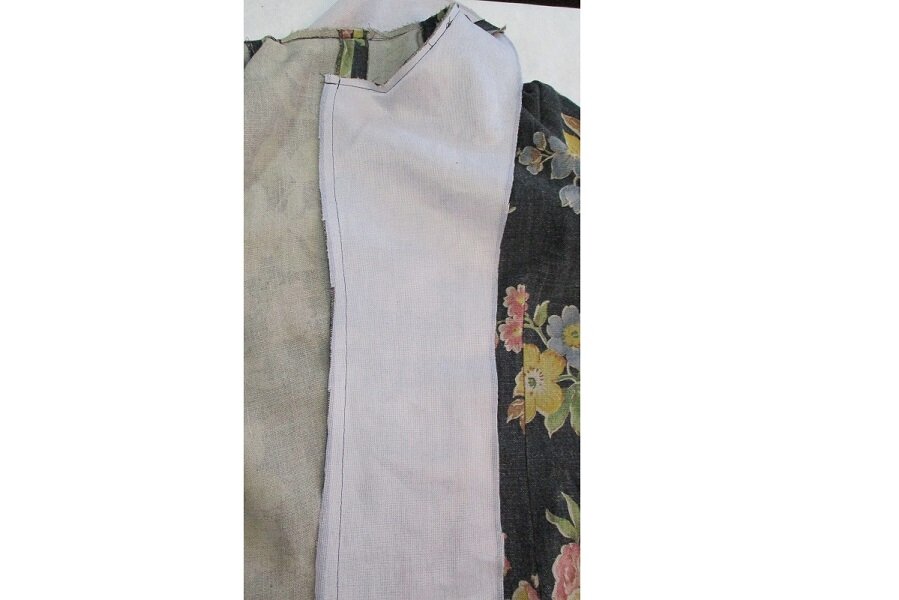
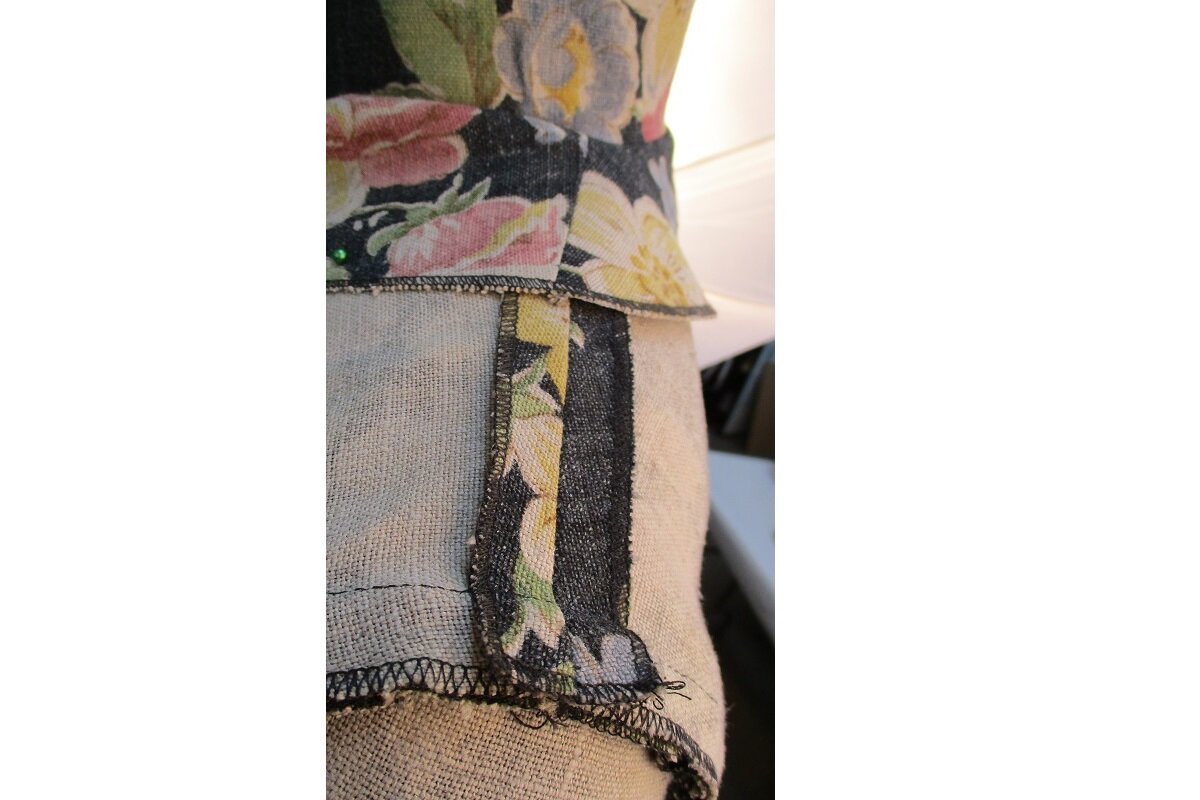
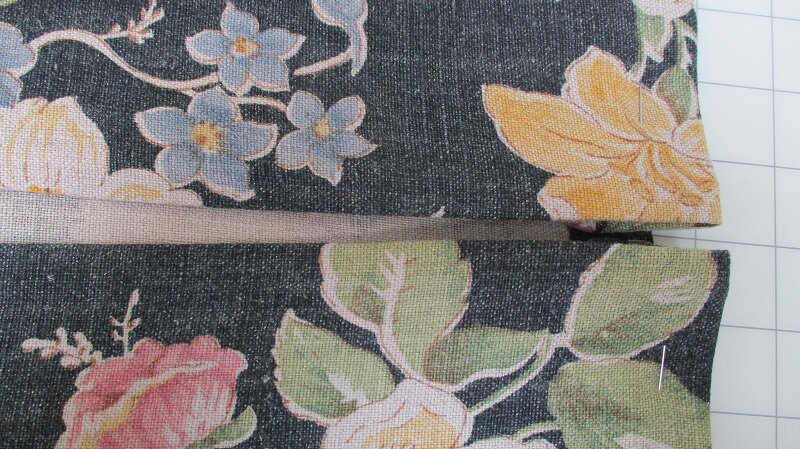
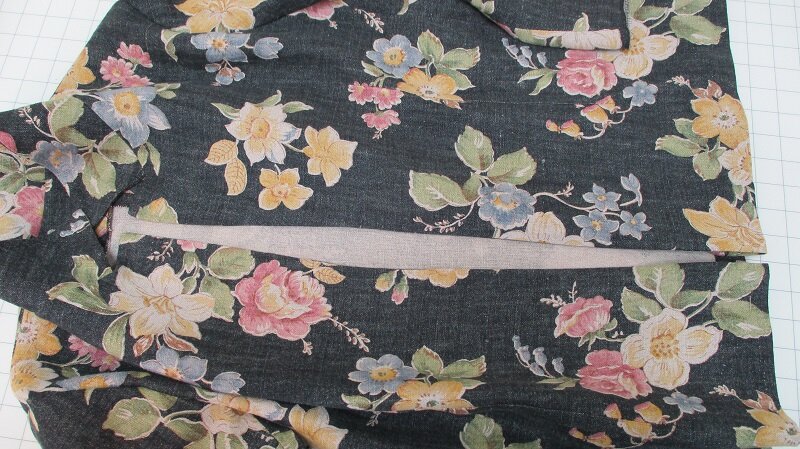
I found an error on pattern piece #2- Side panel on the back seam. It is just a small slice that needed to be shaved off the upper section of the seam only on the back. This correction can still be done if you have already cut out your pattern. Material needs to be taken away, not added. I drafted a replacement pattern piece reflecting this alteration for each size. Please download this new section of the pattern piece #2 and add it to the existing pattern tissue at the lengthen/shorten line.
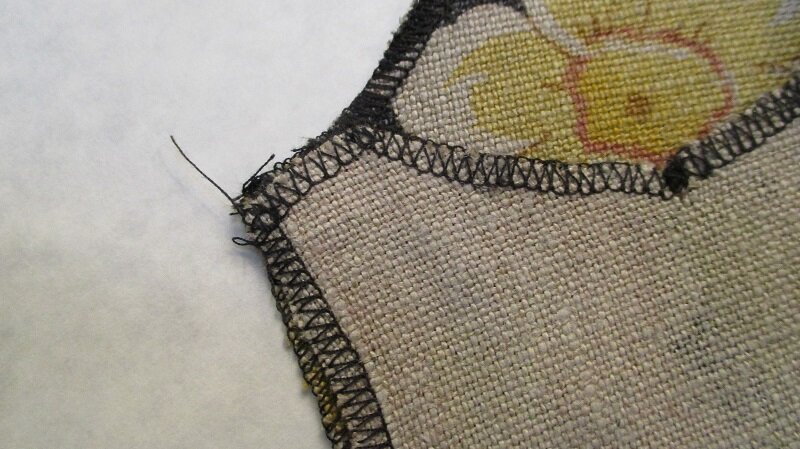
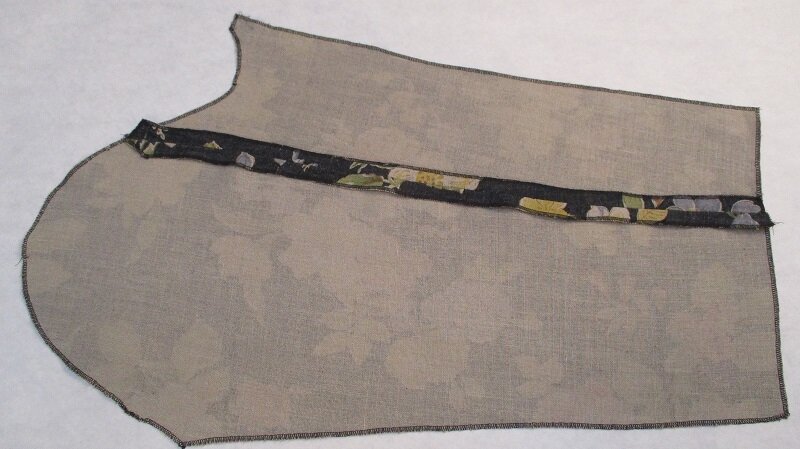
You can see from the photo above that if it is sewn before being corrected the sleeve will not fit properly. This is always a tricky area to sew correctly, so please reference the construction pics as a guide. There are 4 seams that use this angle and they need to be sewn correctly! Sorry for the mistake and I’m glad i found it!
Working with other Jacket Patterns
Several of the techniques you will learn are consistent throughout my pattern line. Use what you learn after you finish the Fitted Jacket or follow along with another pattern!
Choosing the right pattern size is a balance of pattern measurements, body measurements and fabric choice.
Part 3: Start Sewing!
For Part 3 of the sew along, my guide was the idea that “a picture is worth a thousand words.”
Before we start here are a few notes about this sew along:
You will still want to use the Sewing Directions given inside the pattern as I sew my jacket here.
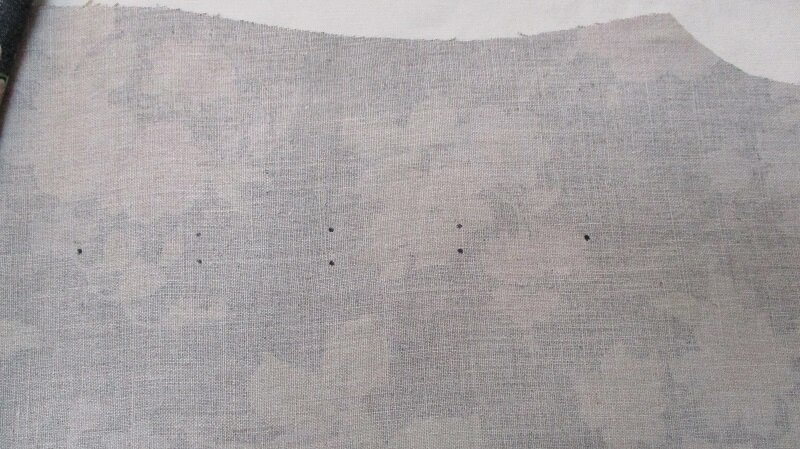
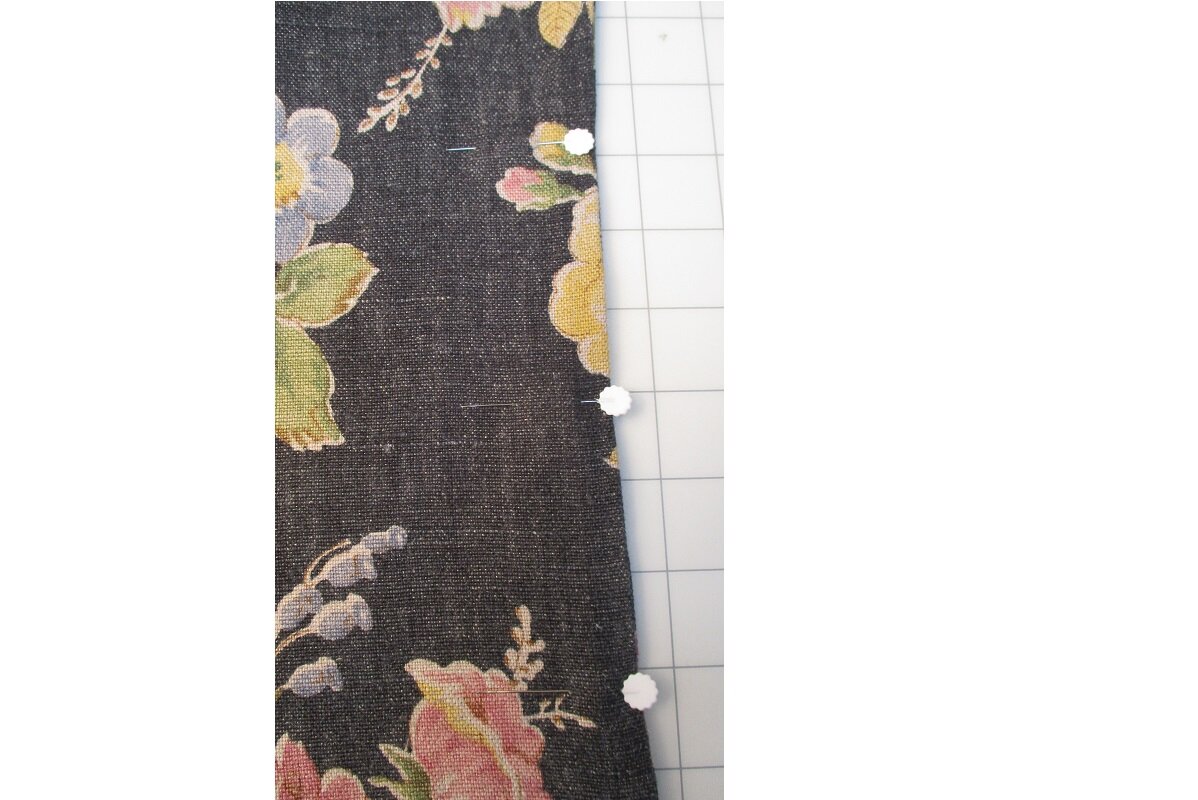
Please mark all the notches and dots given as reference points to help with the construction of this jacket. There are several tricky areas where notches and dots are VERY helpful.
You may also serge this jacket together.
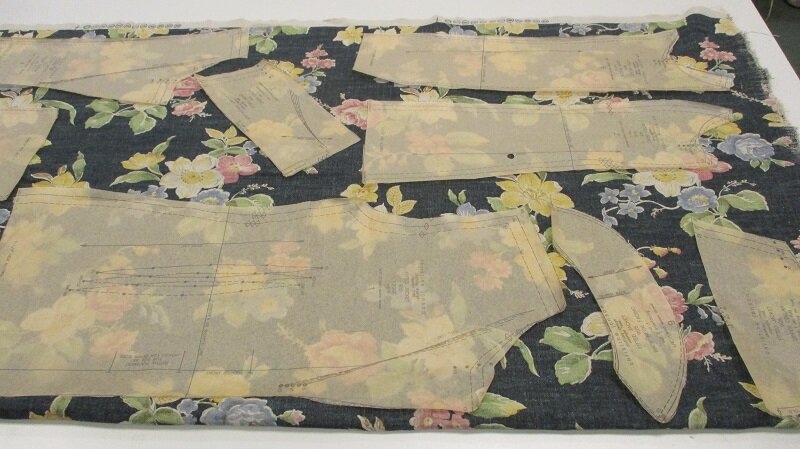
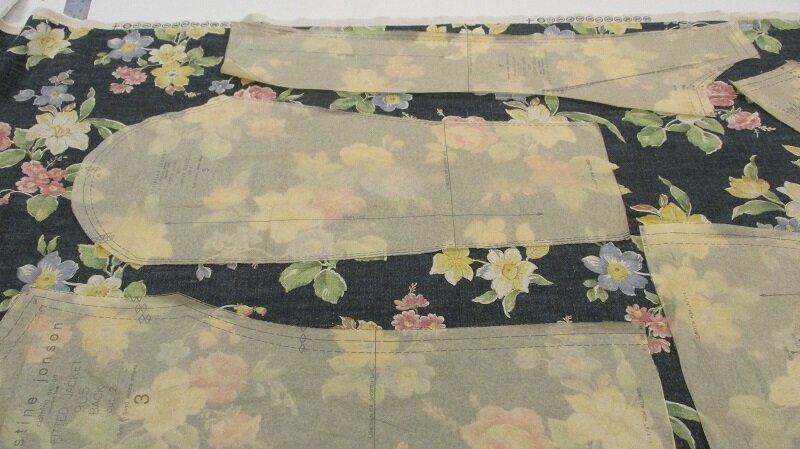
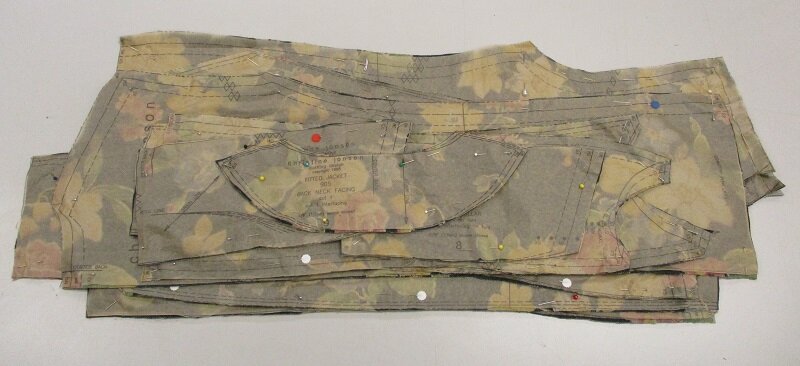
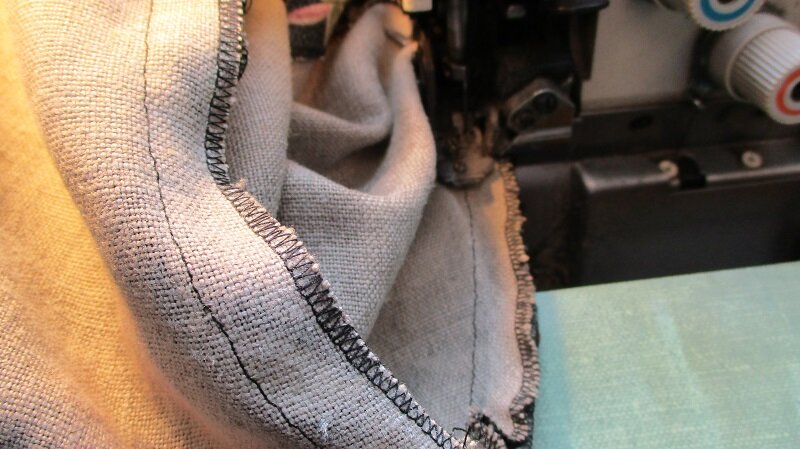
Step 1. Interface all pieces shown on the instructions page. I recommend a lightweight fusible Tricot Interfacing. If there are areas that you feel need more stability add a second layer of your fusible. Be aware of the grain line of the interfacing. You may want to lay it across the grain, with the grainline or on the bias depending on the amount of stability or stretch required.
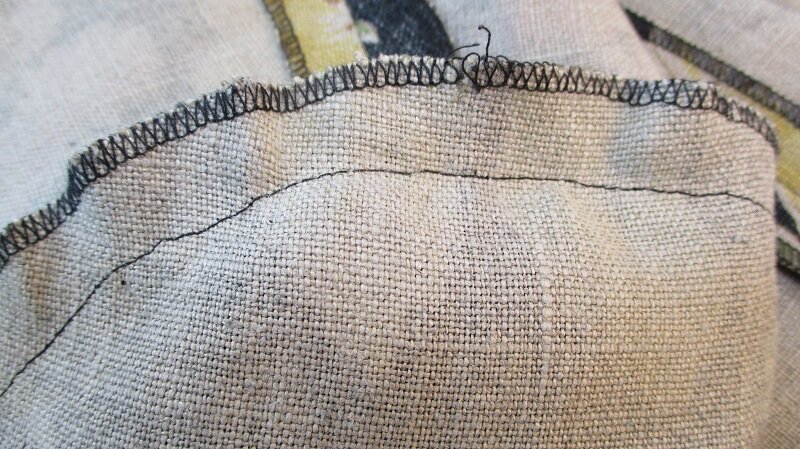
Step 2. I serged the raw edges of my cut pattern pieces before I sewed them. My fabric raveled quite a bit. This is not necessary for all fabrics. You can finish the raw edges using any technique you feel is needed.
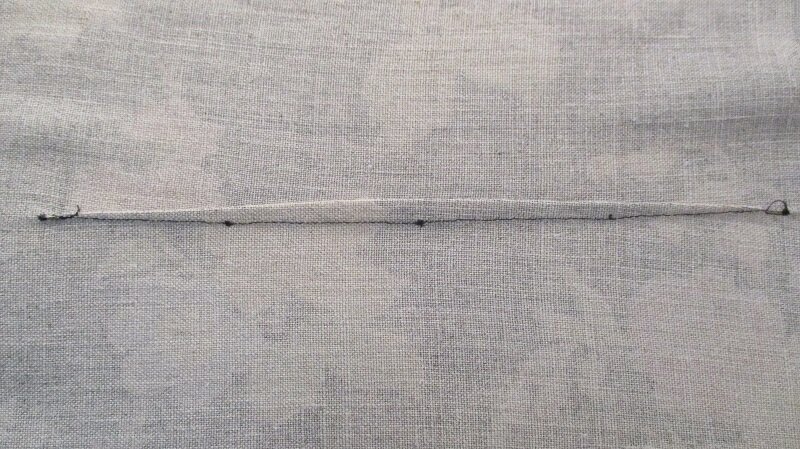
Step 3. I single needled my darts but you can serge them as well.
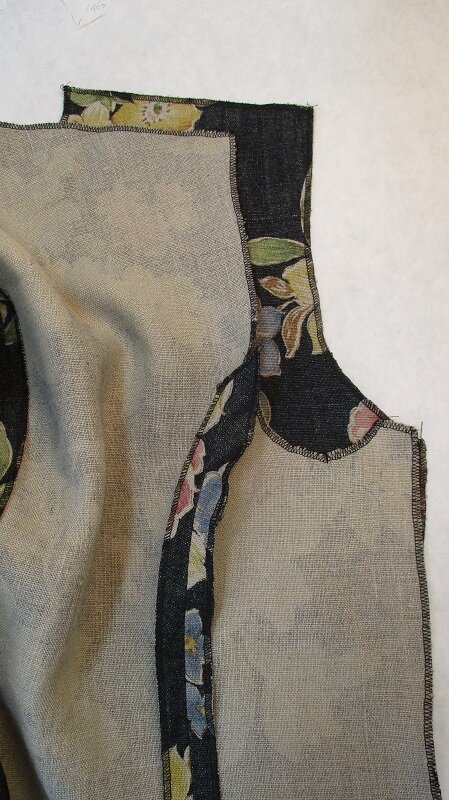
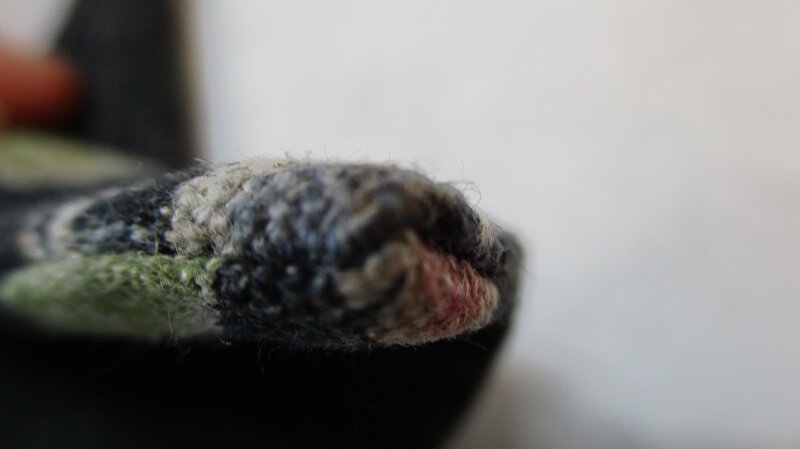
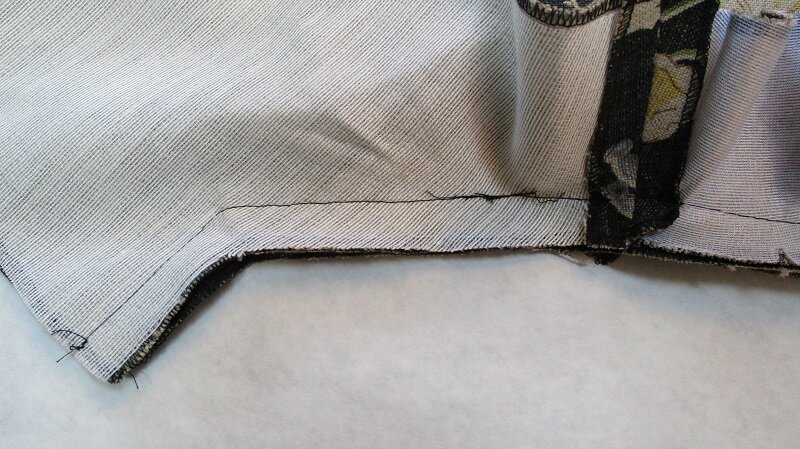
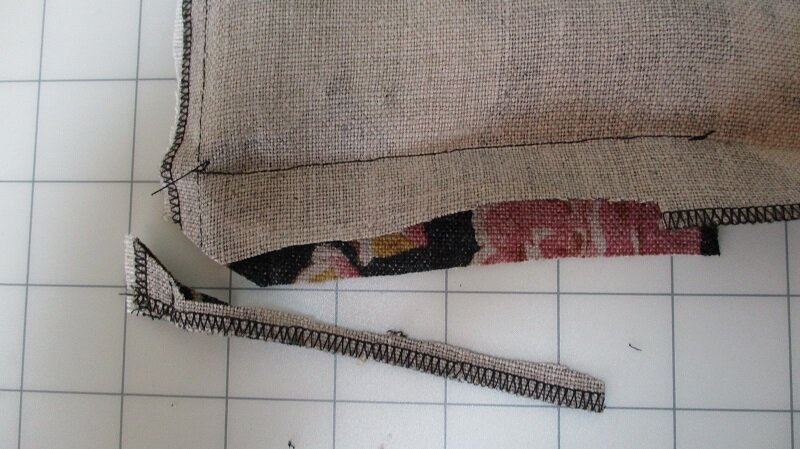
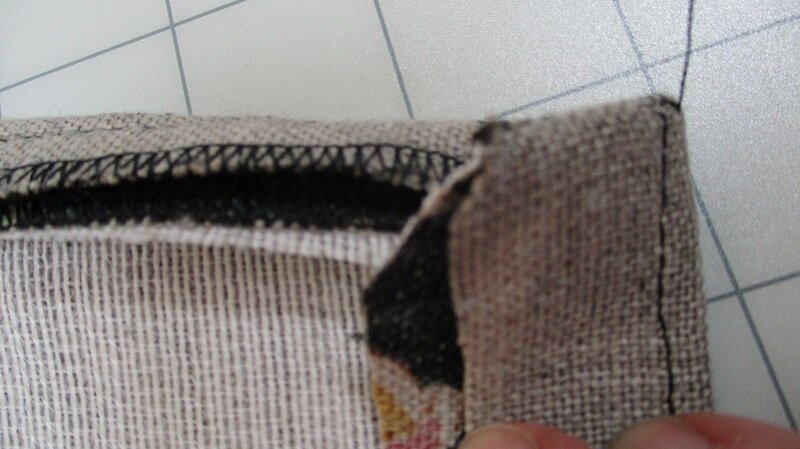
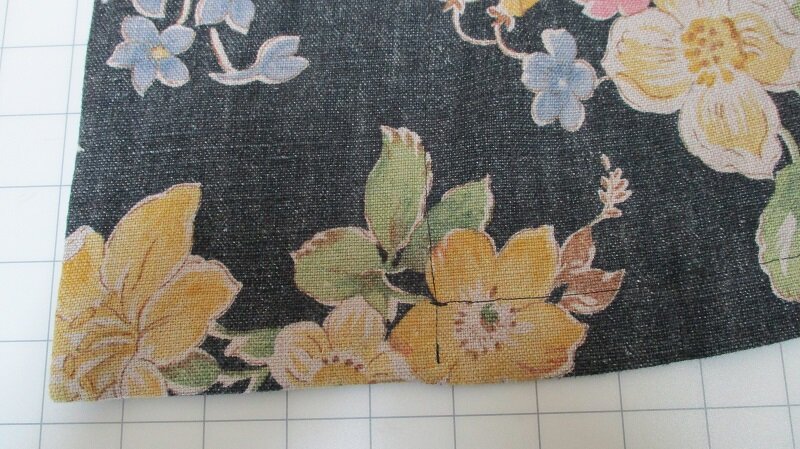
Step 4. On the sewing directions Step #4 Illustration is a bit misleading ☹ This is the piece that I have made a corrected pattern piece for. The corner will not look like the illustration drawn since the angle of the pattern piece has been changed.
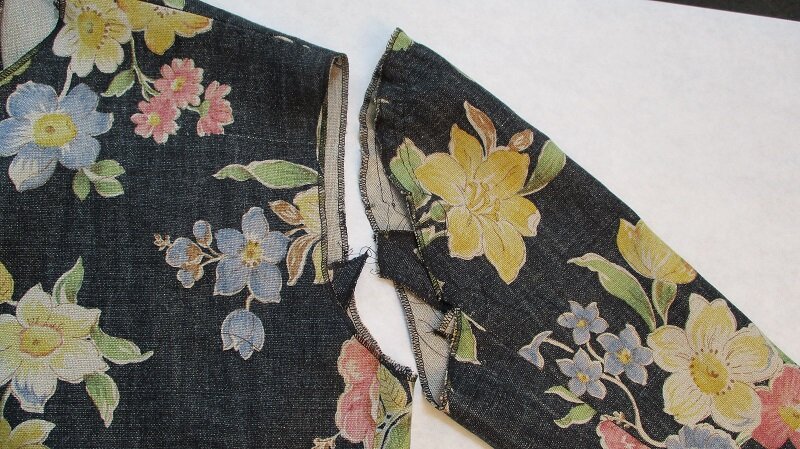
Step 5. MISSING NOTCHES! Add Notches on Pattern pieces 5 and 6 Under Sleeve and Upper Sleeve. Pattern piece #6 can look deceptively like Pattern piece #2.
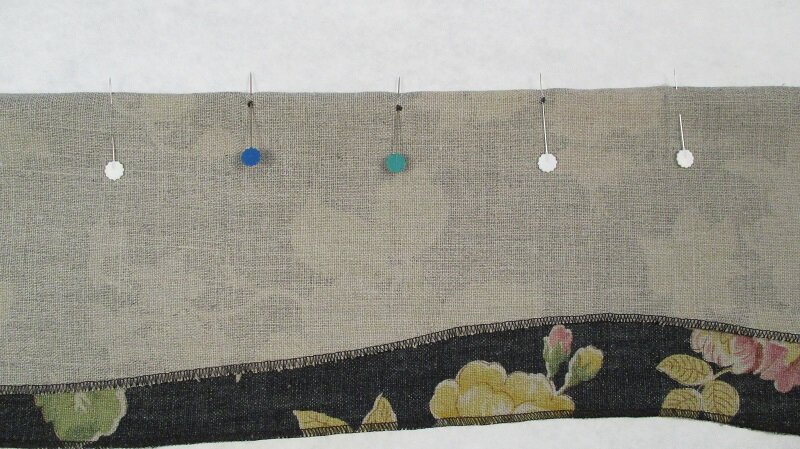
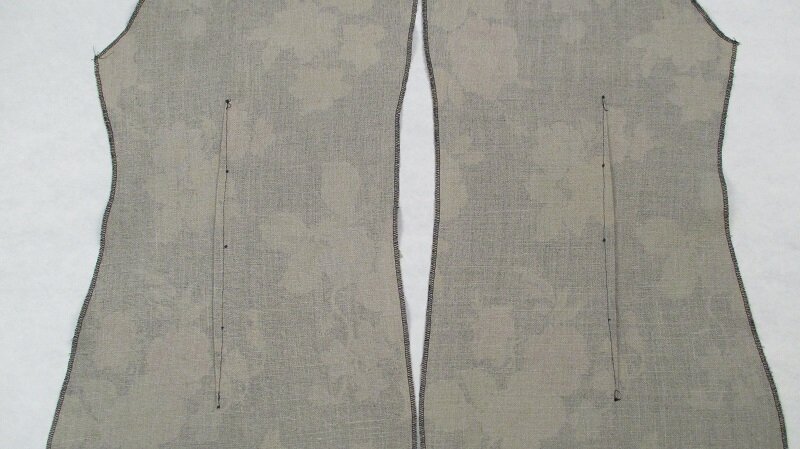
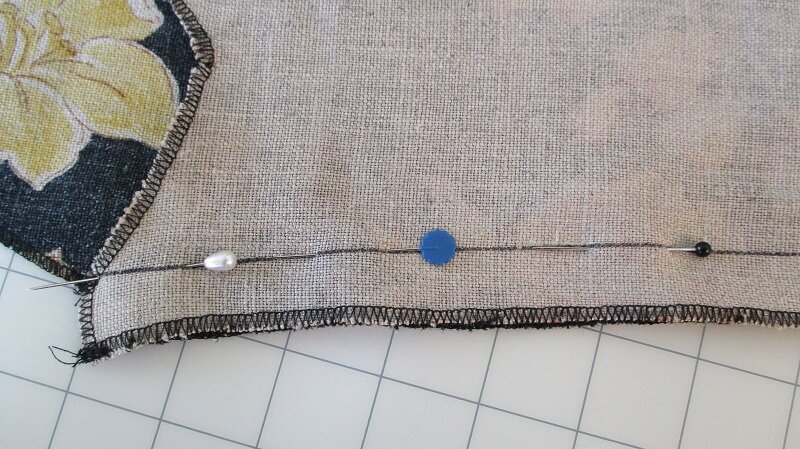
Step 6. Transfer dart markings to your fabric.
Step 7 (optional). Full Bust adjustment suggestion
Step 8. Match dots and pin dart. Carefully sew both darts following the shape.
Step 9. Match neckline and bottom hem and sew center back seam.
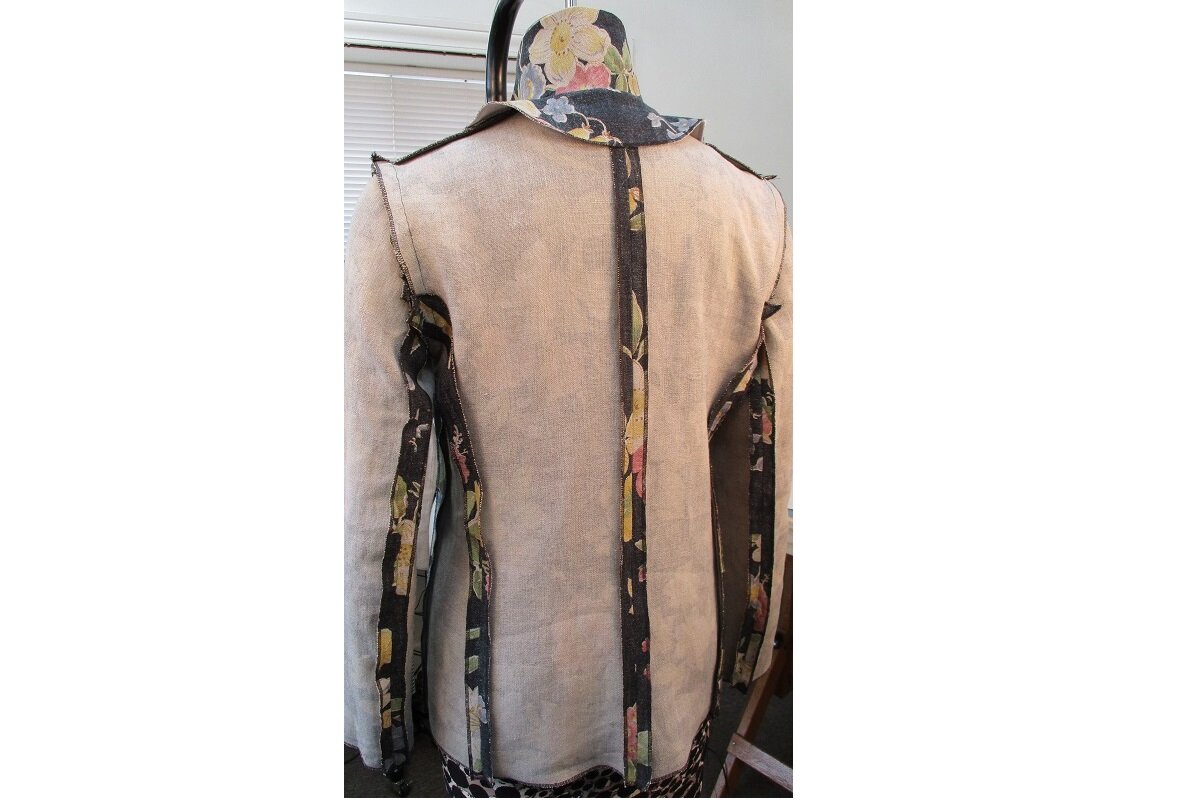
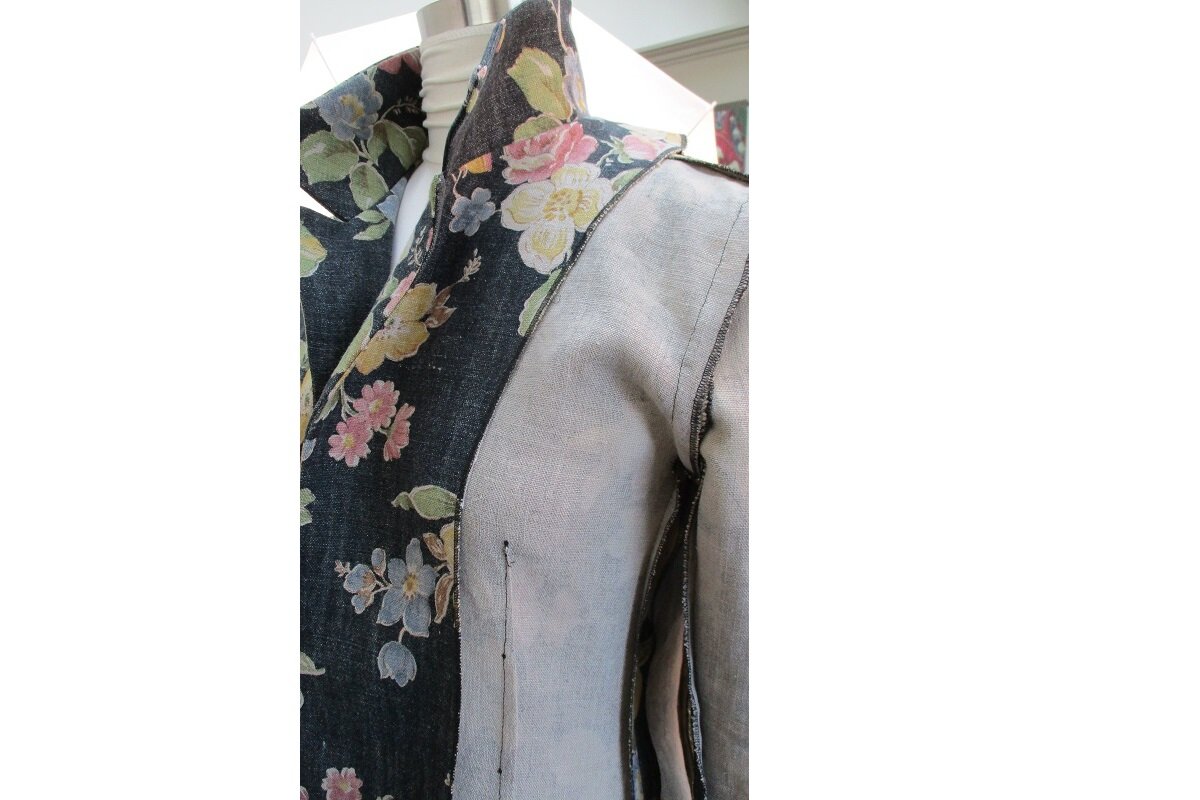
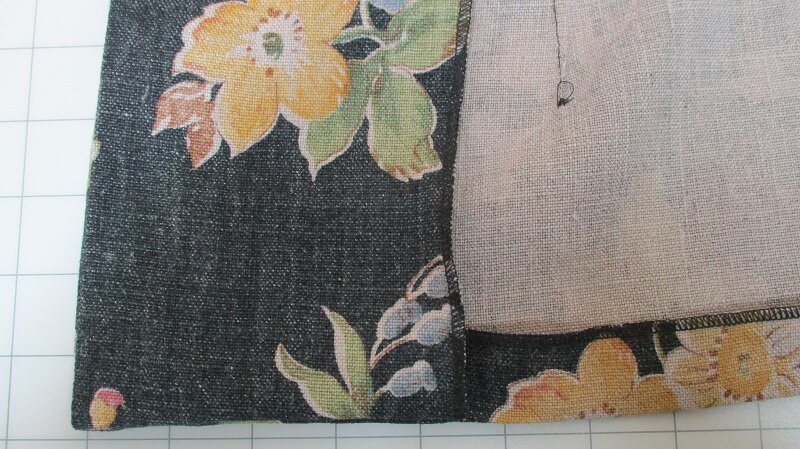
Step 10. Be sure to have updated Pattern piece #2 using the new pattern piece download on the website before sewing this step. Sew Pattern piece #2 Side Back to Back#3. Carefully match the seam allowances to give a smooth transition between pieces.
Step 11. Sew Front of #2 Back panel to Front #1
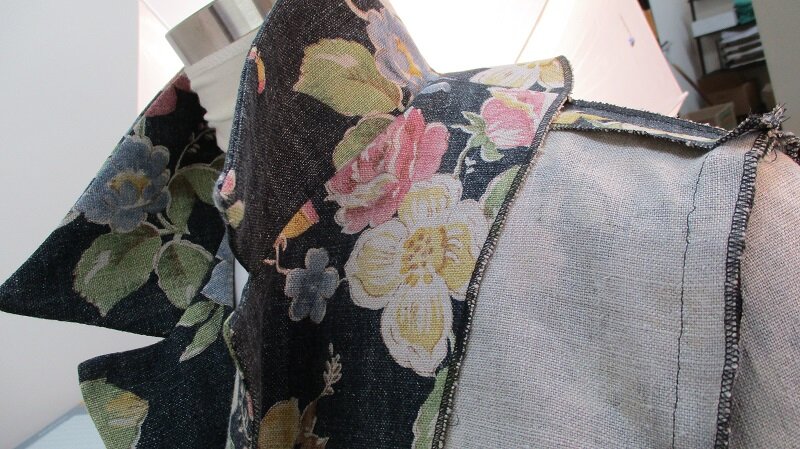
Step 12. Sew shoulder seams.
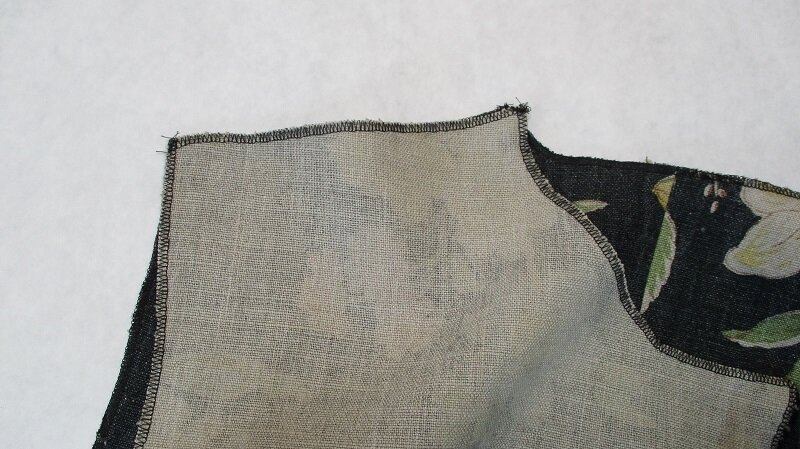
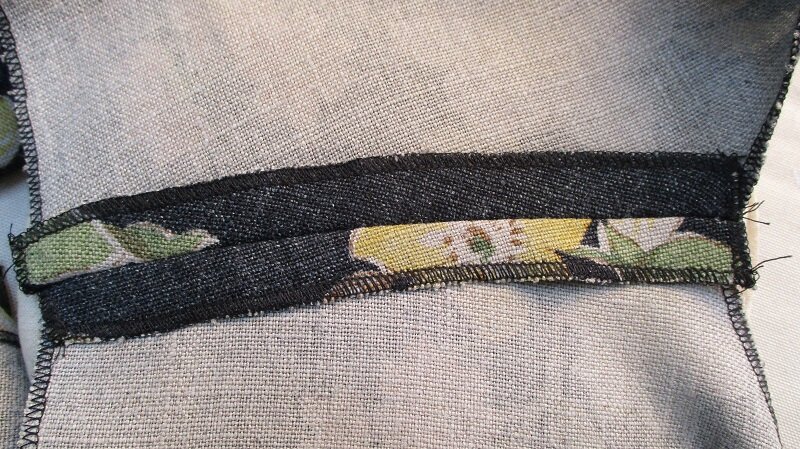
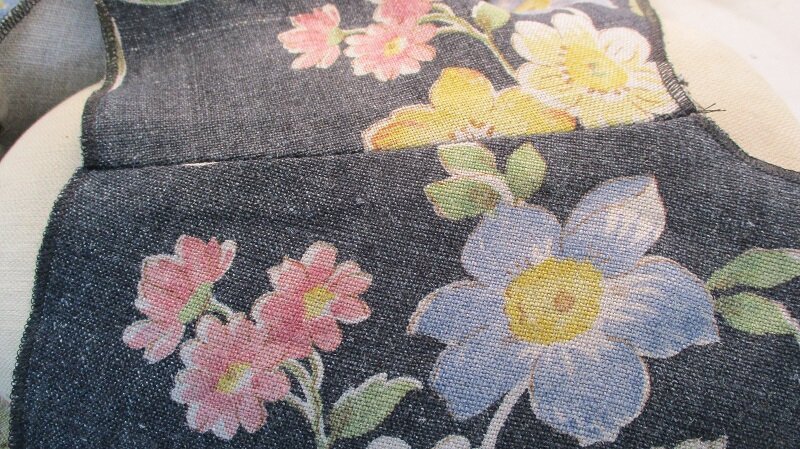
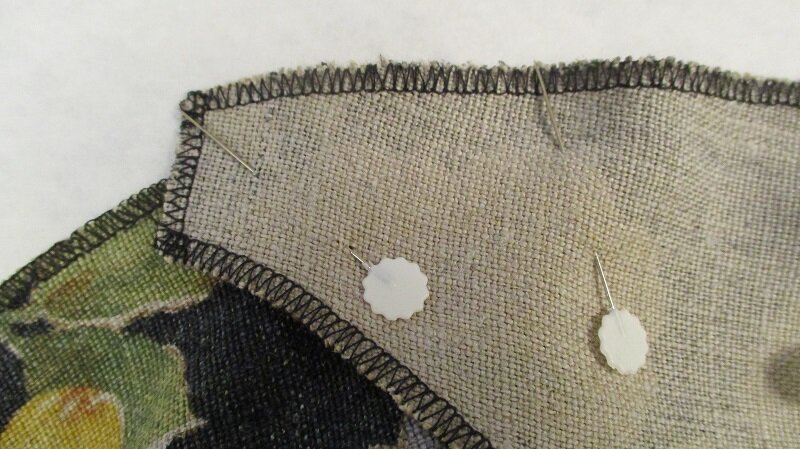
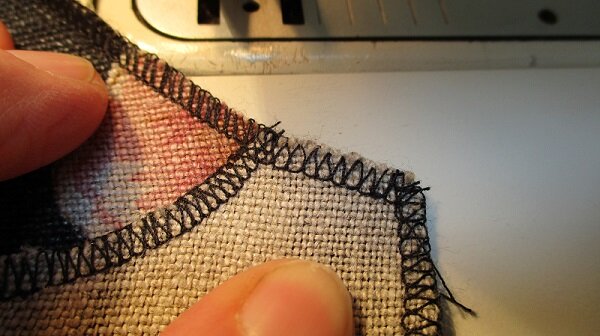
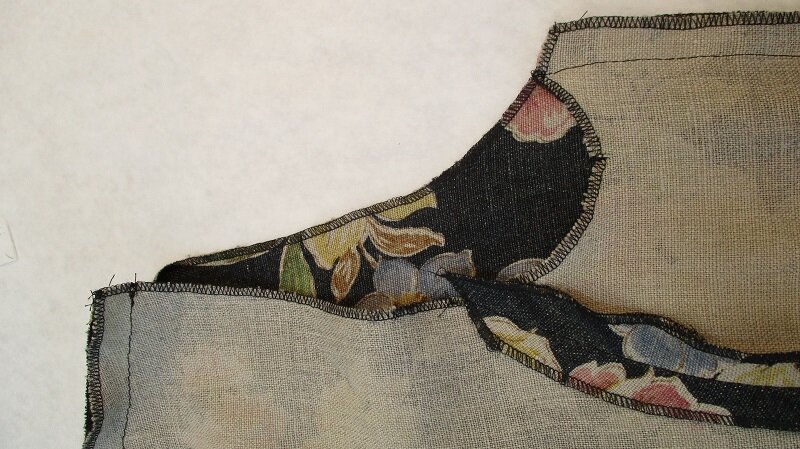
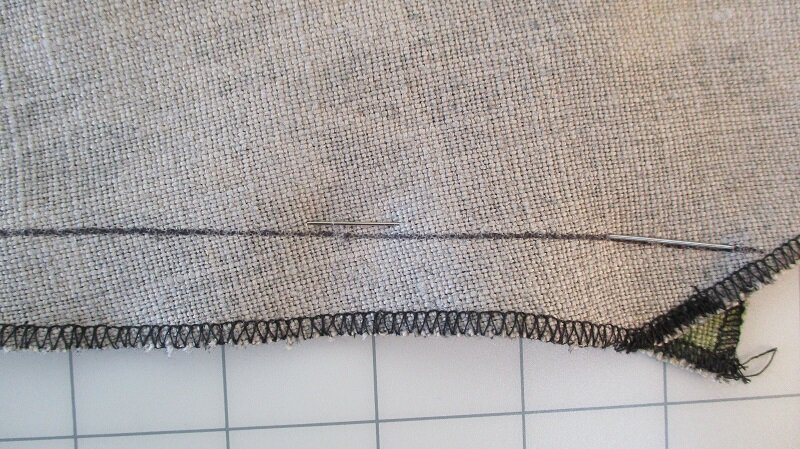
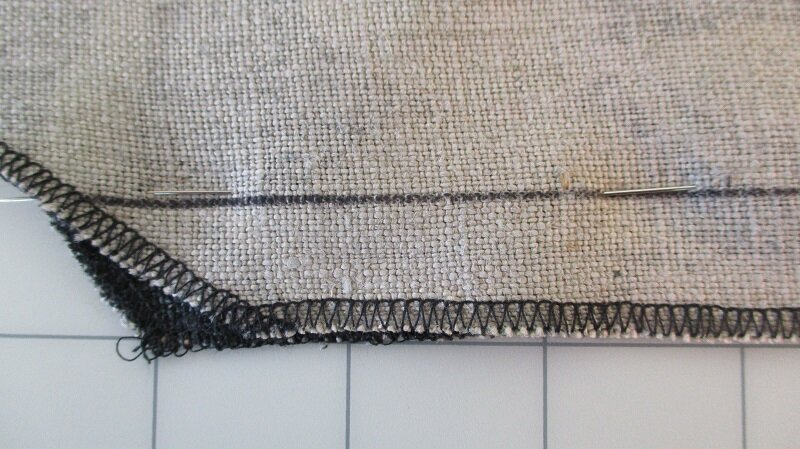
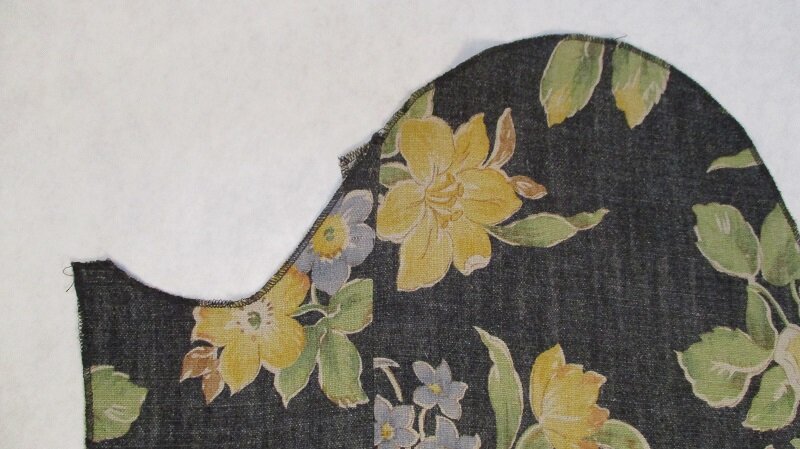
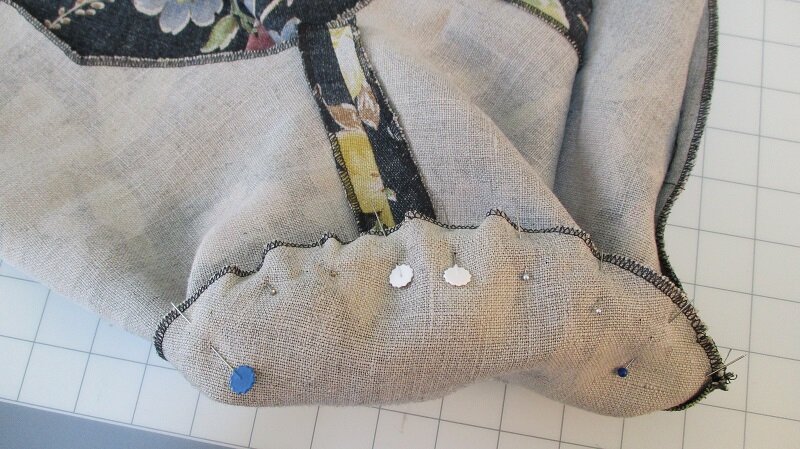
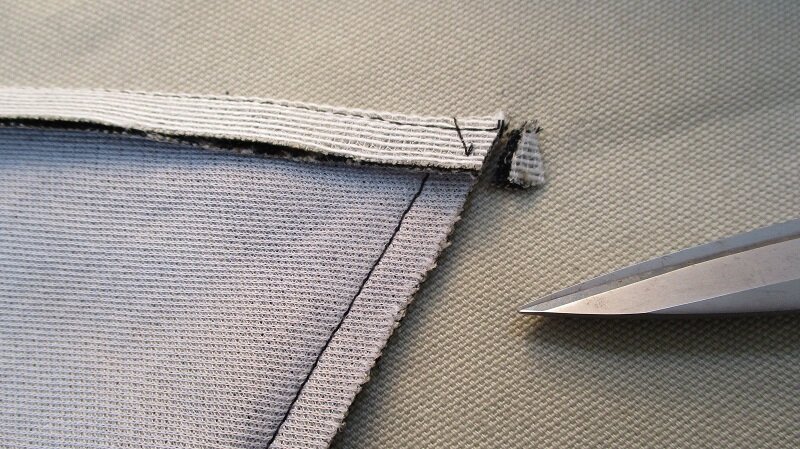
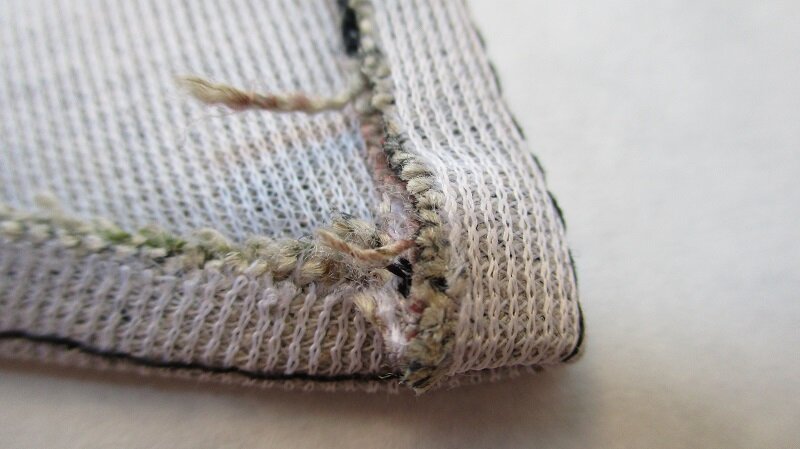
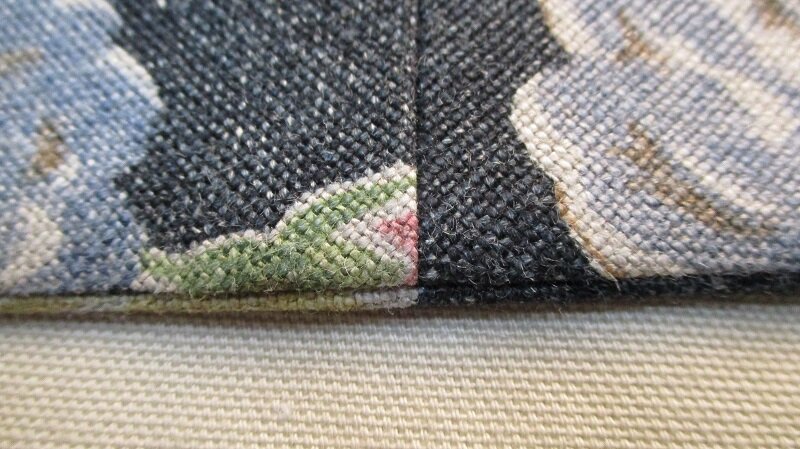
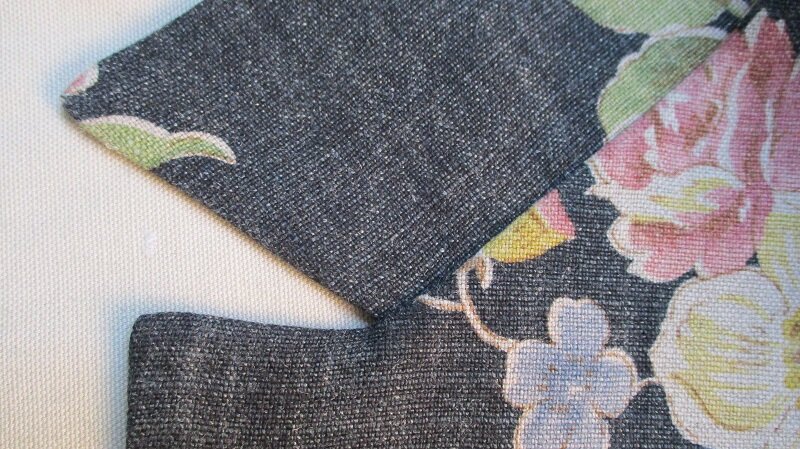
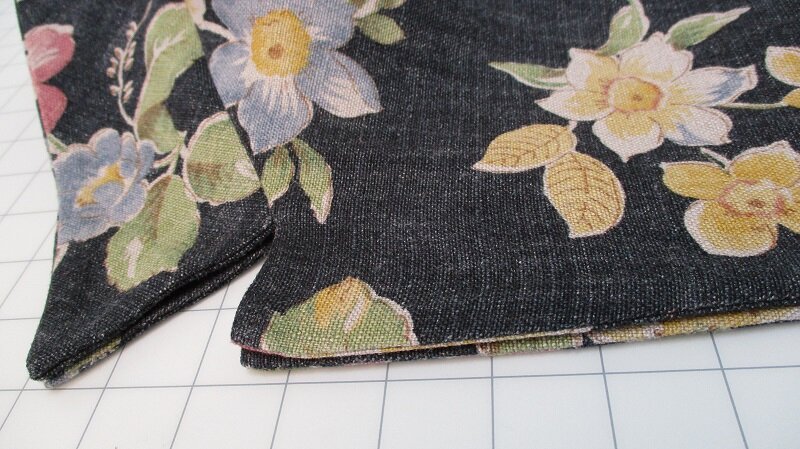
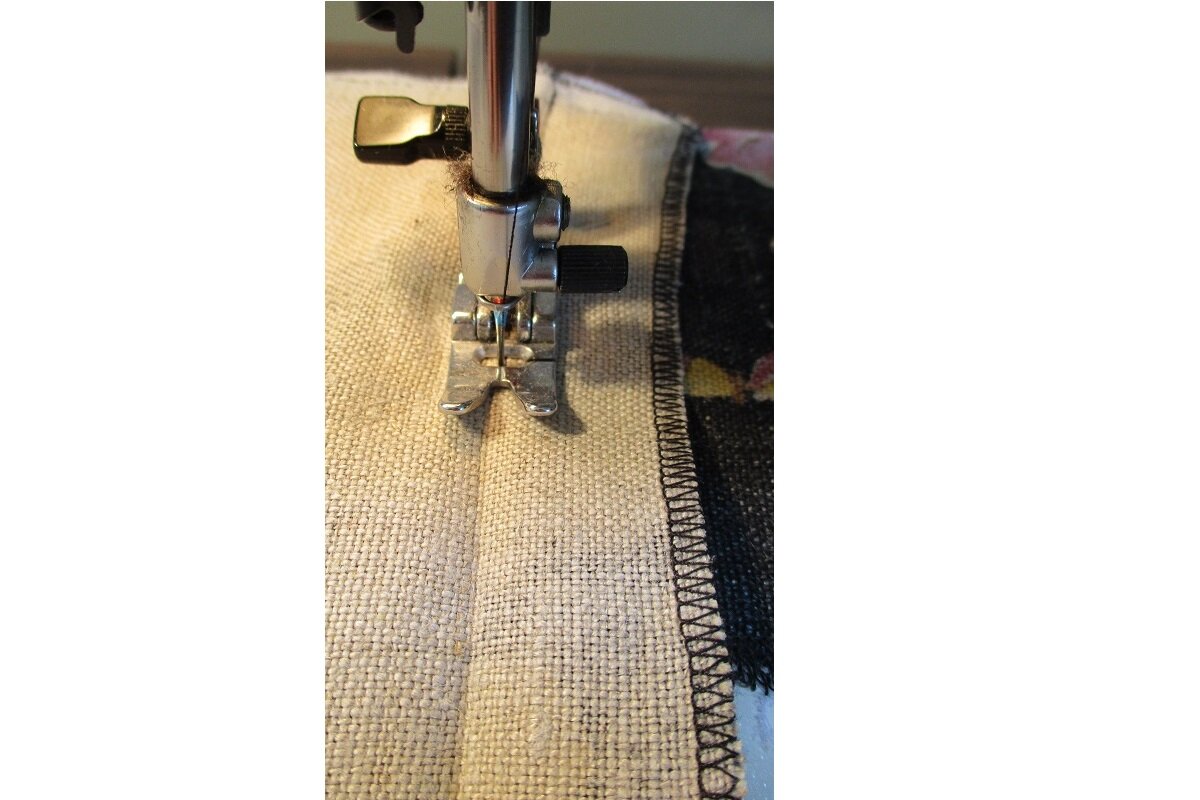
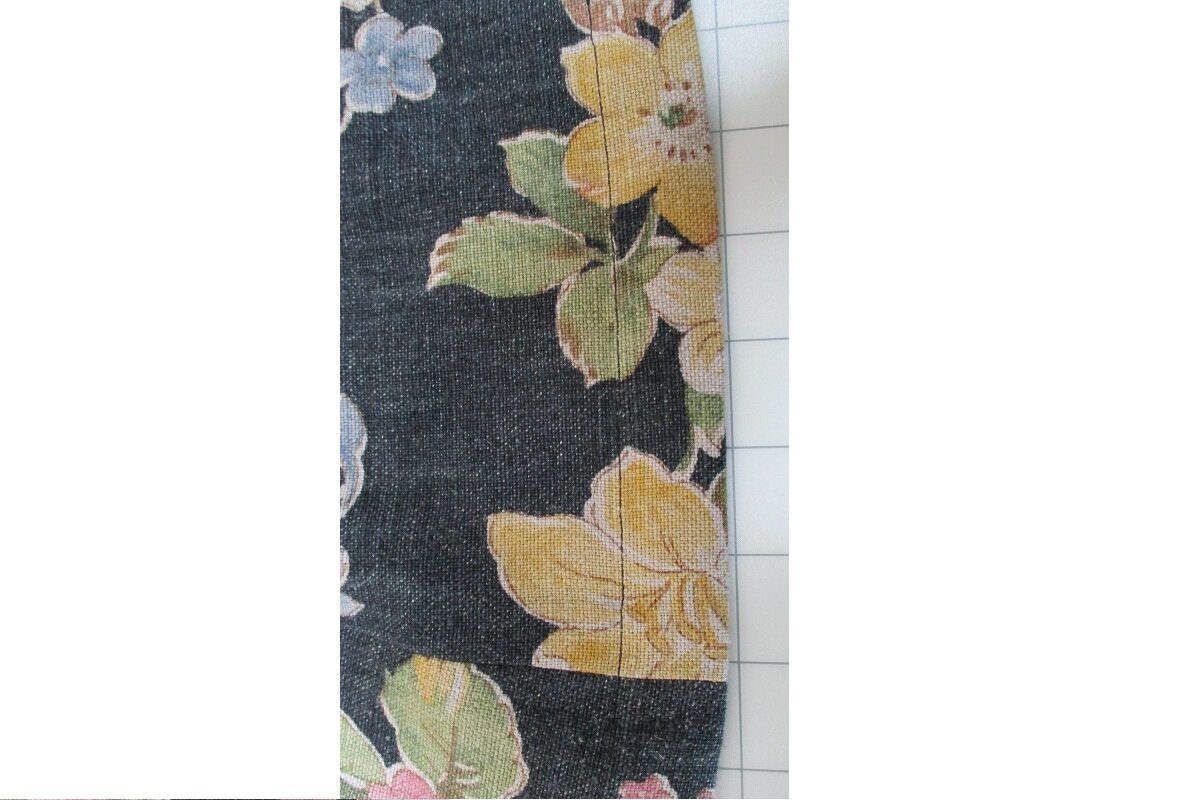
Step 13. Draw seam lines to help position pattern pieces correctly. Tips of corners and edges should look like photos.

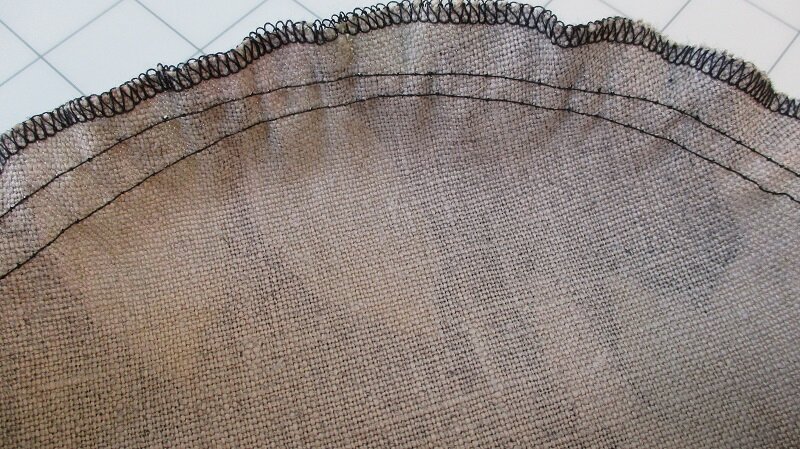
Step 14 (optional). Double row of ease stitching for sleeve cap is optional.
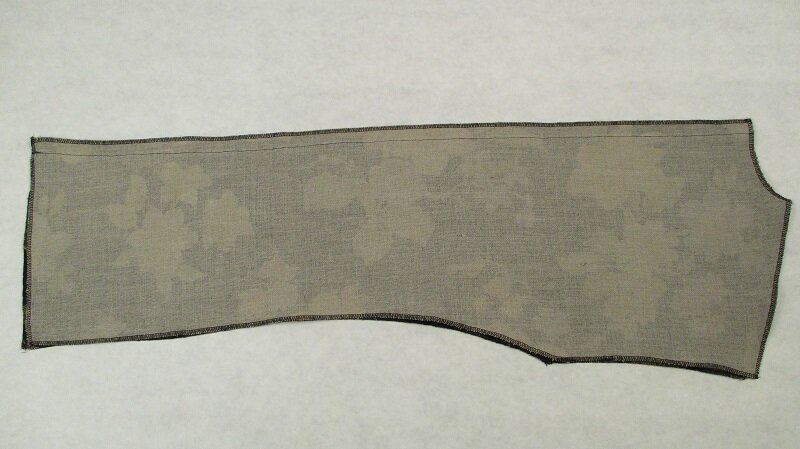
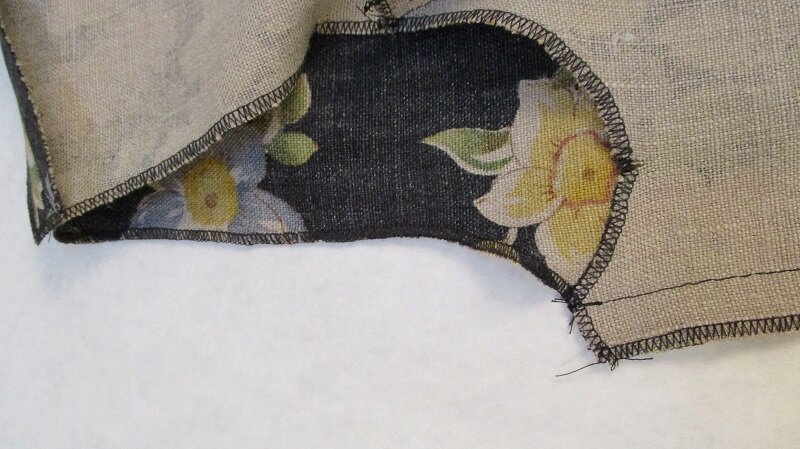
Step 15. Finished sleeve to show shape.
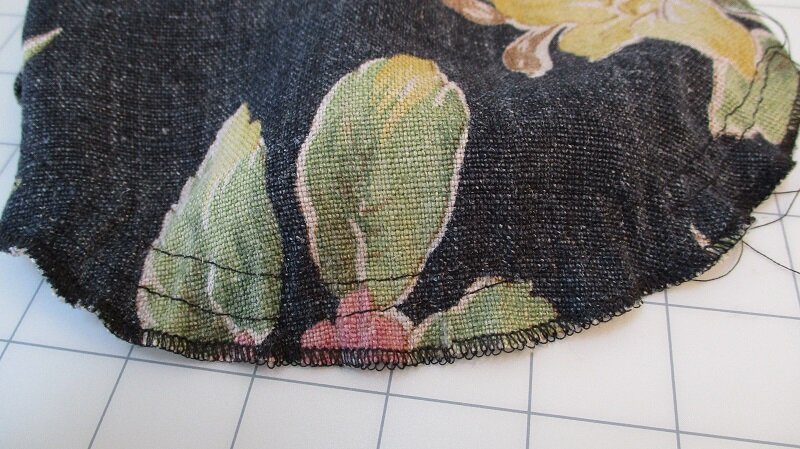
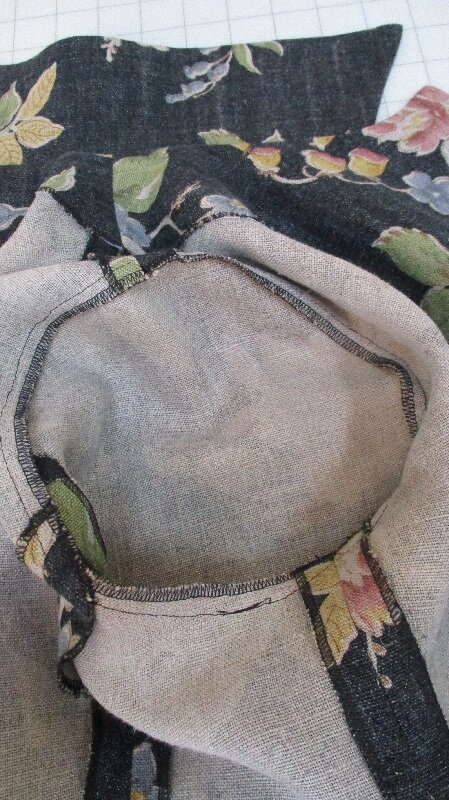
Step 16. Fitting the sleeve into armhole.

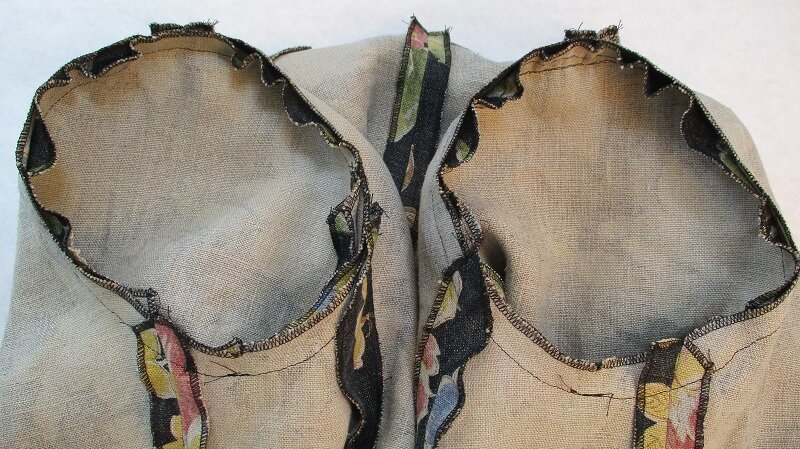

Step 17. Serge or trim excess seam allowance off the sleeve and armhole. Secure raw edges with either bias tape or a zigzag stitch.
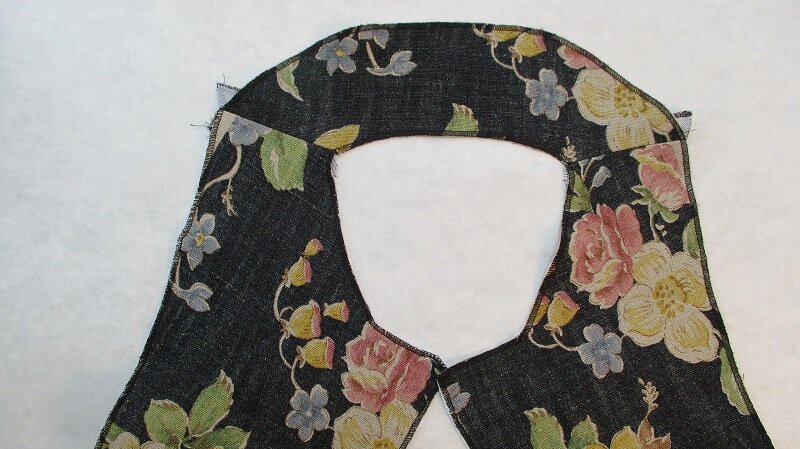
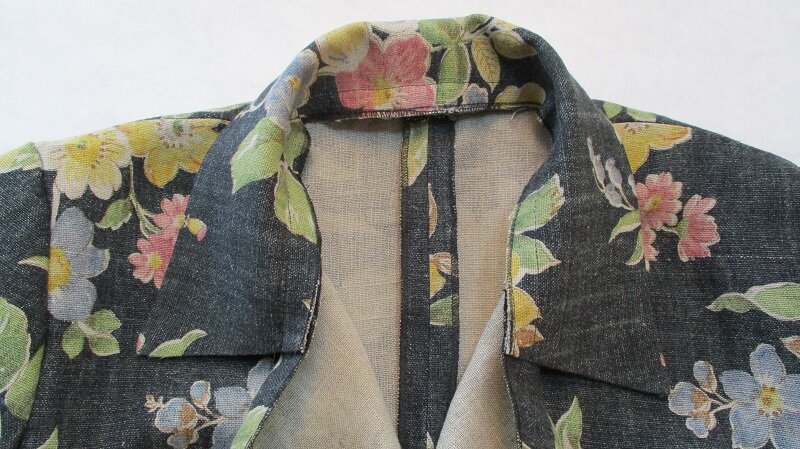
Part 4: Collar and Facings
Many people struggle with collars so I decided to focus on this area in part 4 of the sew along. Some of the steps listed may seem simple but they all add up to create a perfect collar.
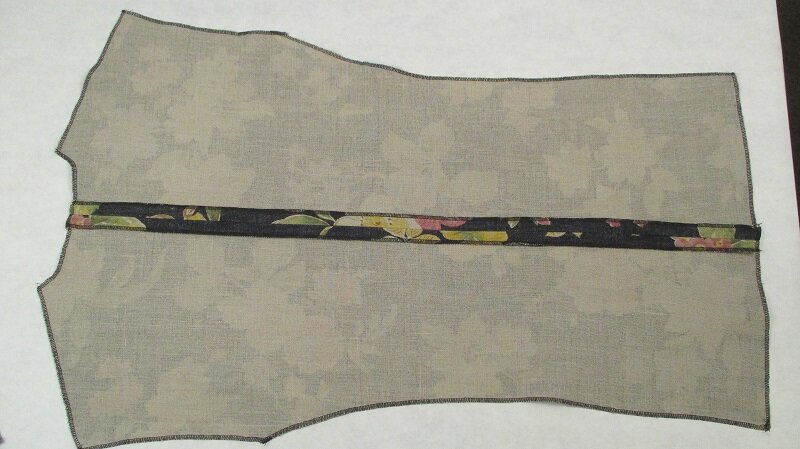
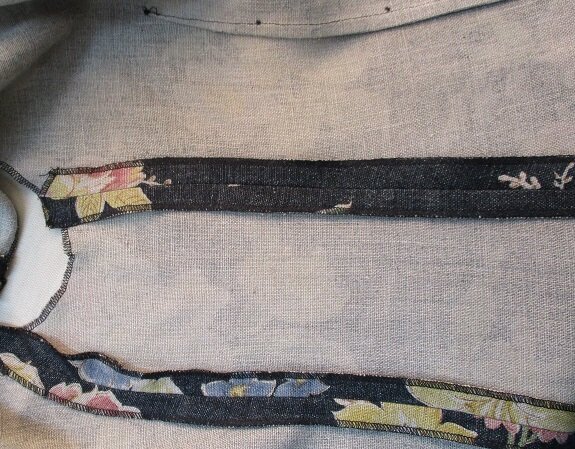
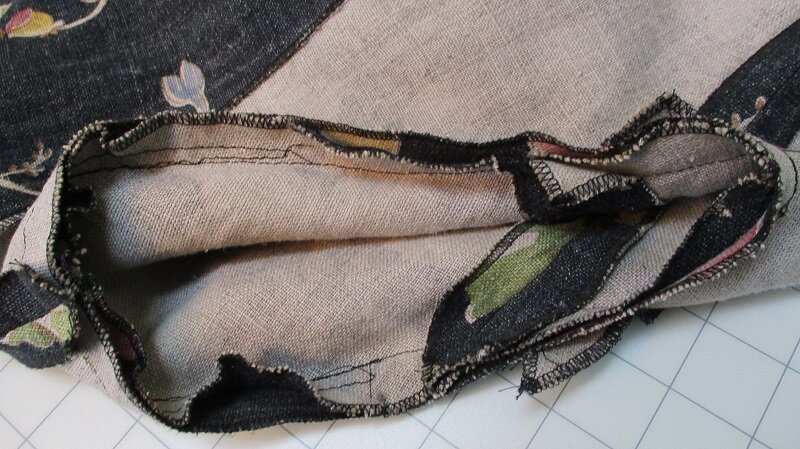
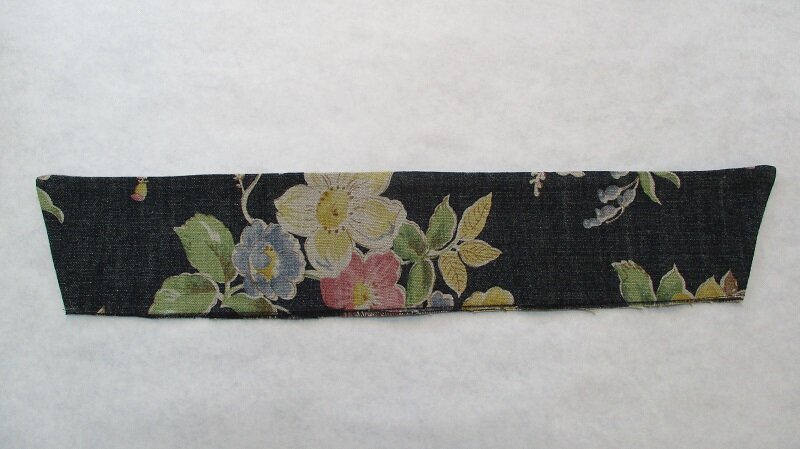
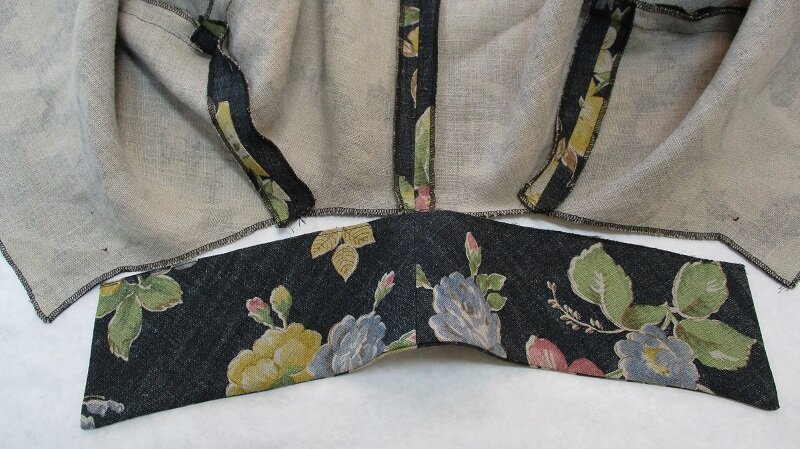
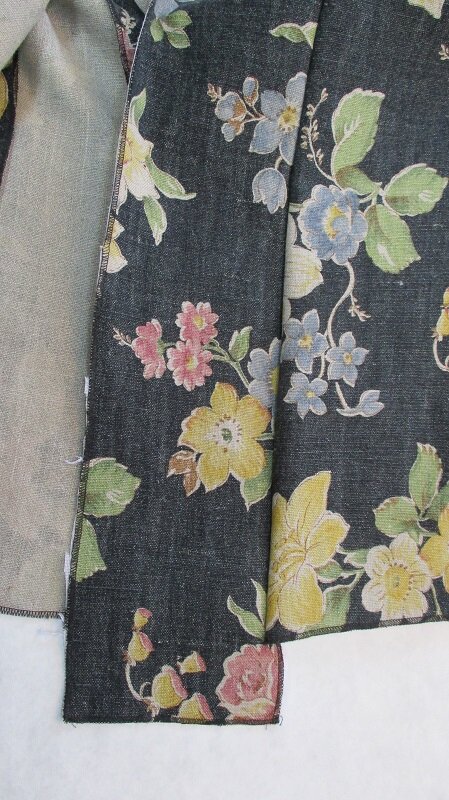
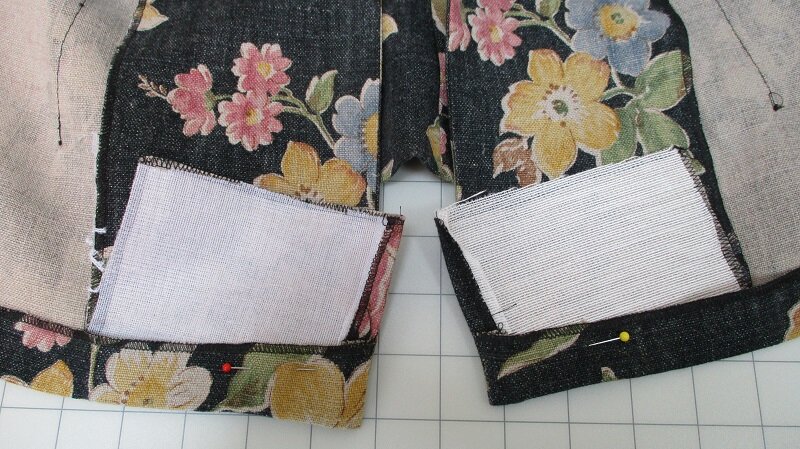
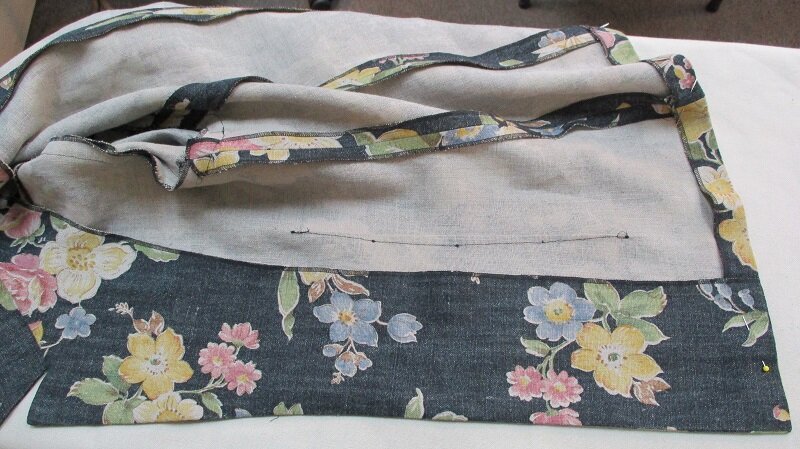
Step 18. Sew Front Facing #4 to back facing #9. Line up seam allowances as shown.
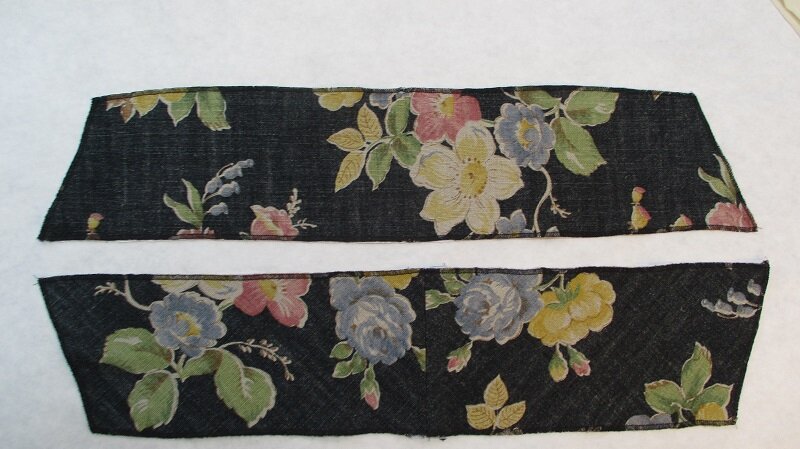
Step 19. Sew Under Collars #7 together.
Step 20. Sew Under Collar #7 and Upper Collar #8 together.
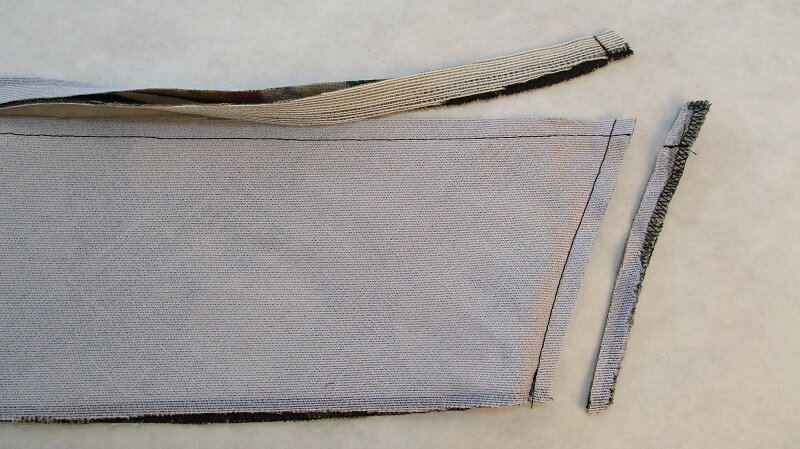
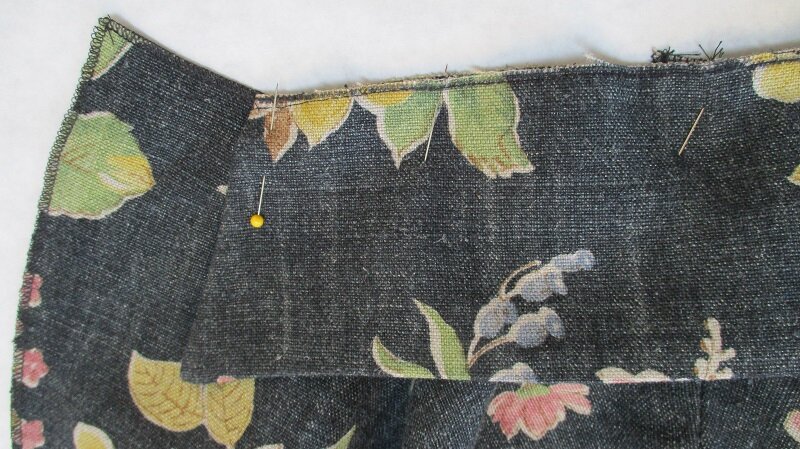
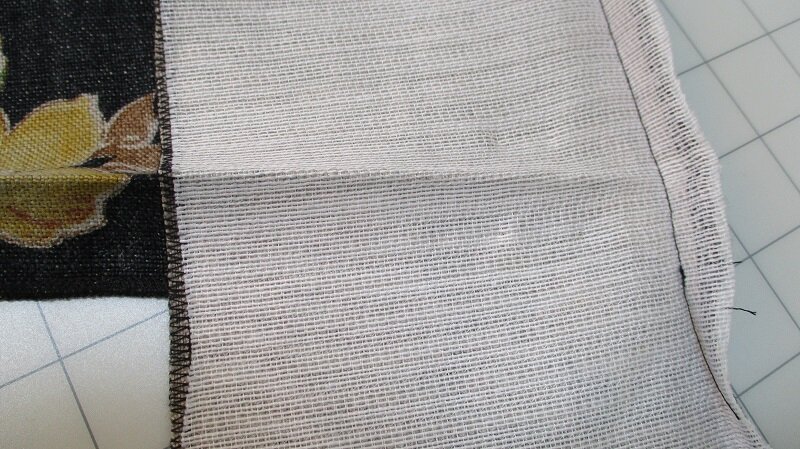
Step 21. Trim seam allowance to 3/8.
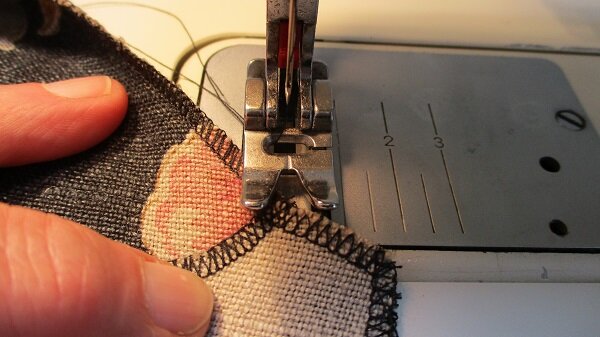
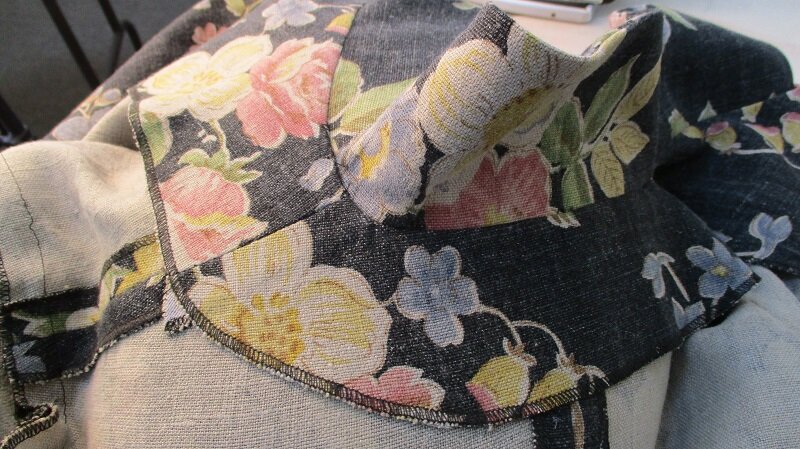
Step 22. Press long edge of collar seam allowance toward the under collar so the seam rolls toward the upper collar. Trim the corner point where seams overlap.
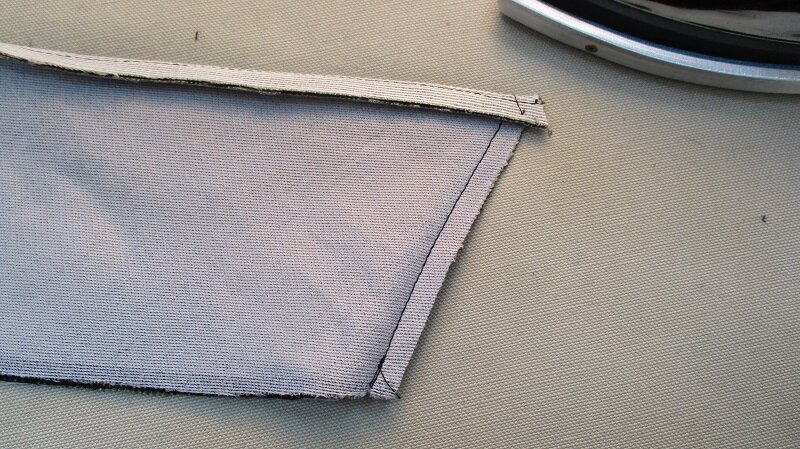
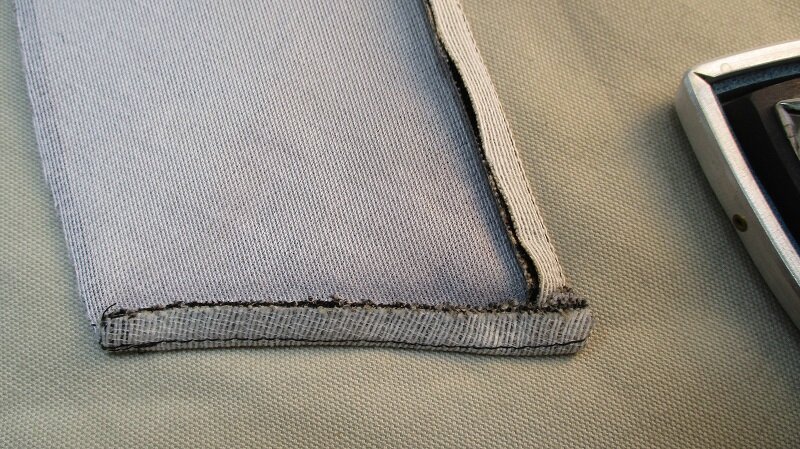
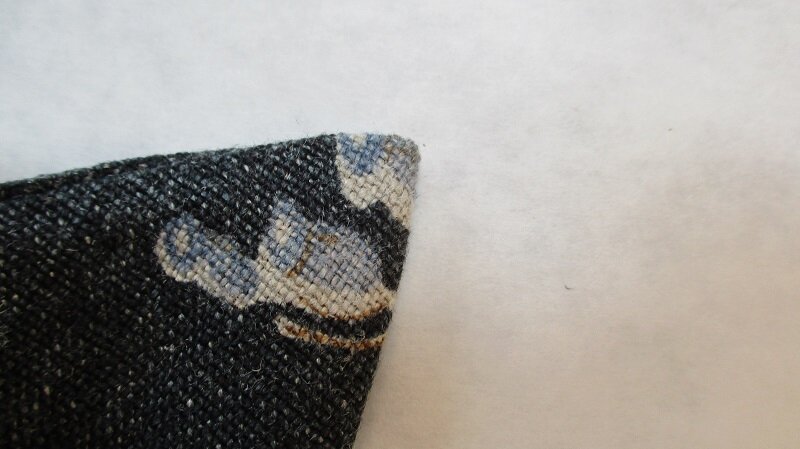
Step 23. Turn the corners.
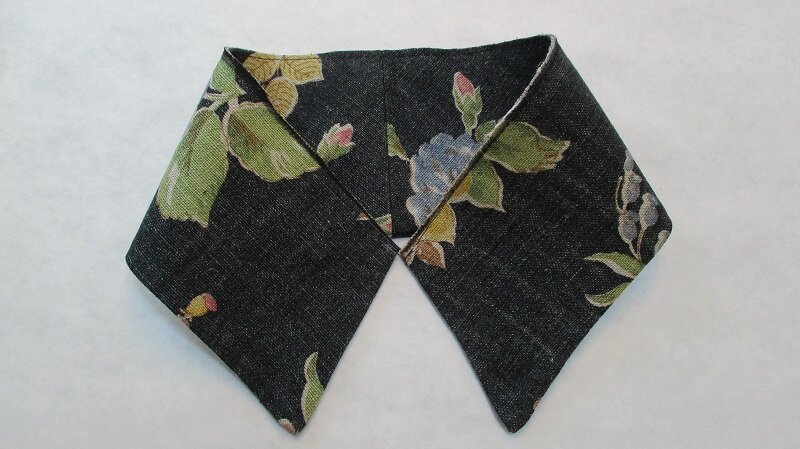
Step 24. Finished collar.

Step 25. Compare/measure the shape, length and width of collar and collar points.
Now is the time to adjust them. Once the collar is sewn in place discrepancies will show up and you will not be able to fix them!
Then stitch the raw edges together.
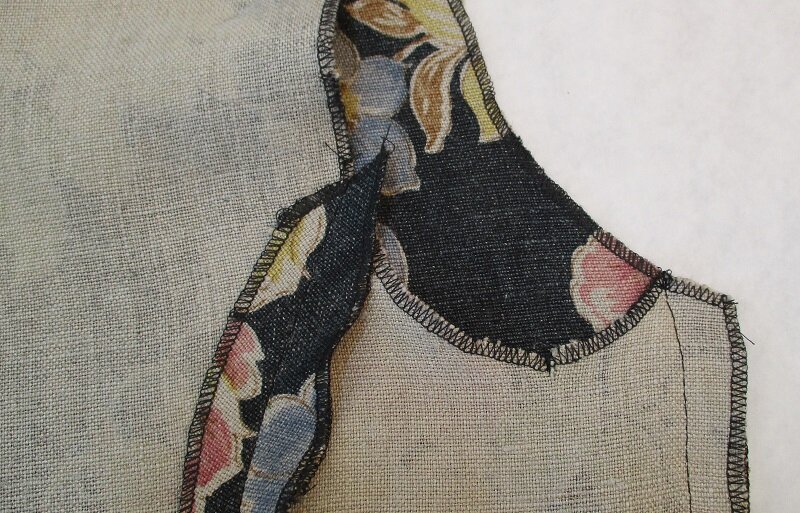
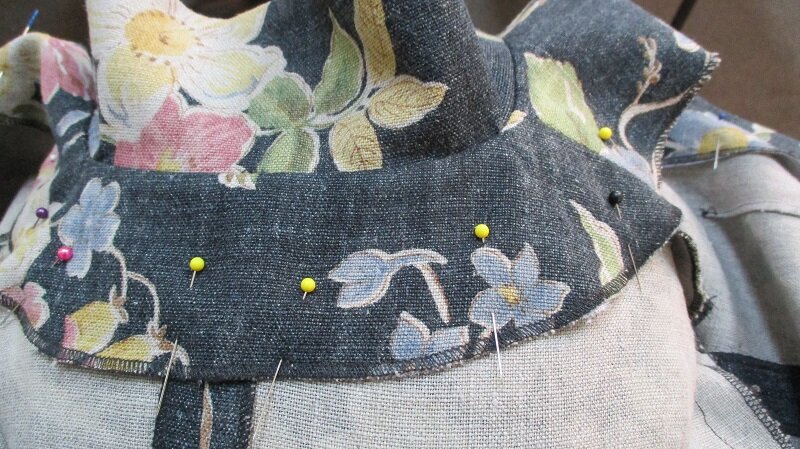
Step 26. Measure/check the length of collar and neckline length to be sure the collar fits perfectly between the dot and center back with no stretching or adjusting. This is an especially important step to assure an amazing neckline and facing fit.
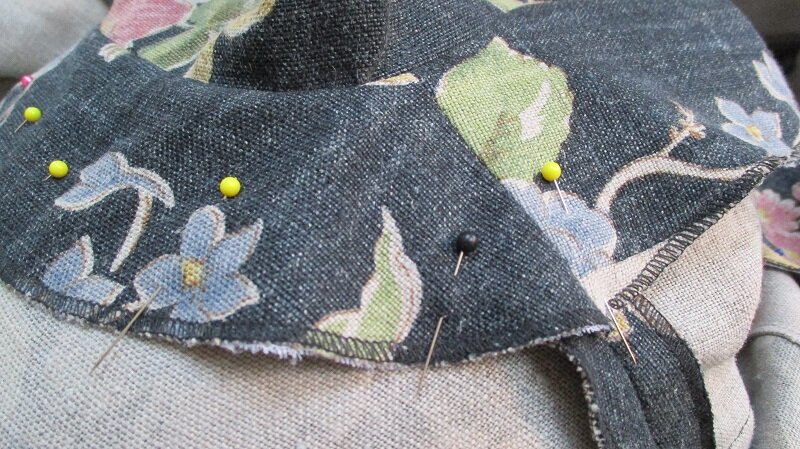
Step 27. Pin collar to neckline matching the center back and dots with the edge of the collar. Measure/compare the length from the point of the jacket to the collar placement at the 5/8” seamline. If they do not match from side to side when your jacket is finished the notched collar will not look balanced.

Step 28. Carefully sew the collar to the neckline. Be sure to end at the dots perfectly at each end.
Step 29. It is always nice to have seamlines match exactly even when they do not show! The under collar and center back seam just look great when they are in perfect sync. It is fun to show off when this happens 😊

NOTE: These next steps are especially important. If any of the match points are not lining up, or if you must stretch or force anything to make the facing fit the neckline it is time to STOP and figure out why this is happening and fix the problem. If you continue with the next step anyway this decision will catch up with you when you try to press, pin and topstitch the facing in place.
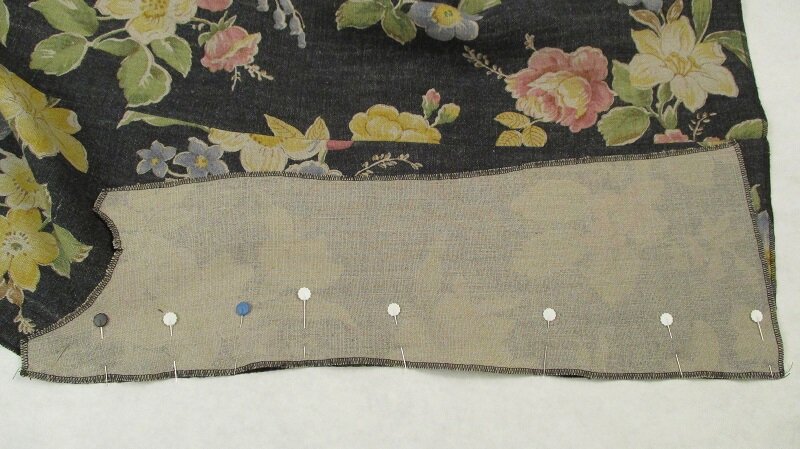
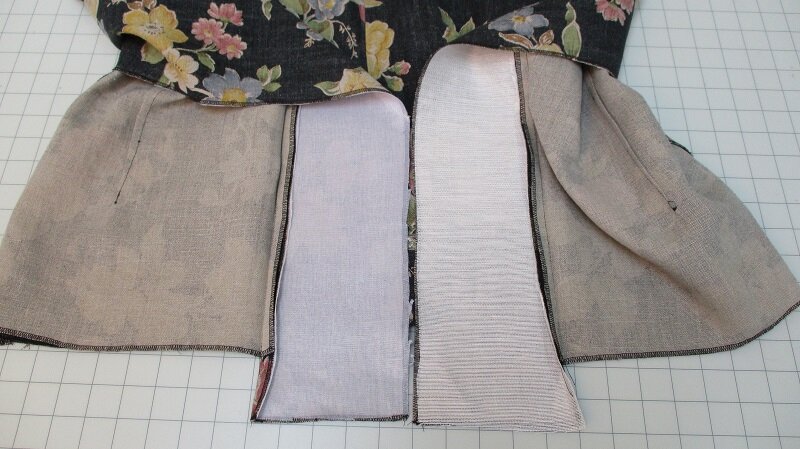
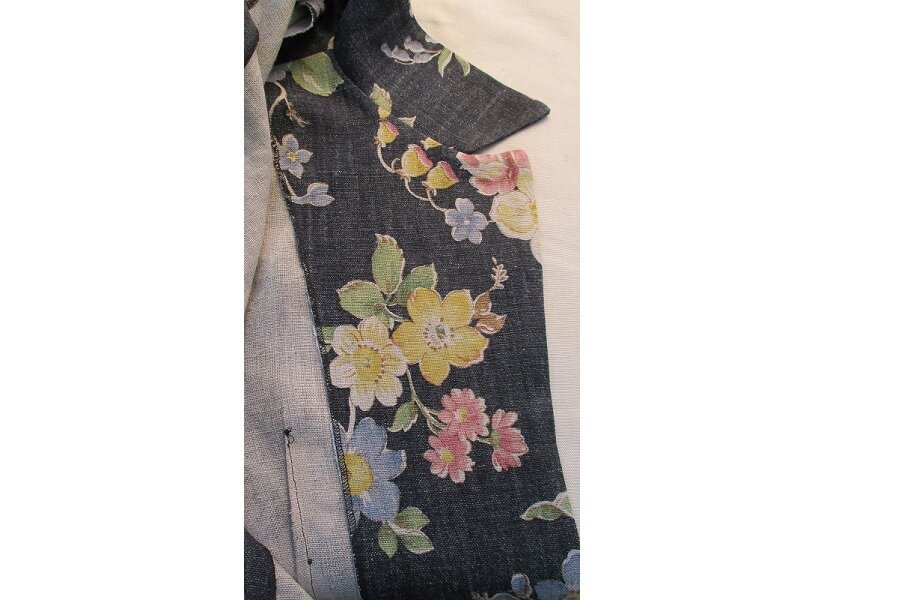
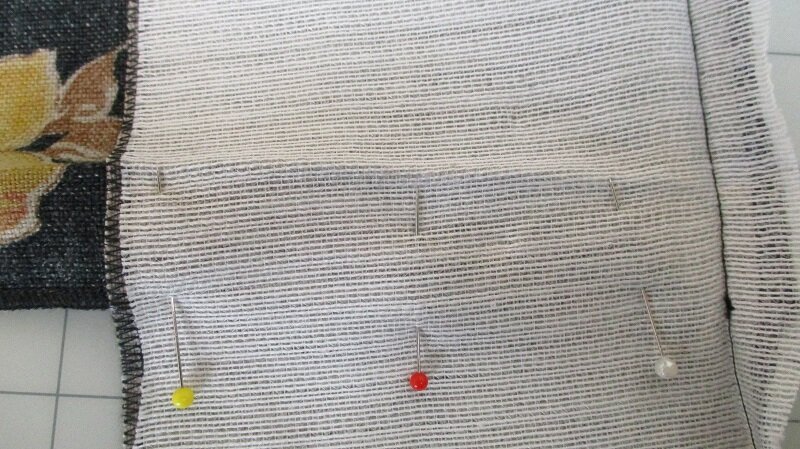
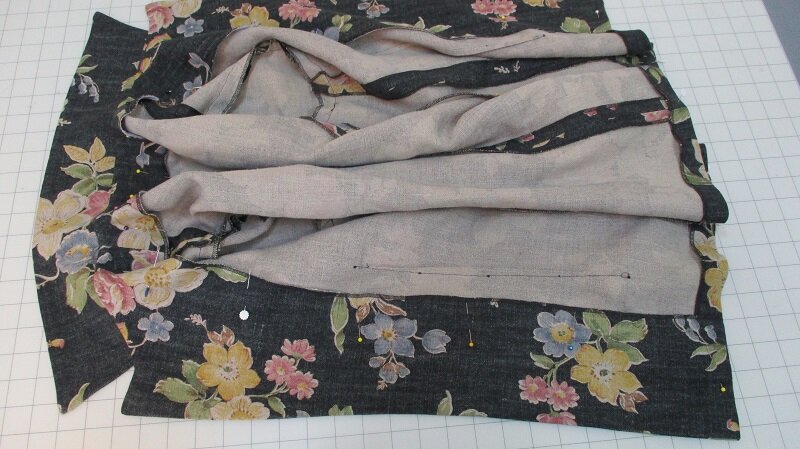
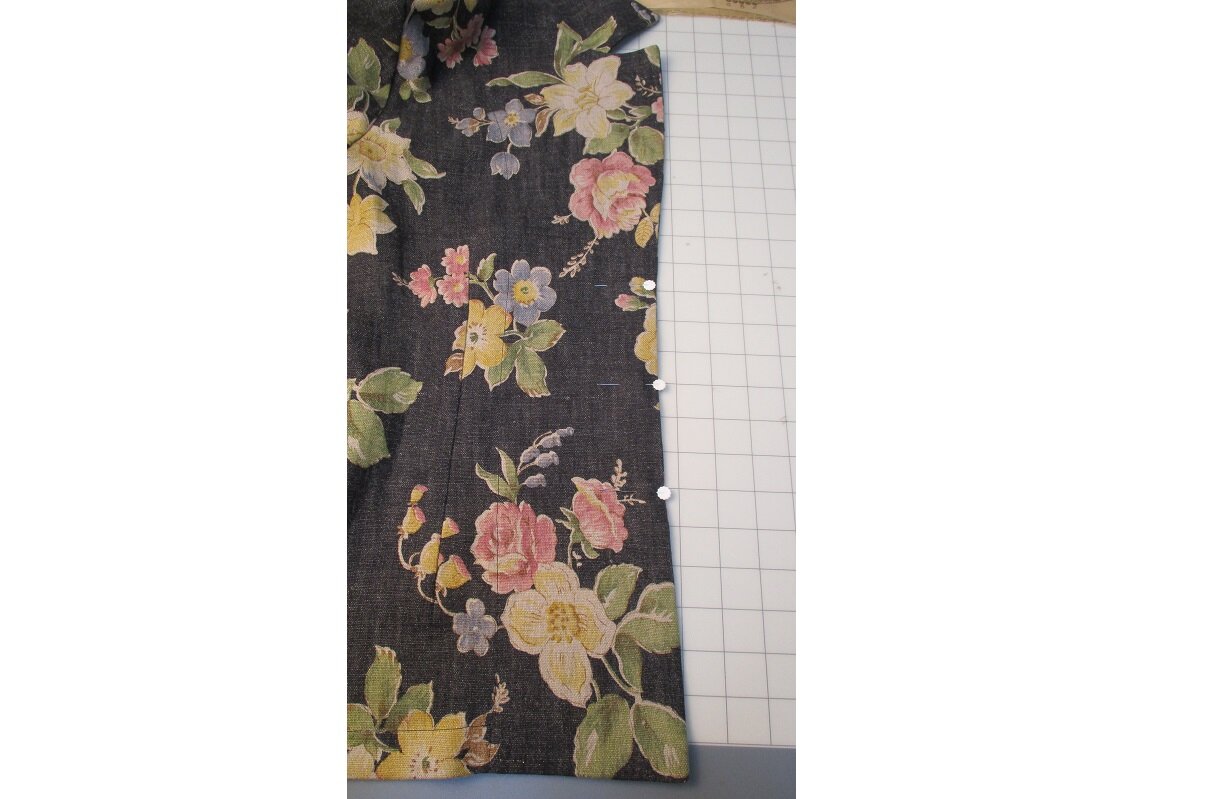
Step 30. Lay the Facing onto the neckline of the jacket and pin in place matching center back and lapel point. Then match the lapel to the point and pin in place. Also pin the facing down the front of the jacket to the hem. Take your time here. It may be a good idea to baste the facing in place.
Step 31. It is time again to match the collar width and lapel length. If one is longer or wider than the other side, make the adjustment.
When you pin the facing to the jacket remember that the facing is cut extra long to allow for shrinkage when you fused the interfacing on. So, make sure the length of the front from the lapel tip to the hem is the same. Pin in place and sew with the facing on the top for both sides.
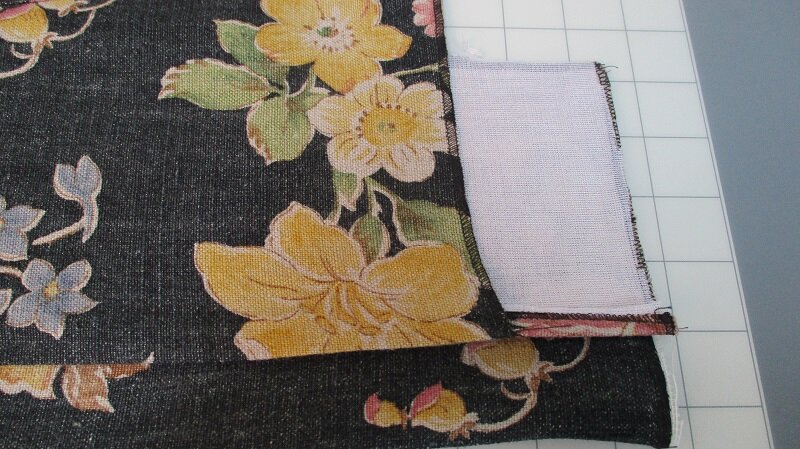
Step 32. Trim seam allowance to 3/8”

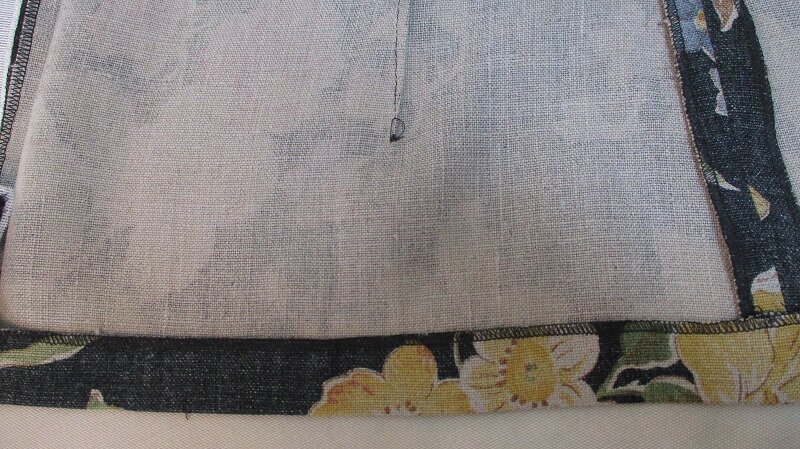
NOTE: THANK YOU JUDY and SUE! I ran out of Interfacing and a sewing friend delivered a yard of fusible interfacing to me! Even though they do not look the same they worked out great! I couldn’t even go to JoAnne Fabrics since they are closed right now!
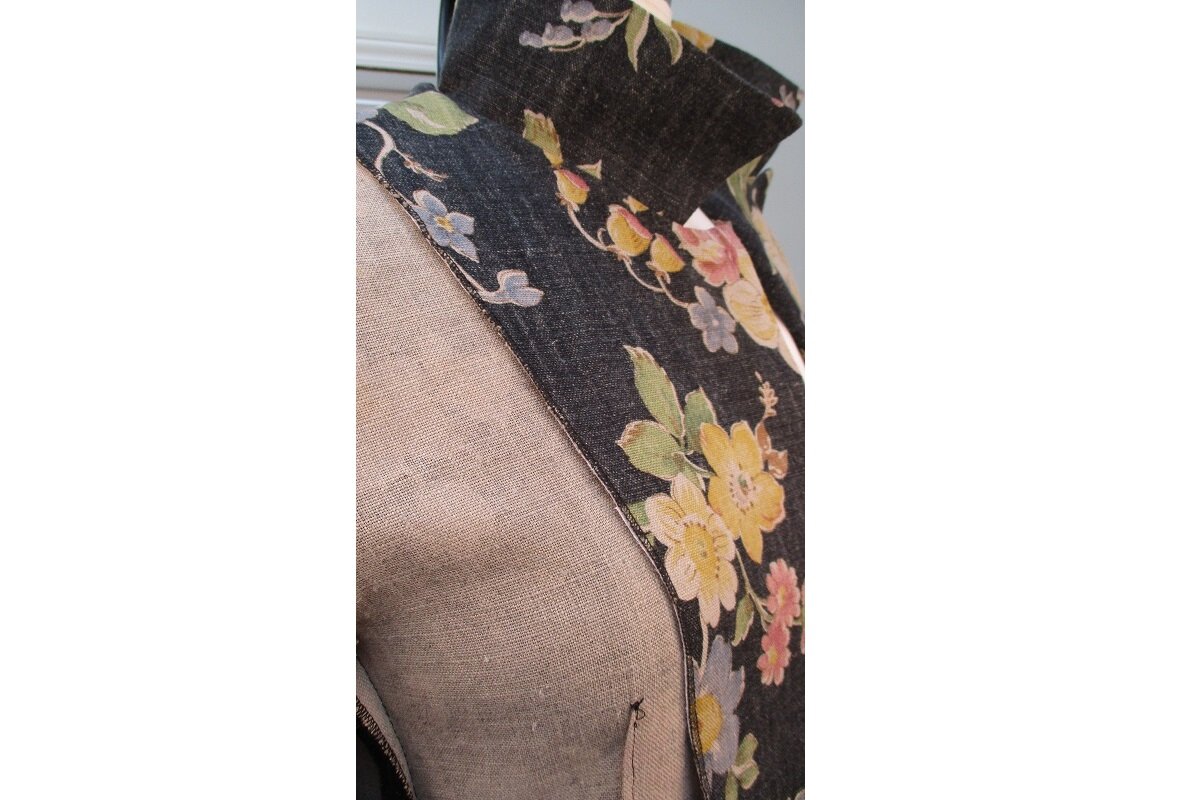
Step 33. Press the facing seams using a ham for the curved seams. Follow the curves of the body when pressing. Match the shoulder seam lines as close as you can without distorting jacket. Sometimes these facing seams will not match perfectly and its OK. The most important thing is that the outside of the garment is smooth and hangs correctly.
Using a dress form is especially helpful at this point.


Step 34. When pressing the seam allowance from the lapel to the bottom of the roll line press it towards the facing. This will help force the seam to lay towards the underside.
Then slowly begin pressing the seam allowance towards the jacket from just under the roll line to the hem and this will roll the seam to the inside.
Remember this when you press this seam flat.
Step 35. At the corners, use the same cornering technique as we used for the collar.
Step 36. Now that you have pressed the facing/jacket seam allowances its time to compare the sides of the jacket, yes again!
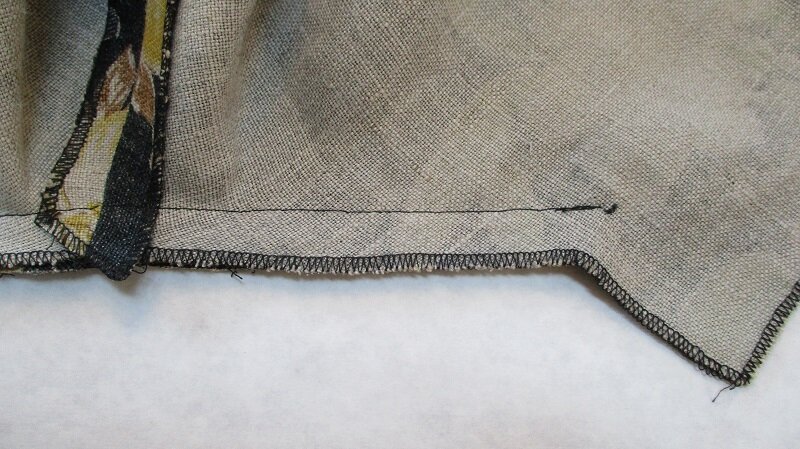
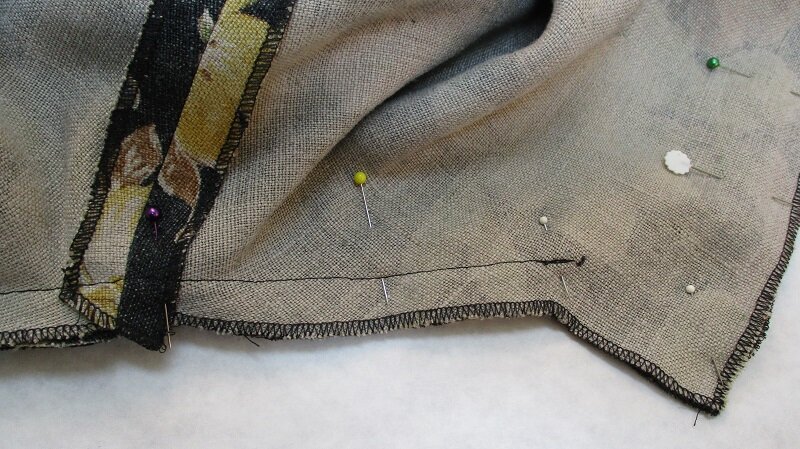
Step 37. Press hem and corners of the jacket. Make the sides match from the lapel corner to the hem.
Step 38. From the inside of the jacket press the hem fold line firmly and let it cool.
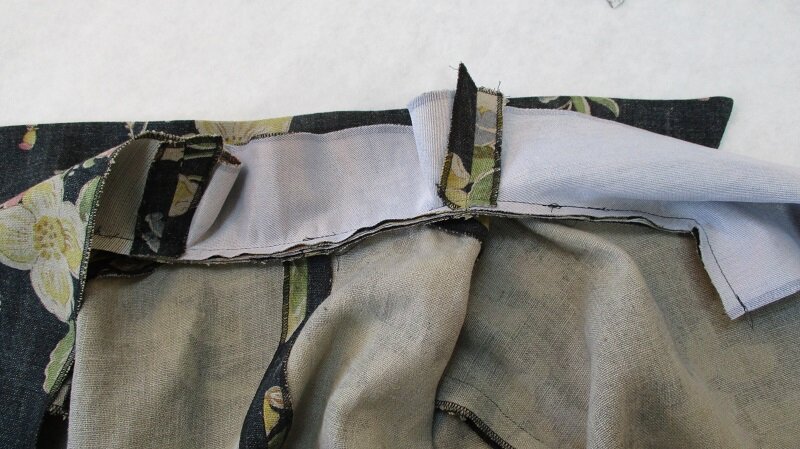
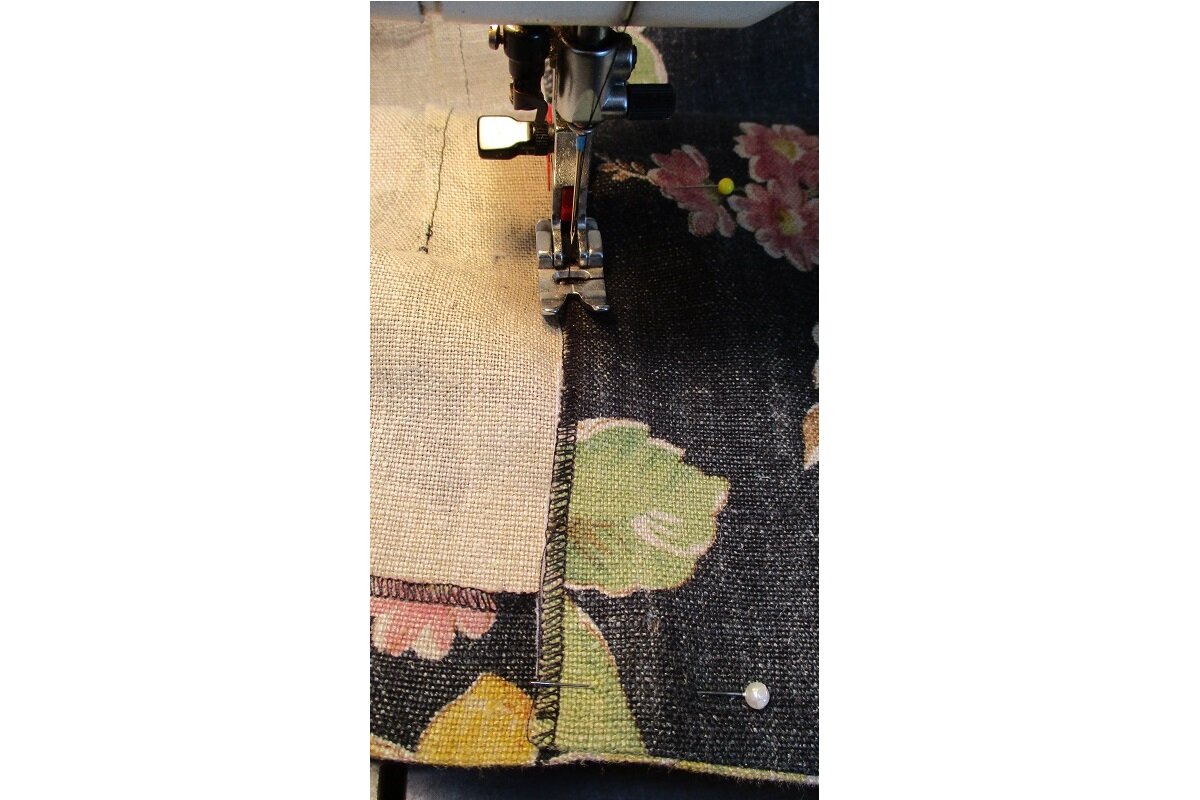
Open the fold and pin flat just below the fold line. Fold back the facing to the outside matching right sides along pressed fold and pin in place.
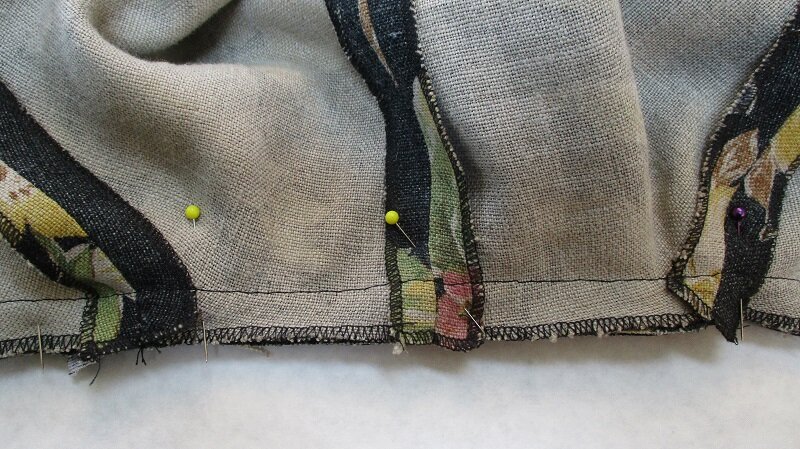
Sew the facing to the shirt just a tiny bit outside of the fold line. Stitching just outside the fold line will maintain the hem fold. Also, do not stitch all the way to the end of the facing. End 2-3 stitch lengths from edge.
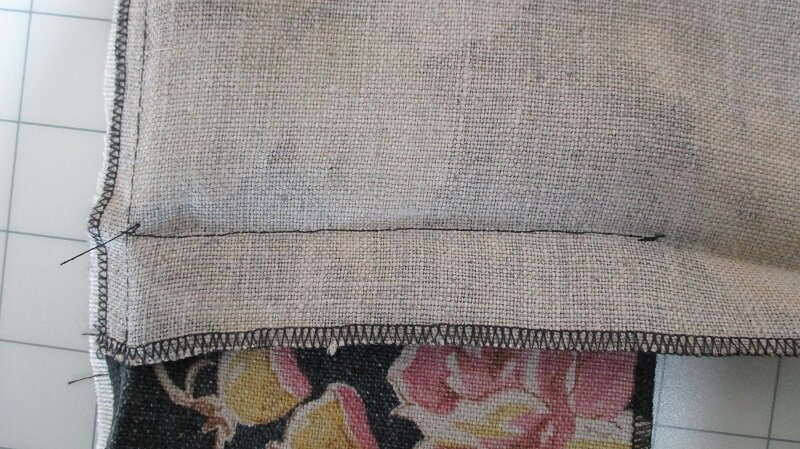
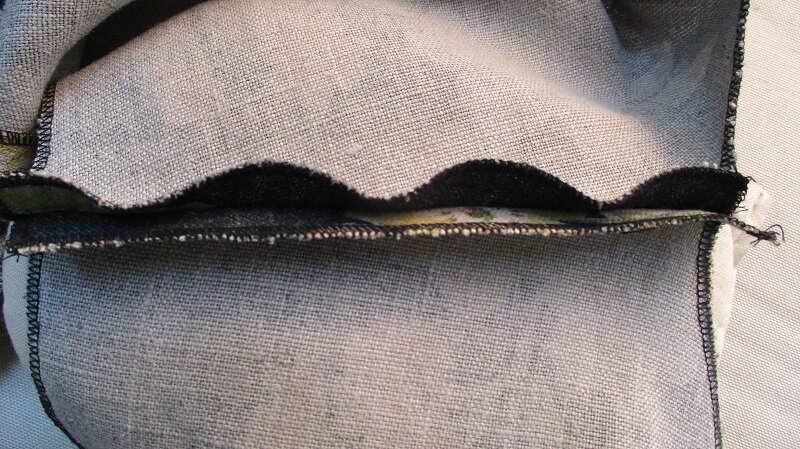
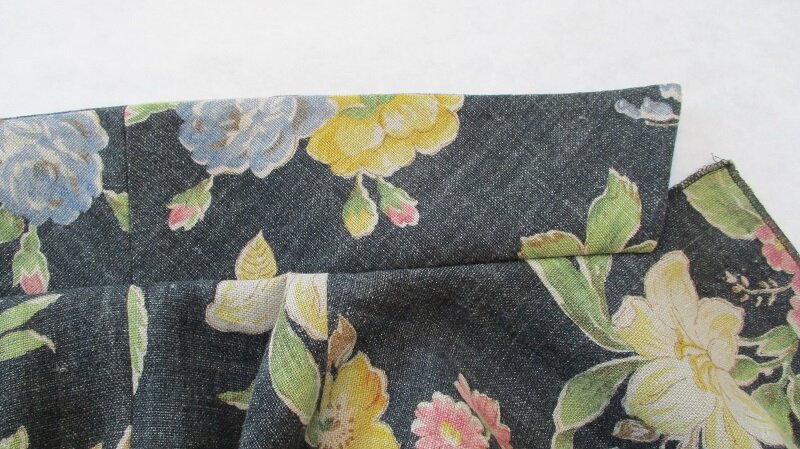
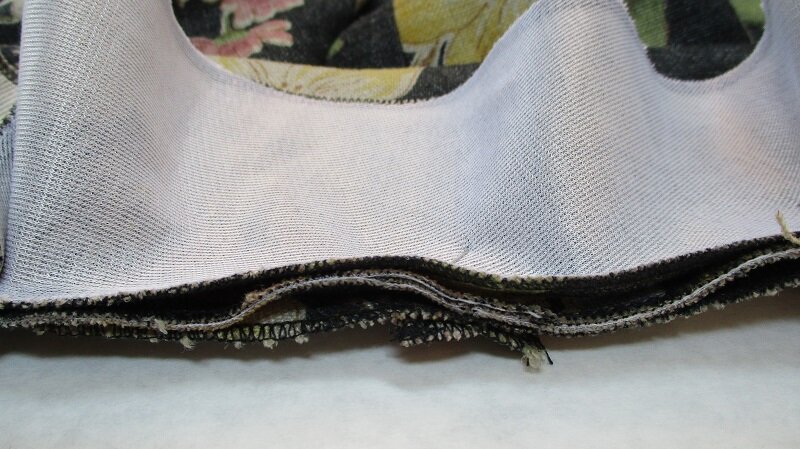
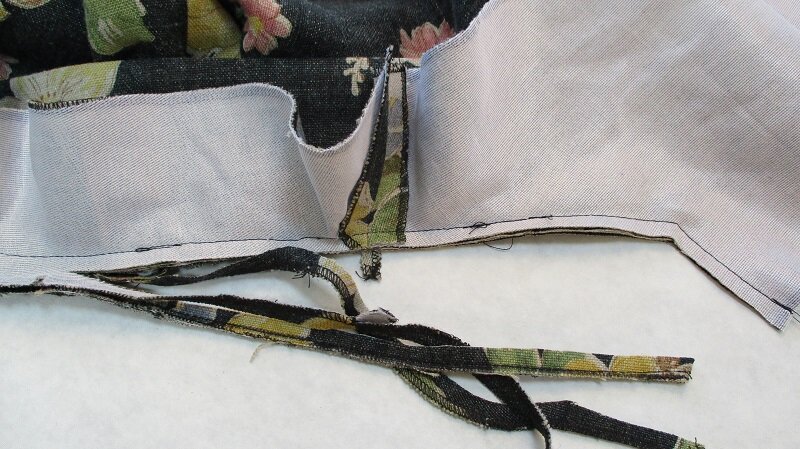
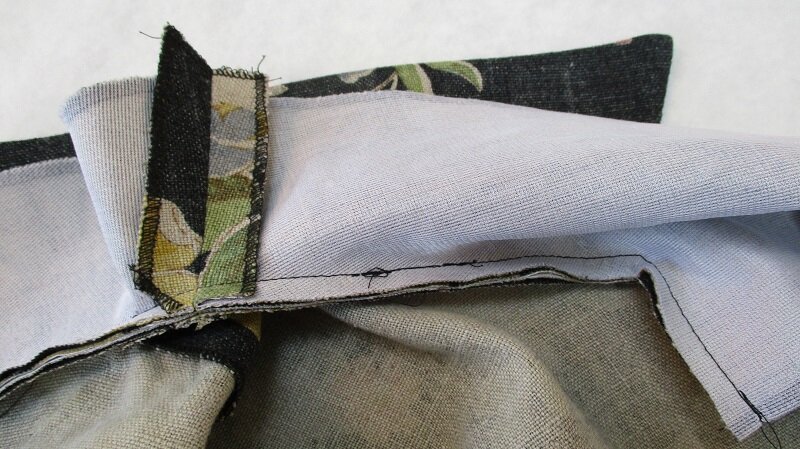
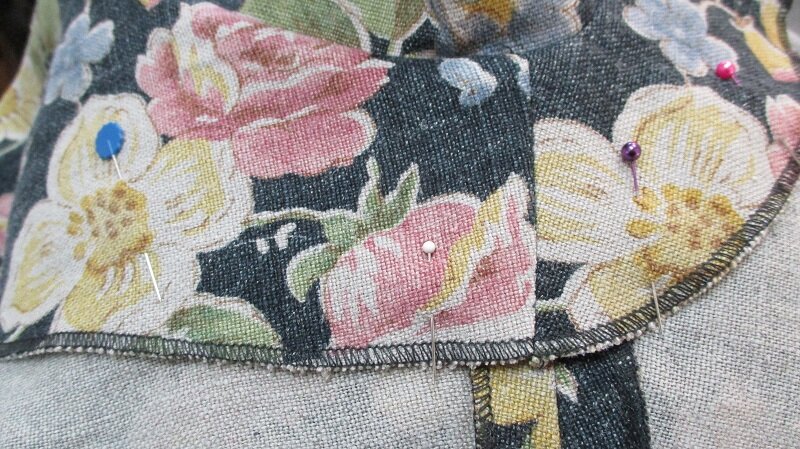
Step 39. Trim the corner and just the facing as shown. I also trim just the serging of the jacket fabric an inch shy of the facing to get rid of the possible thick line when pressed. Do not trim the facing too close to the stitching line as the hem corner needs the support.
Turn the corner as shown for the collar.
Turn the facing to inside and hem up in place, press and pin. Press and pin carefully so the facing meets the hem perfectly because it will be topstitched in place.
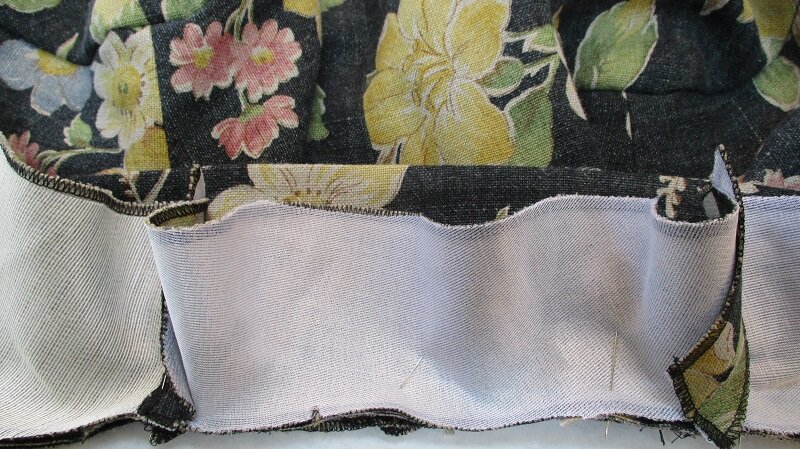
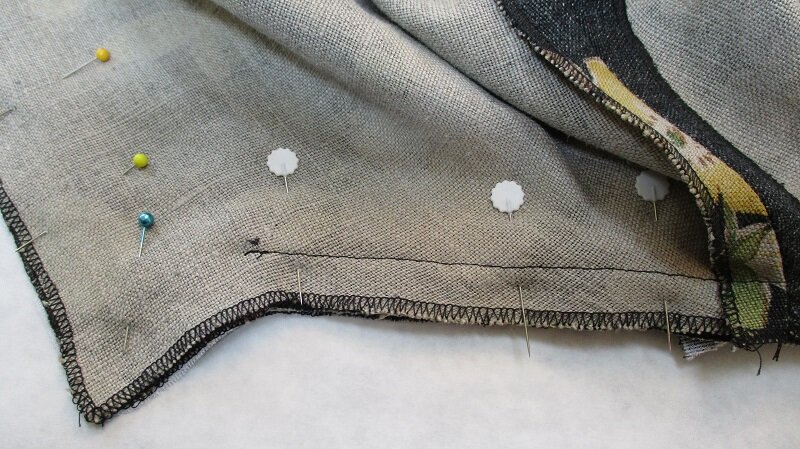
Step 40. Pin the facings to the jacket all the way around.
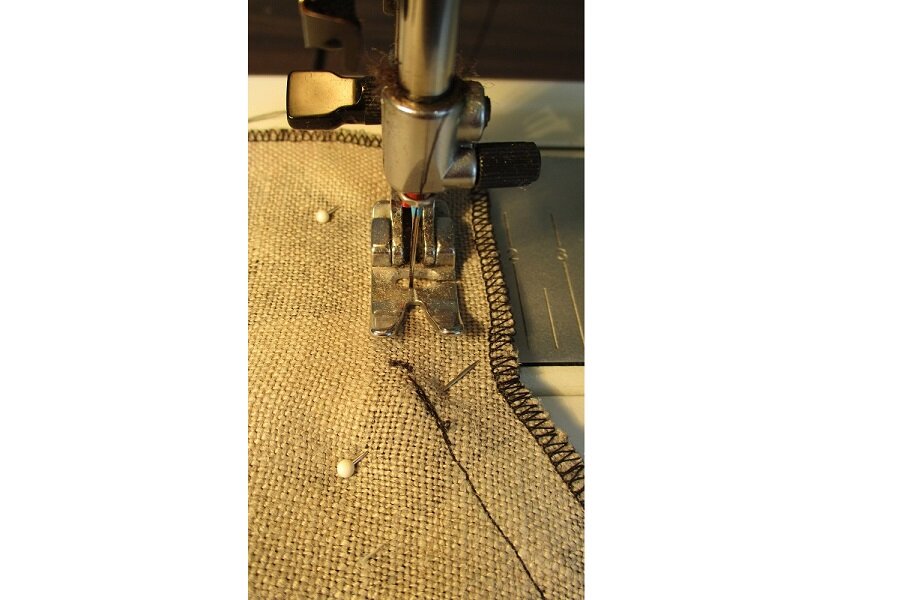
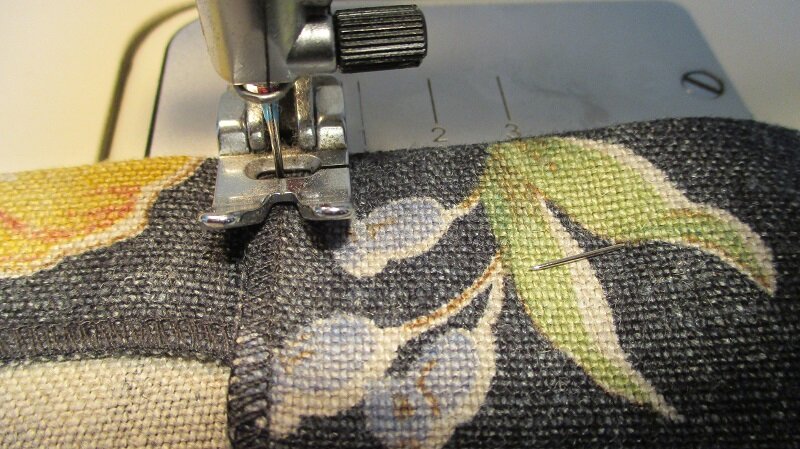
From the inside of the jacket begin sewing the facing to the jacket. Start sewing 2 stitches away from the fold at the hem. Sew slowly and carefully just on the other side of the serged line following the curves around the shoulder area very carefully. It is extremely easy to sew small folds underneath and/or sew crooked lines. Sometimes it is best to baste the facing in line while the pins are in place. The finished jacket will show the amount of care you took when sewing and handling the facing.
Begin sewing the hem at the facing topstitch. Do not cross the stitching lines.

Step 41. Press sleeve hems and topstitch


Part 5: Finishing Touches
Step 42. Press the entire jacket using a ham for shaping the seams as needed.
Carefully and lightly press the sleeve armscye seam allowance toward the sleeve cap.
Press and shape the back of the collar and lightly press the roll line as indicated on the pattern.
Optional: Thin shoulder pads can be used to square your shoulder line.
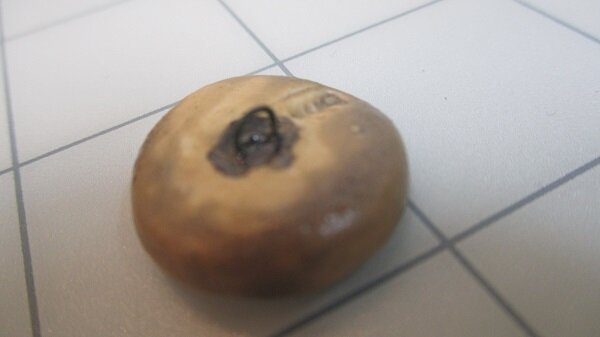
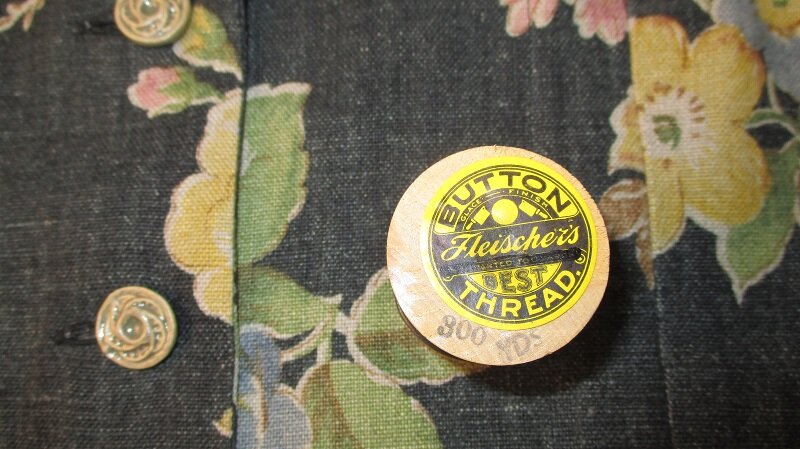
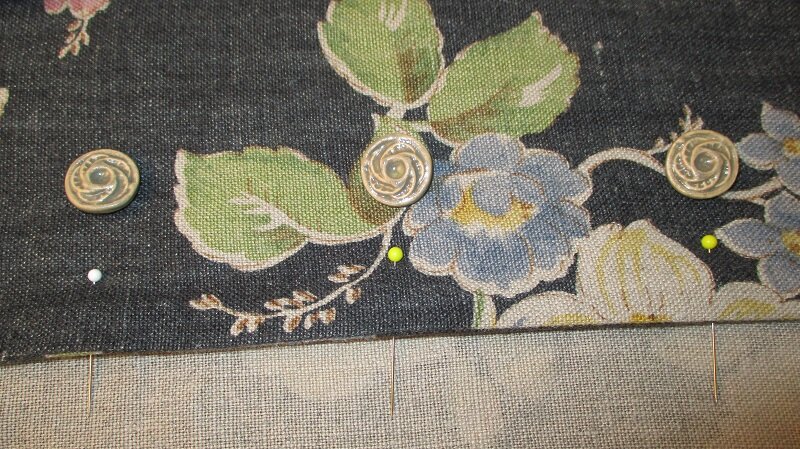
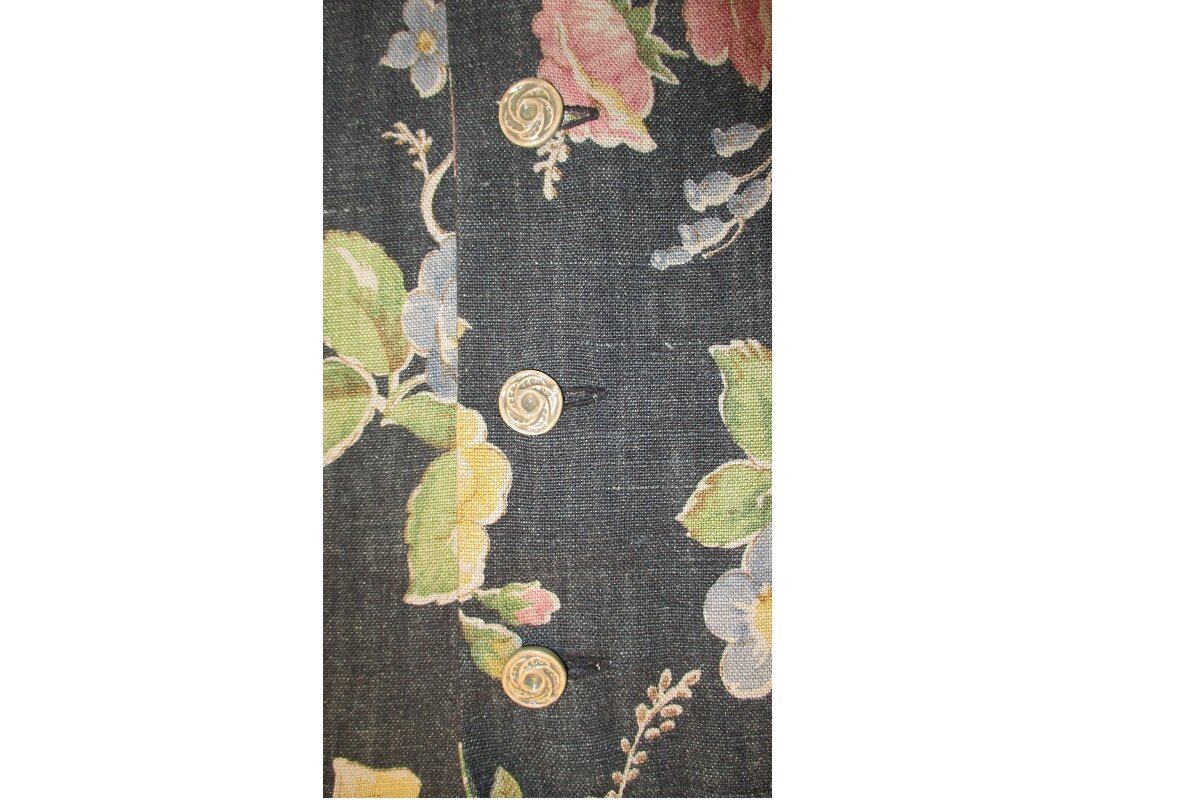
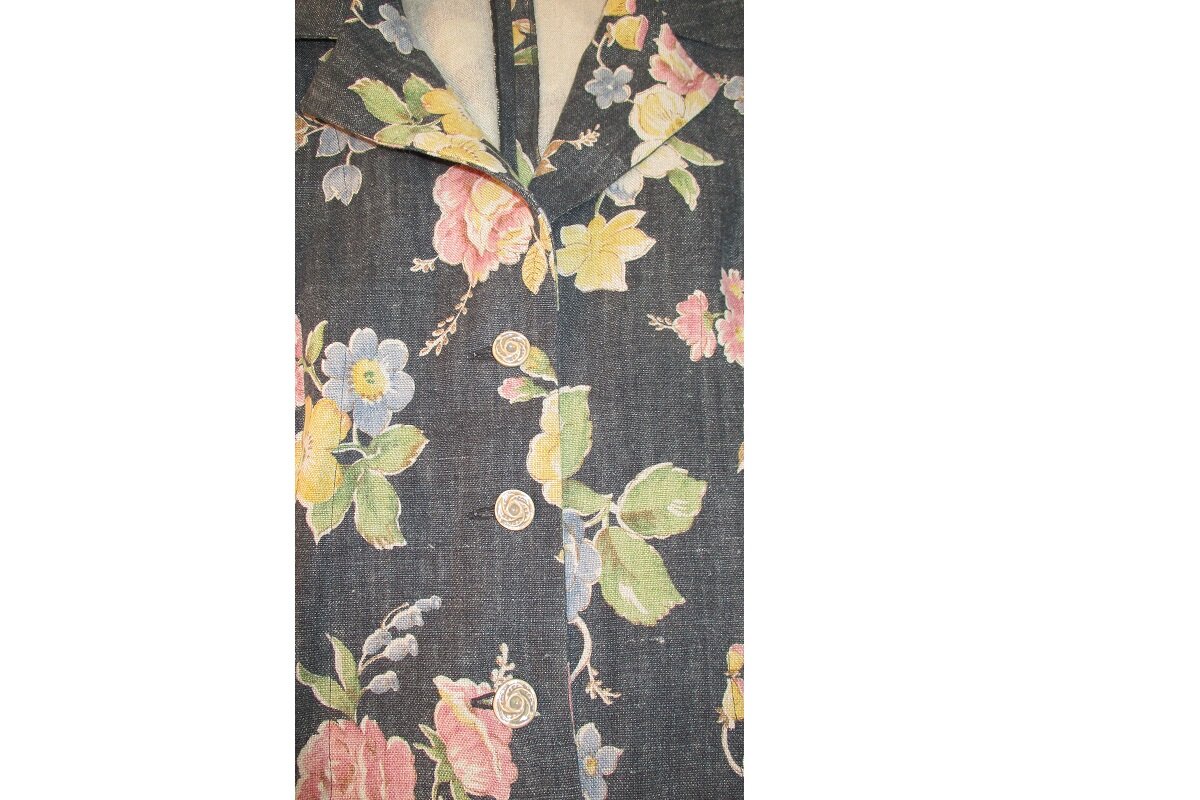
Step 43. Decide on the buttons. This is always a fun part for me. Buttons add personality to your jacket so let your personality shine through! A button with shank is best for a jacket to give room for the underside to lay nicely. If your button does not have a shank you can make a shank with the tread as you sew the button on.
Step 44. Decide button placement. Following the suggested placement on the pattern is optional, instead try on your jacket and decide where the best placement will be. Mark the placement with pins.

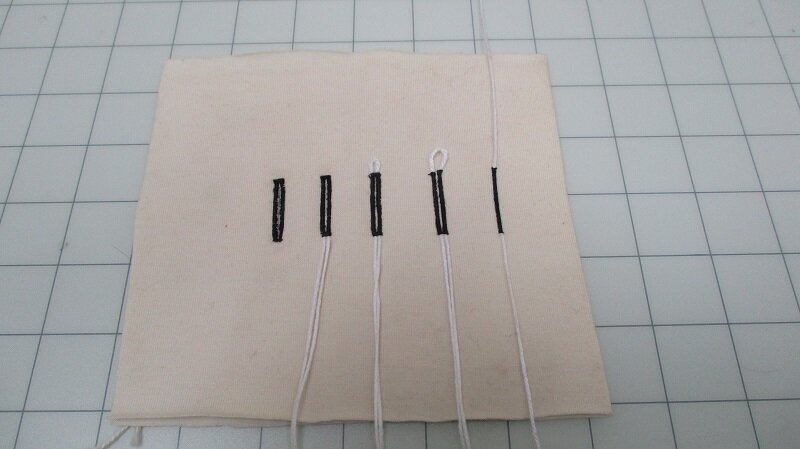
Step 45. I suggest making corded buttonholes. A corded buttonhole is very stable, sits above the fabric, and becomes a prominent accent to your jacket. It maintains its shape when buttoning and unbuttoning your jacket. For my linen jacket I used a heavier thread as I wanted the buttonholes to stand out.
- If you do not have access to making a corded buttonhole, consider other ways to close your jacket. You can add snaps and sew the button on the outside.
- If your machine makes standard buttonholes that you are happy with, consider using a thicker thread if the fabric needs some stability.
- No matter what type of buttonhole you choose be sure to make a few practice ones.
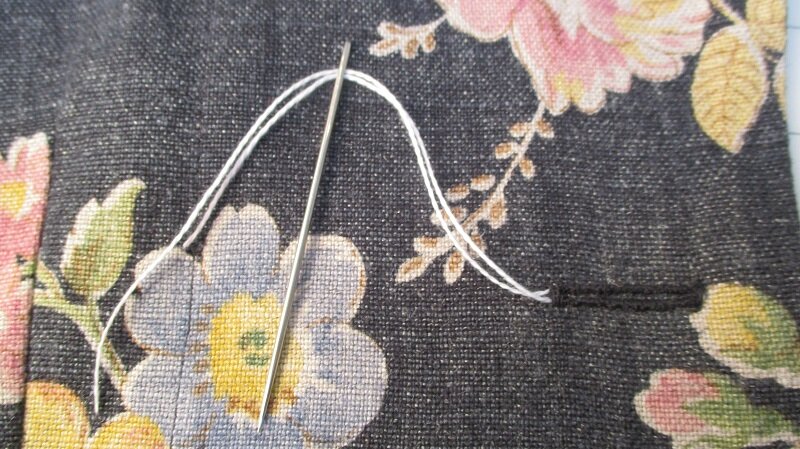
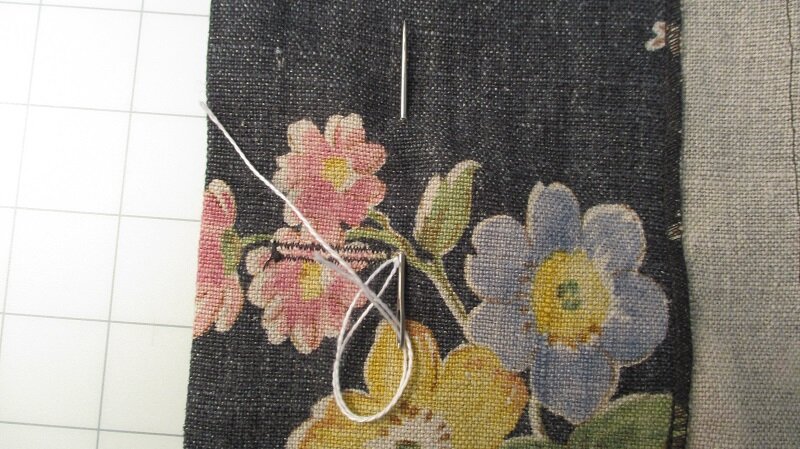
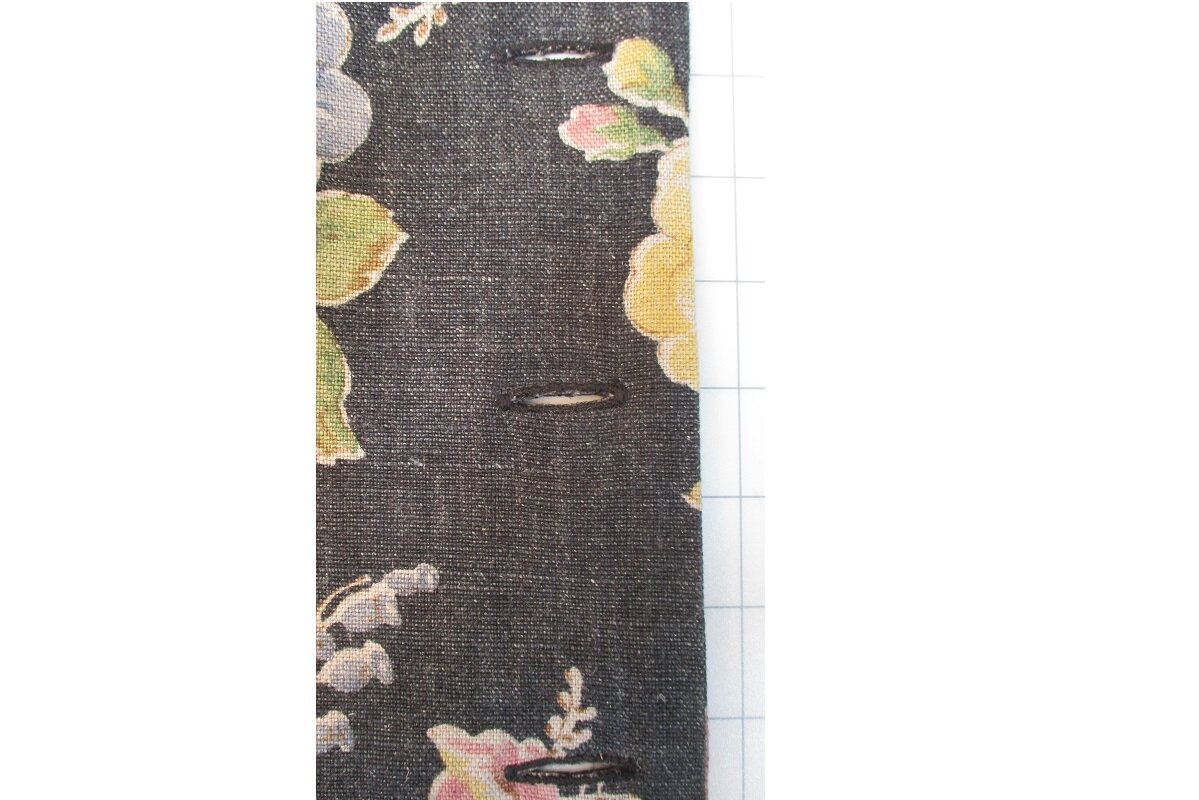
Step 46. The following photos show the steps of making a corded buttonhole using a simple slide button-holer This type of attachment has a prong in the back to loop the string and slits in the front to hold the string. I use simple Kite String for cording. It’s the perfect thickness and strength.
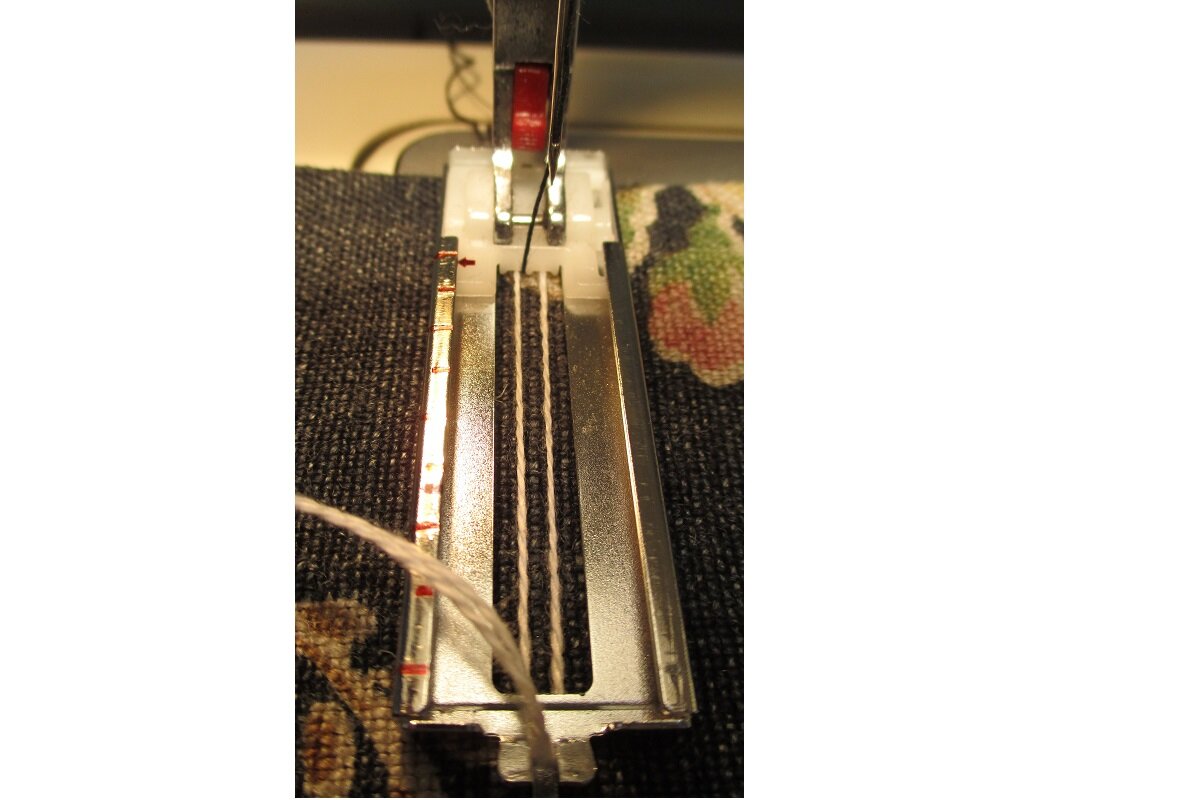
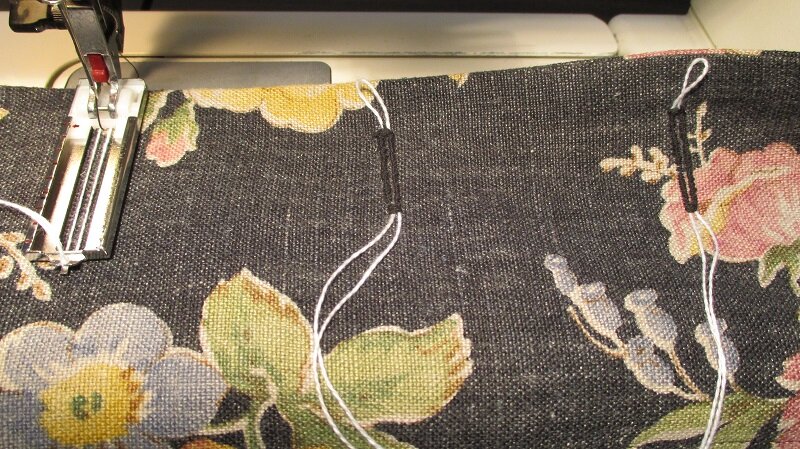
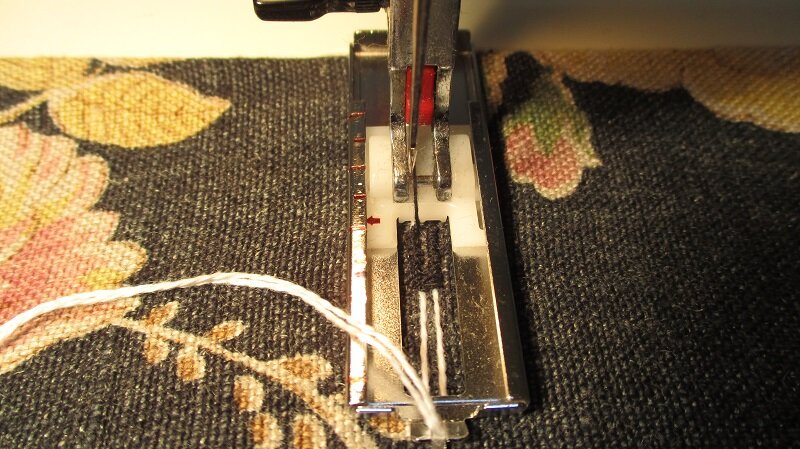
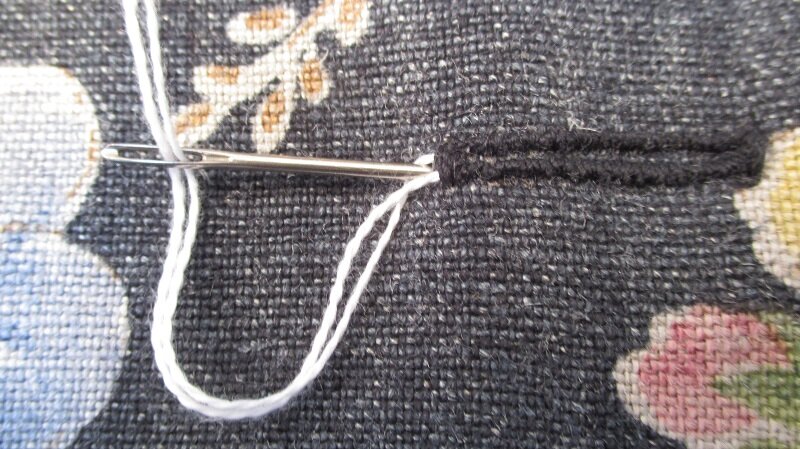
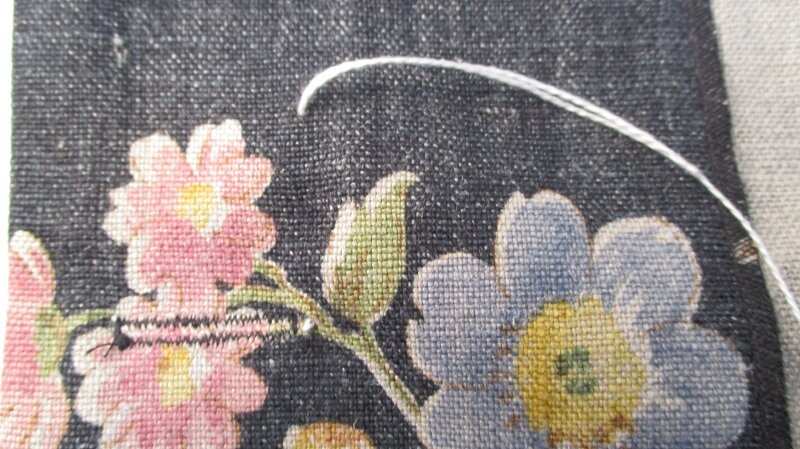
Step 47. Once you have completed sewing the buttonhole slowly and carefully pull each cord evenly just until the top loop is under the bar tack. Check that the buttonhole looks straight and even side to side.
Then thread the cord through a large eye needle, tuck the needle point just under the bar tack and pull it through to the back. Tie a double knot with the cord.
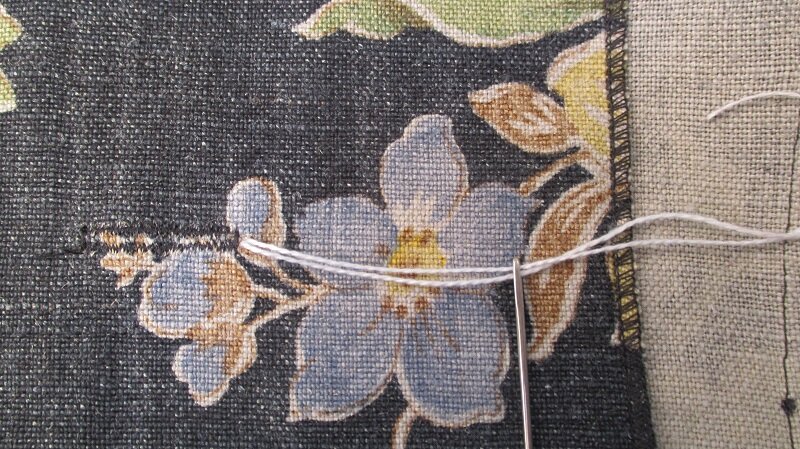

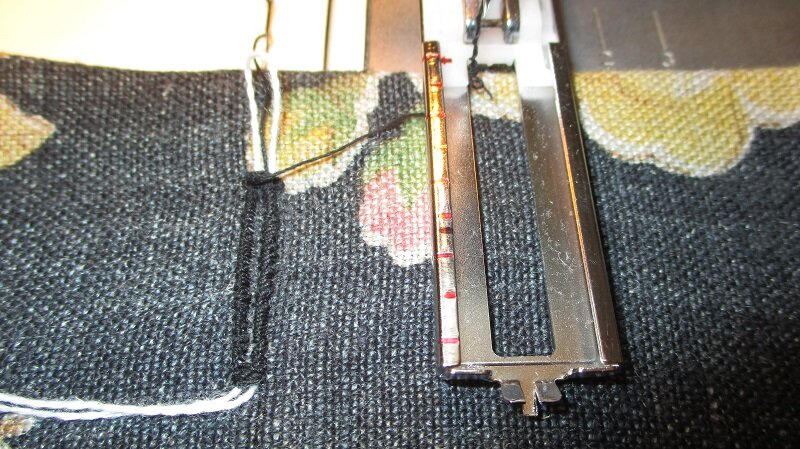
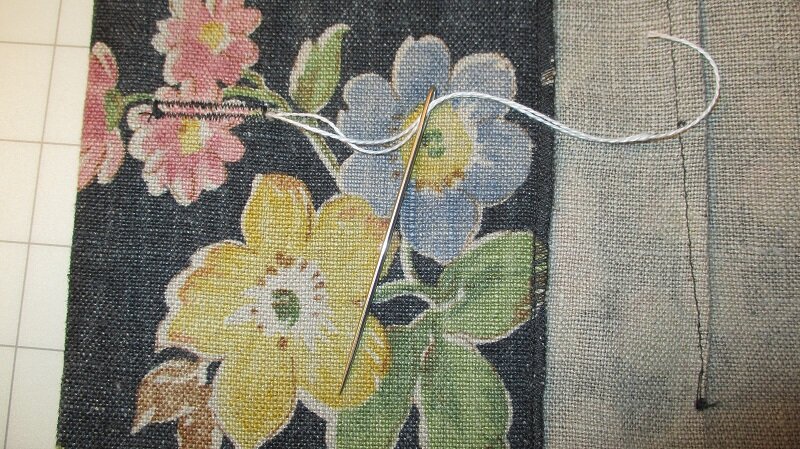
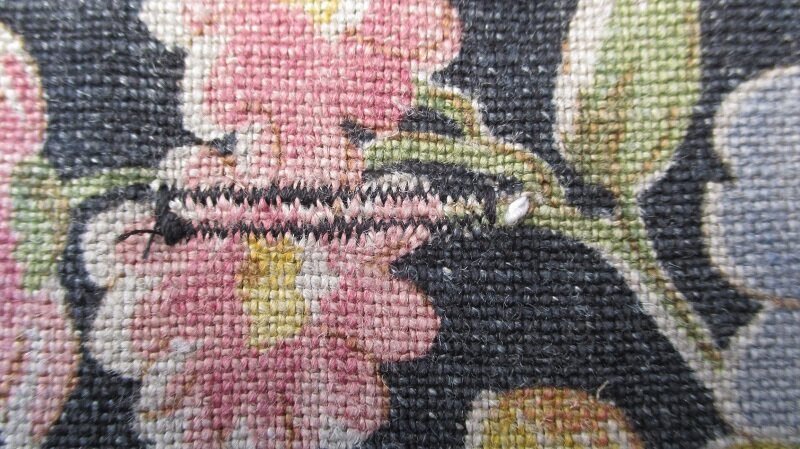
Step 48. Thread the cord again through the needle and poke it through just the facing and pull it up and out a few inches. Cut the cord and pull the facing so the cord is sandwiched between the facing and the jacket.
All you can see of the cord is the knot on the inside of the jacket.
I sometimes use a Sharpie to disguise it!

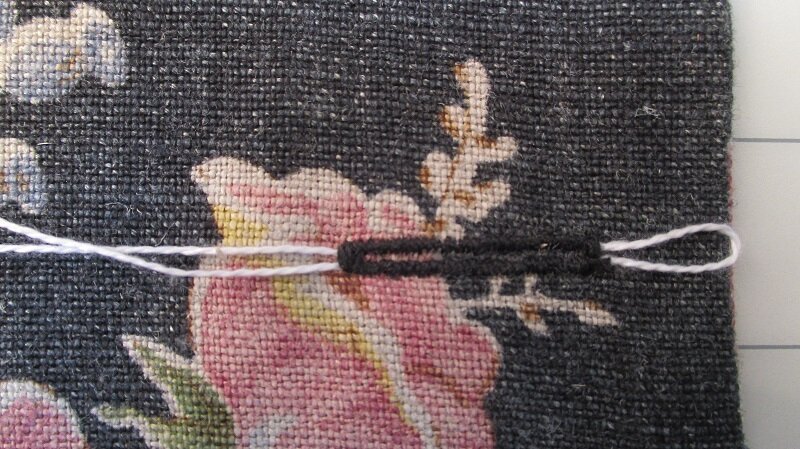
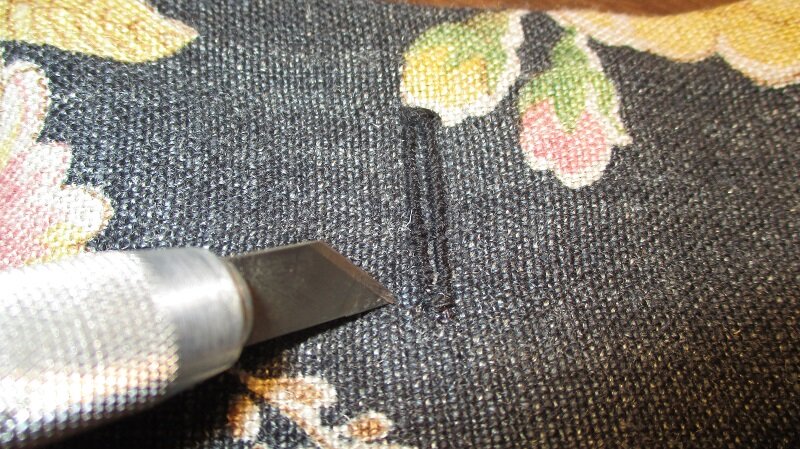
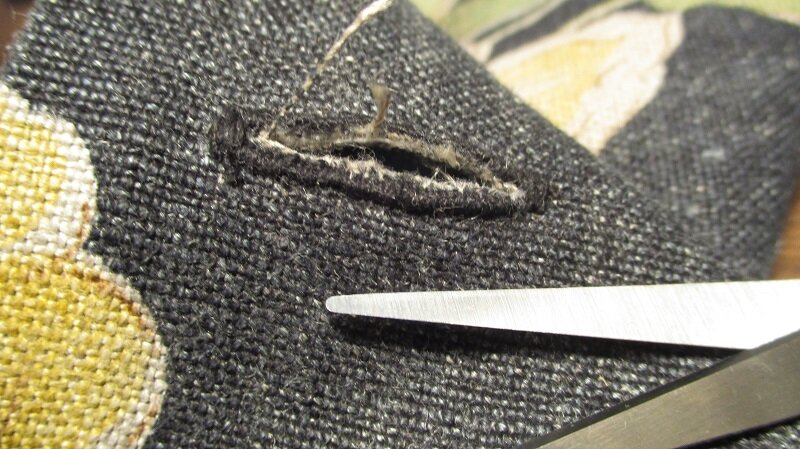
Step 49. I suggest using an X-acto Knife blade to cut open the buttonholes. A thin, angled and sharp blade is very helpful but be very careful not to cut the threads that are over the cording.
Trim the excess fabric threads from the inside of the buttonhole.
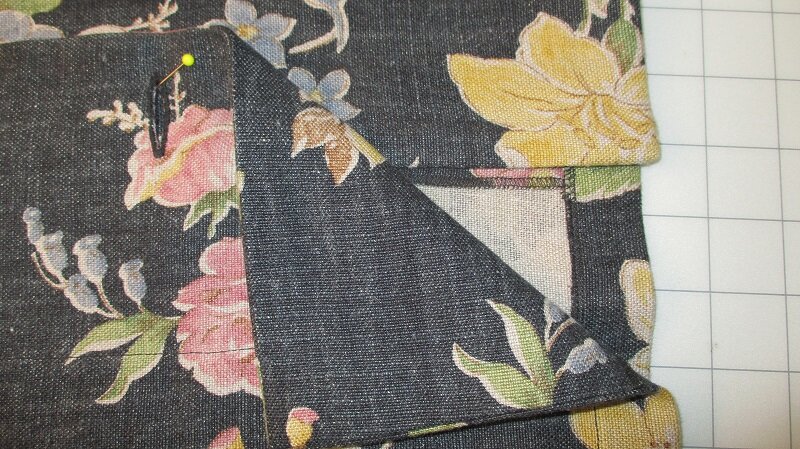
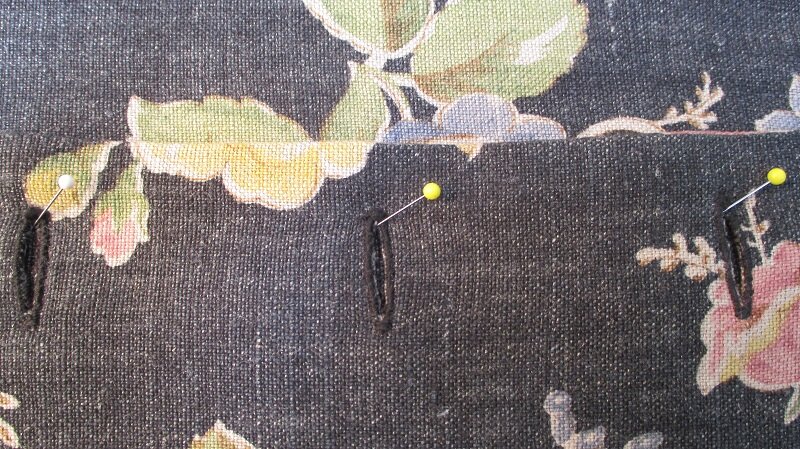
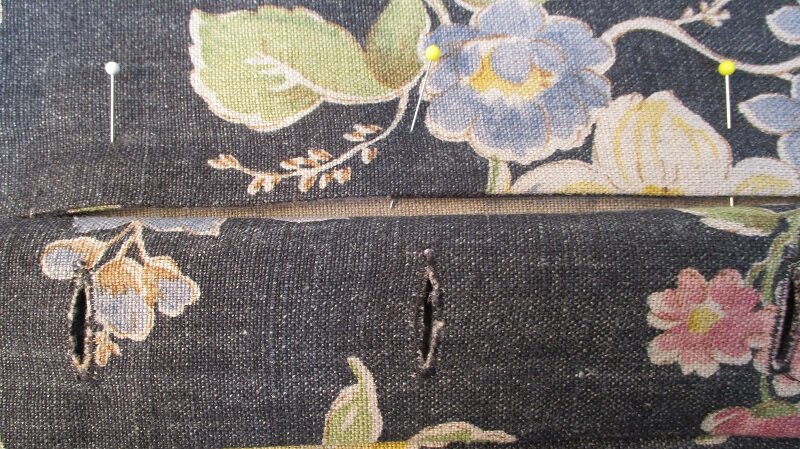
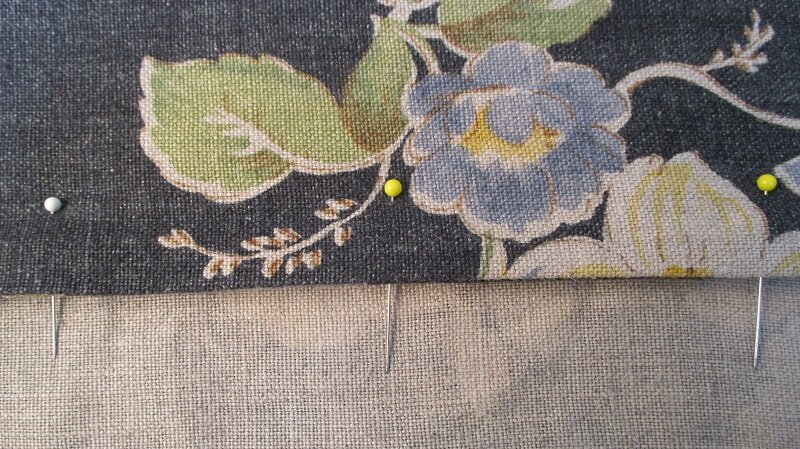
Step 50. Fold the buttonhole side of the jacket to mark the button placement. Lay the inside end of the buttonhole along the edge of the jacket. Match the collar and bottom hem overlap. Secure a pin at the end of the buttonhole, and this is your button placement.
Step 51. Sew the button where the head of the pins are. Sew the bottom button first and double check the pin placement. You may need to make small adjustments so the spacing between the buttonholes lays flat. Be sure to leave enough ease at the shank of the button.
Thank you!
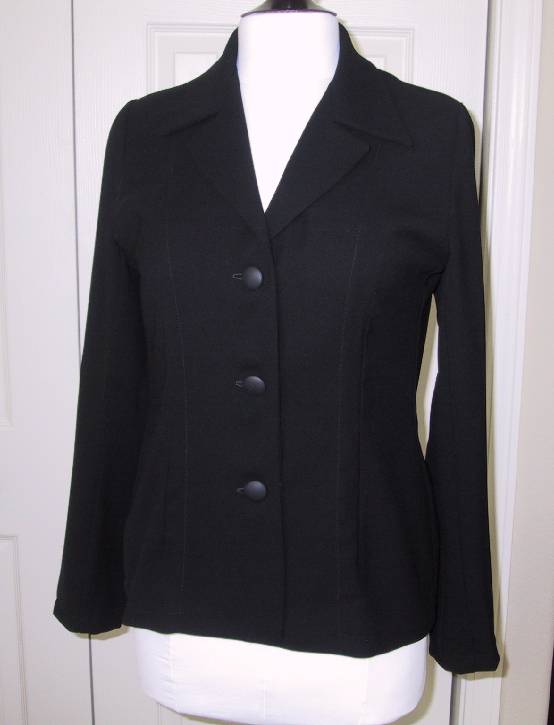
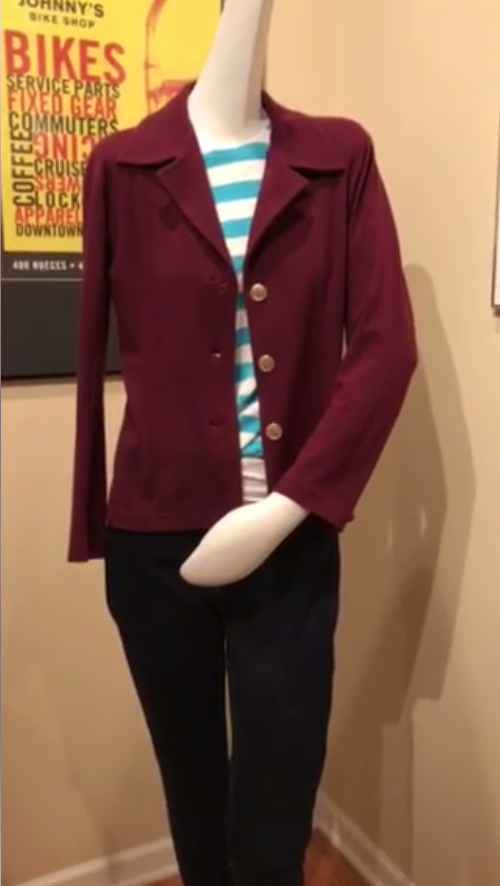
Thank you so much for your interest in my Fitted jacket Sew Along! I have enjoyed sewing my new linen Fitted Jacket and sharing the steps along the way with you. If you haven’t started sewing yours yet, I hope that I have inspired you to get going! It’s the perfect time of year to wear this everyday piece.
The sewing techniques used for this jacket translate into several of my jackets and coat patterns. If a fitted jacket is not your style or if you are looking to make a second jacket - choose one of my other patterns. You can easily apply the planning groundwork and many technique photos in this sew along to other jackets.

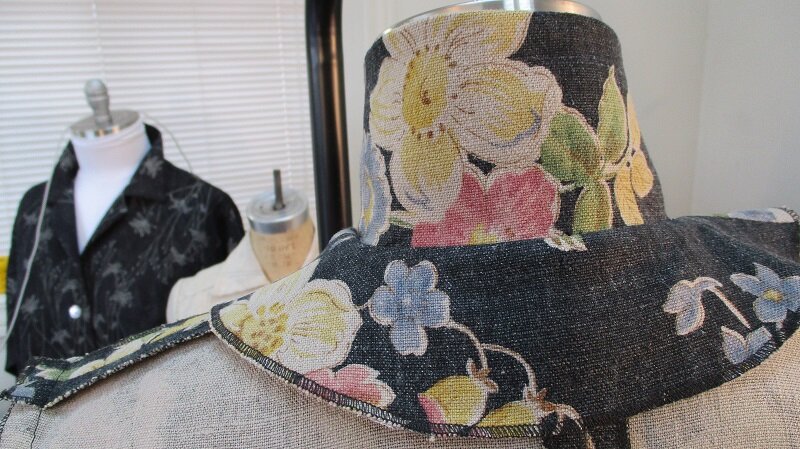
My completed jacket! I love it 😊
I would appreciate if you would take a minute and post photos on facebook of your jacket in progress and a final photo when its all done! I’d also love some feedback regarding the Sew Along with any helpful hints for my next one.