
Sewing a Tie-Back Knit Dress

Tie Back Dress
Alteration to Tie Back Top #107
by Christine Jonson
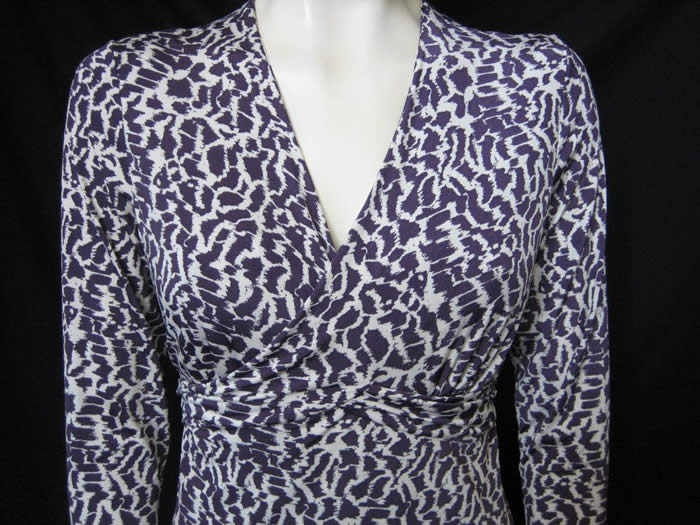
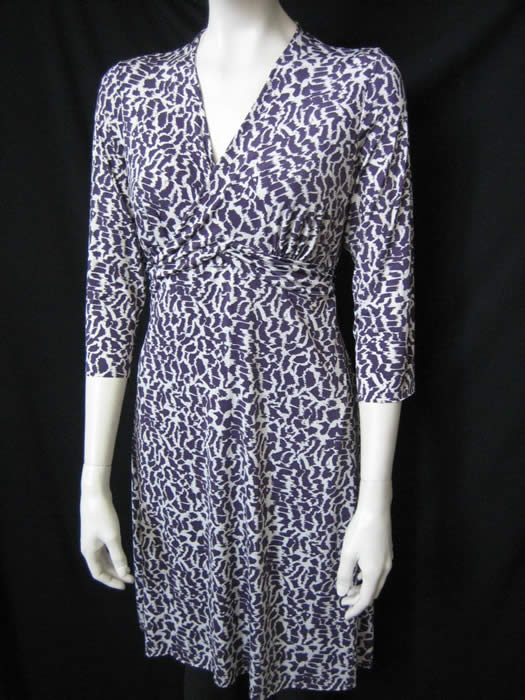
I had fun making this dress version of the Tie Back Top using the plum and cream print from the current collection. Not only do I love this print, but the weight and drape of this lightweight jersey is perfect for Tie Back Top turned Dress and the summertime weather and events!
I spent about an hour and a half one evening laying the pattern out, chalking the new length and getting it cut out. It was ready to sew when I arrived at t he studio the next morning. Nice!
It had been a while since I used the Tie Back Top pattern and I was impressed with how well it went together and the instructions! I know that must sound strange since I did the pattern making, wrote and illustrated the instructions (with the help of my friends Jan and Cathy)!) I did read and follow the instructions step-by-step. Why reinvent the wheel !!?
I did not make many changes to the pattern, most notably, it was lengthened. I decided on my finished length and hem width then simply laid my long straight ruler on the cutting line of the widest part of the hip and matched it with the new hem length and width mark and drew an new side seam and hem. I did also shorten the sleeves to below the elbow.
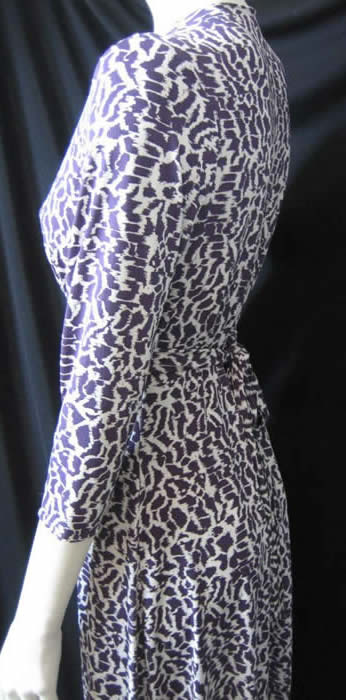
I thought about eliminating the ties in the back by shortening and tucking the ends into the side seam and sewing them in but I thought for summer it would be fun to have the tie back. I am planning on making a sleeveless version that can be reversible ( two dresses in one!) using one of the prints and an ITY solid coordinate. The dress took me 2 hours of sewing time. So that is 3.5 hours beginning to end.
Keep in mind that the dress is self-lined to hip-length and some fabrics could be too bulky or heavy. This fabric is lightweight with excellent drape and a comfy "slide-on" feeling!
Have fun sewing one of these fun summer dresses for yourself!
xo
Here's a sewist tutorial on that tie back top, thanks Diane!